Windows
The AdvaPACS Gateway has two installers for Windows, they're in exe and msi formats.
Installation Steps
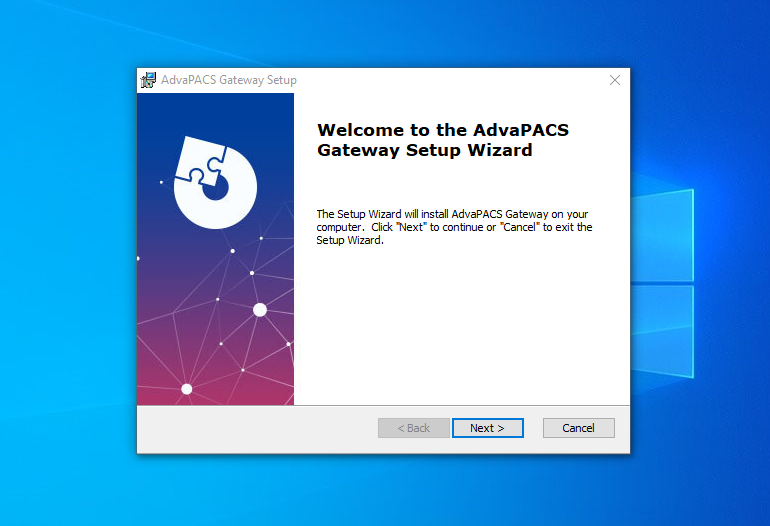
Download and install the Gateway
-
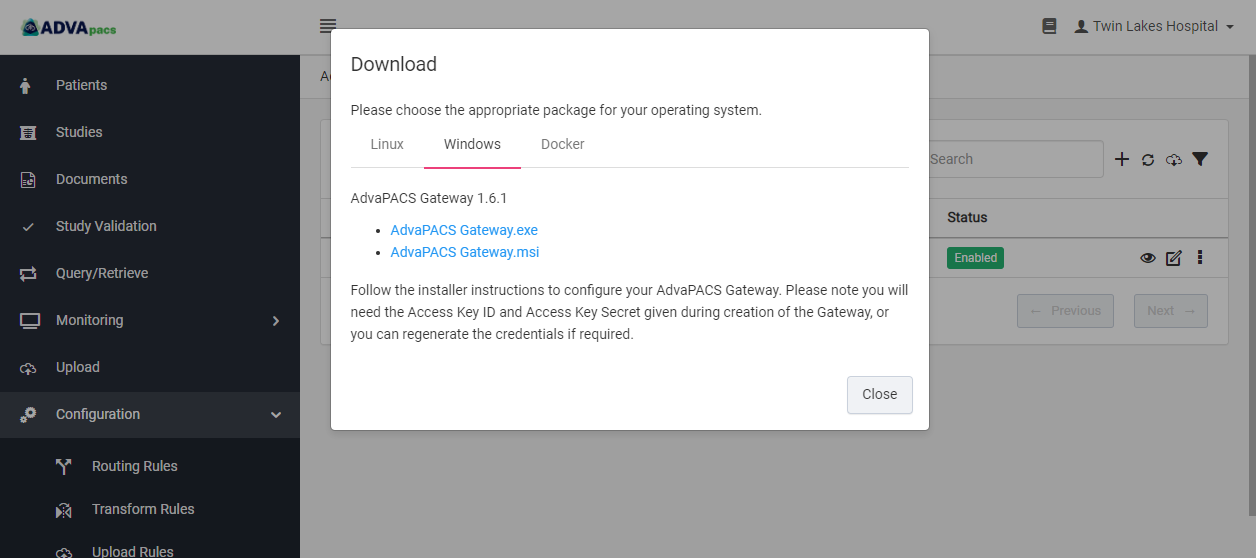
In the installation package dialog box, select the Windows tab and download either installer.
-
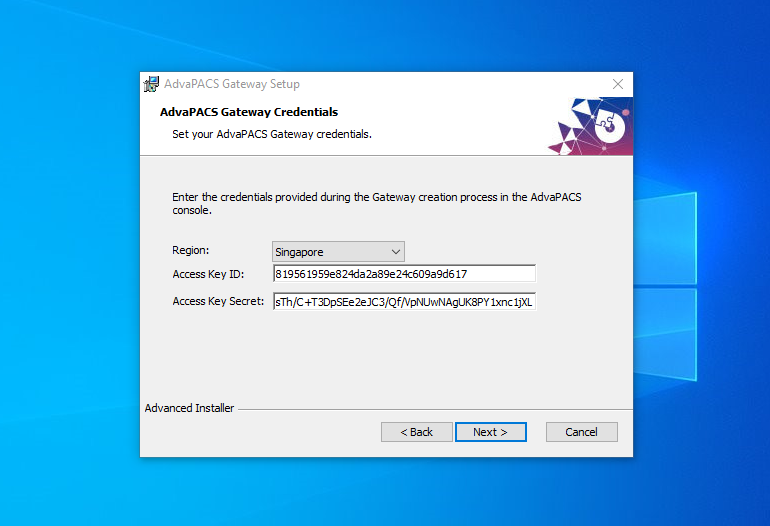
Run the installer, and click Next. Then, enter the Region, Access Key ID and Access Key Secret, which are provided to you when you create a Gateway profile.
-
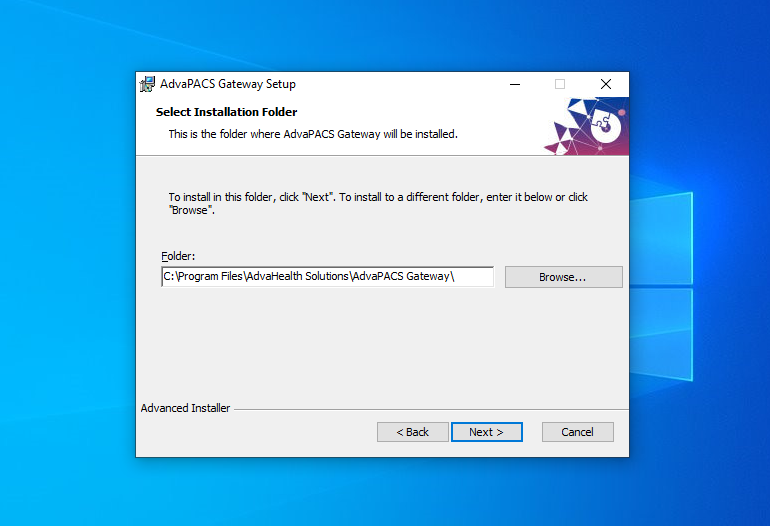
Select its installation folder, then click Next.
-
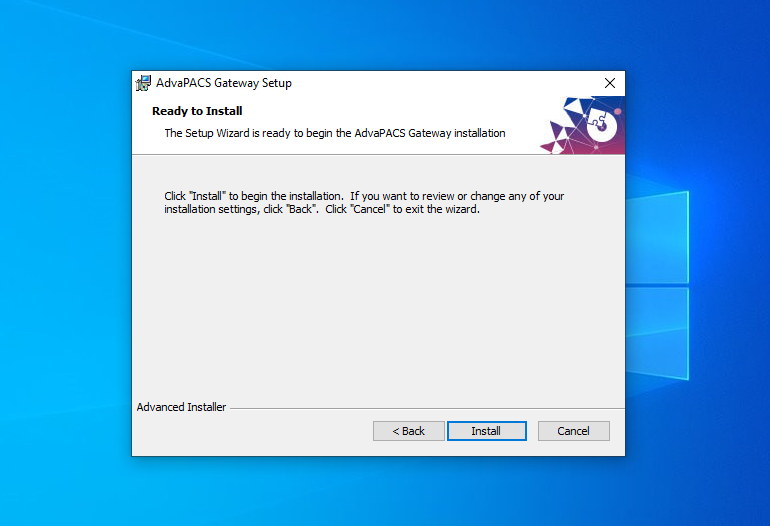
Click Install to start the installation.
-
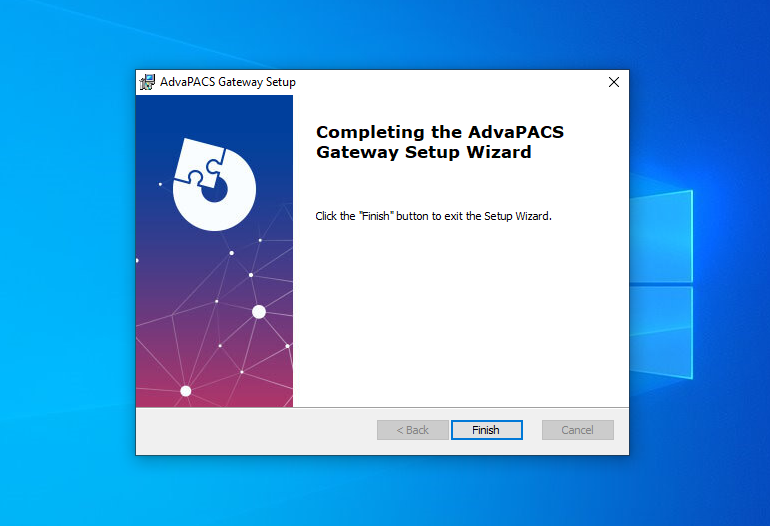
Click Finish once the installation is complete.
Run the AdvaPACS Gateway
The Gateway should automatically run after installation, however, if it isn't follow these steps to run the service.
-
Go to Windows Services. Press and hold the Windows button on the keyboard, then press the R key to open the Run dialog box.
-
Type "Services.msc" and then press Enter.
-
Find the AdvaPACS Gateway service, right-click on it and click "start".
-
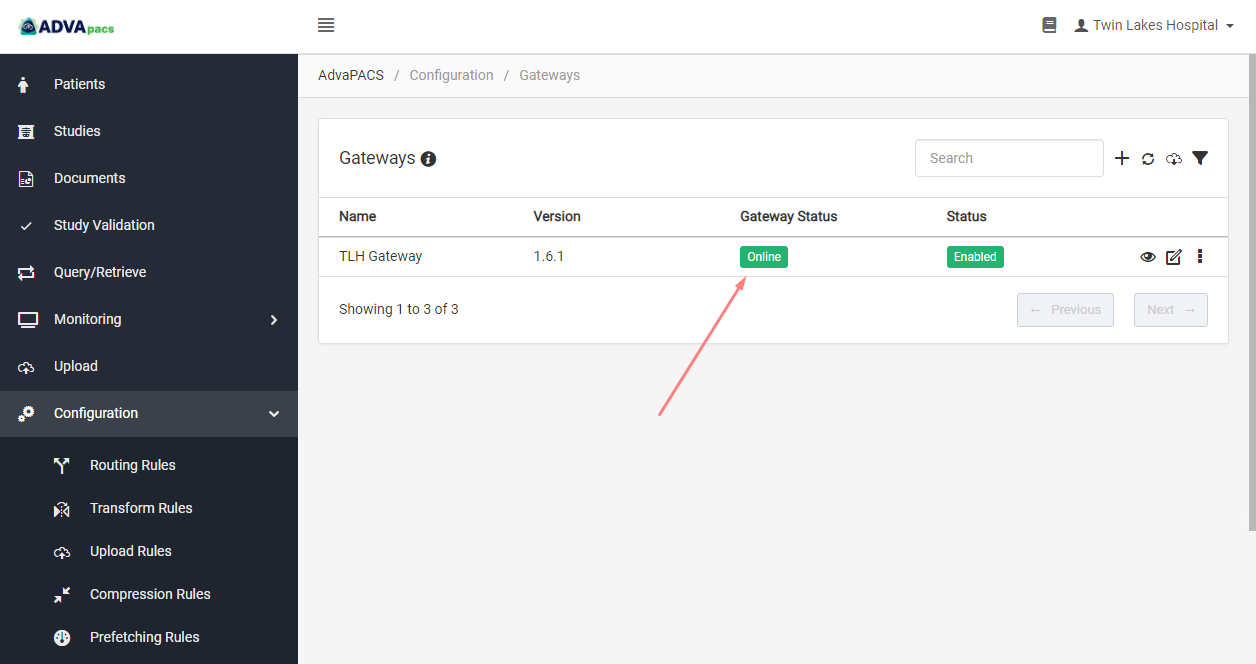
Go to the Gateways screen in your AdvaPACS dashboard. In a few minutes, the Gateway should now show as Online.
Now that your account and the Gateway have already established a connection, the next step is to set up a DICOM server on the Gateway we just installed.
Troubleshooting
If the Gateway profile still shows as Offline, click on the "refresh" button to refresh the page.

If after troubleshooting, your AdvaPACS Gateway still shows as Offline, you can contact us for assistance.