User Roles and Users
User Roles
User roles allow the tenant to control its users' access to certain features in AdvaPACS. You can completely customize a role's name, description, and set of permissions. The account owner and users who have the right permissions can create, view, and edit roles.
Role Permissions
Each role that you create can be fully customized. You can give it the appropriate permissions that fit the user you want to assign it to.
Creating a user role
-
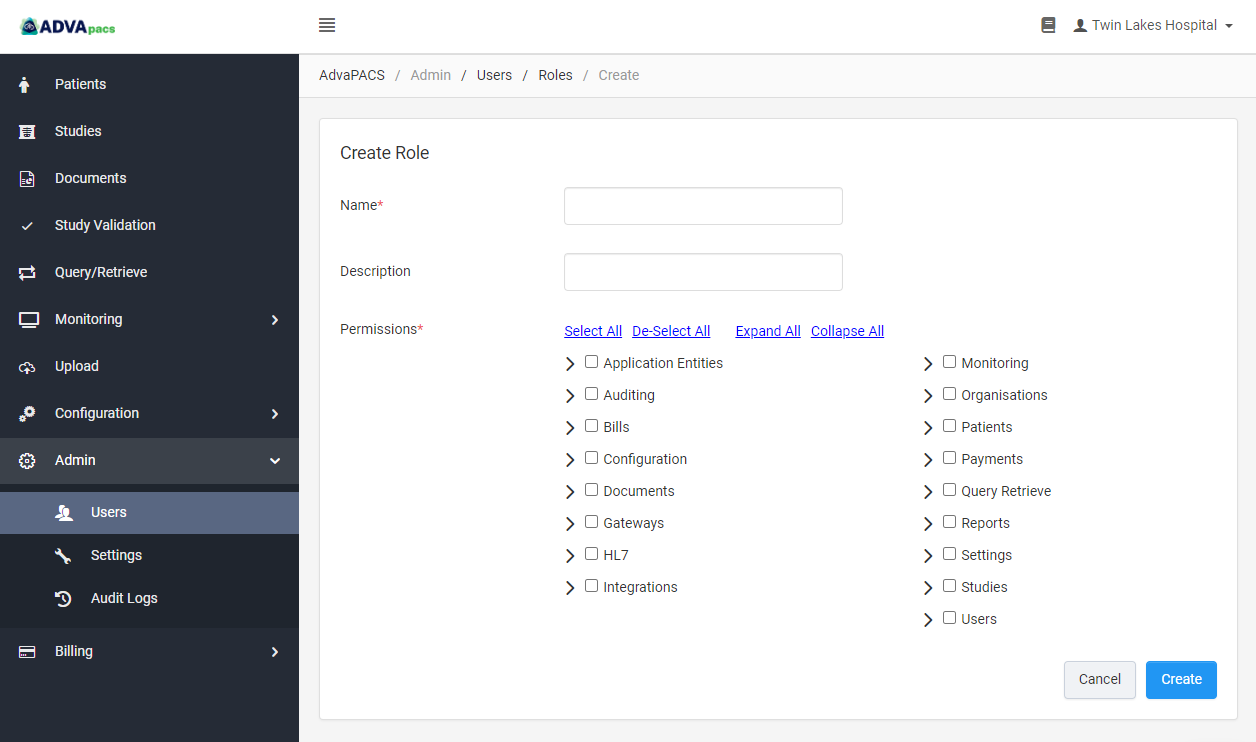
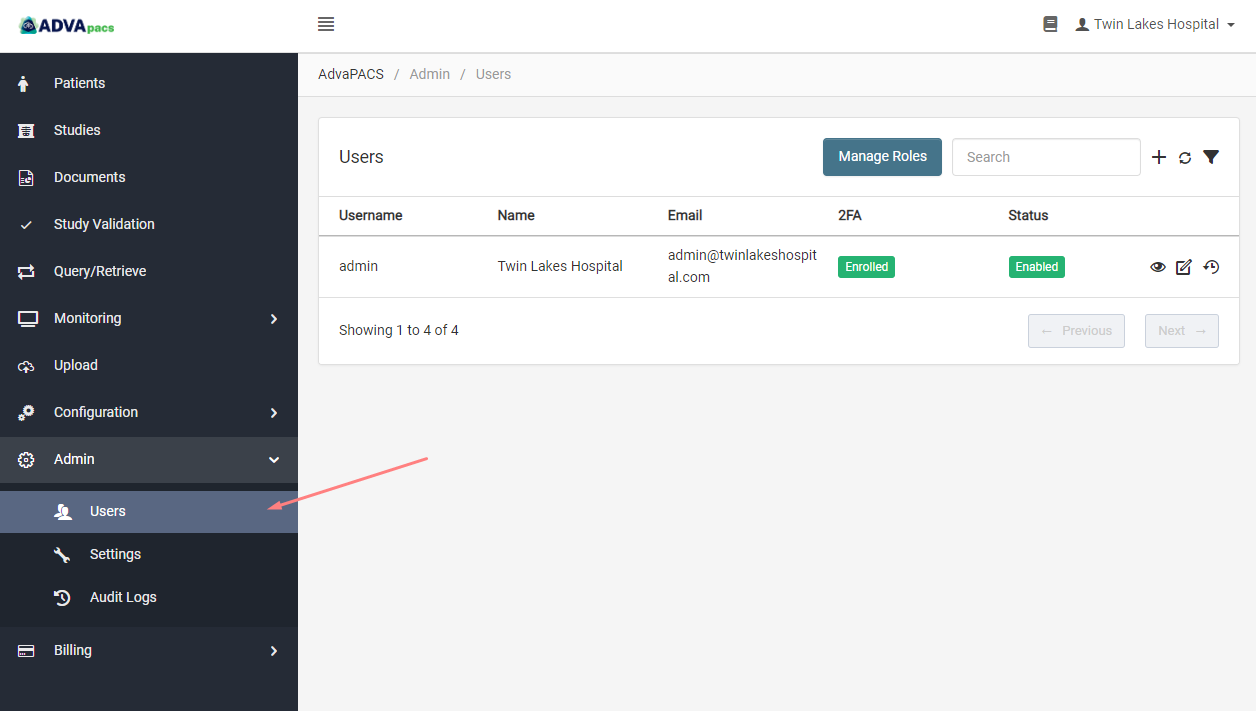
To create a role, first, navigate to the Users screen.
On the left navigation bar, click on Admin to expand the section then click Users.
-
In the Users Screen, click on Manage Roles to go to the Roles screen.

-
Click on the "+" icon to create a role.

-
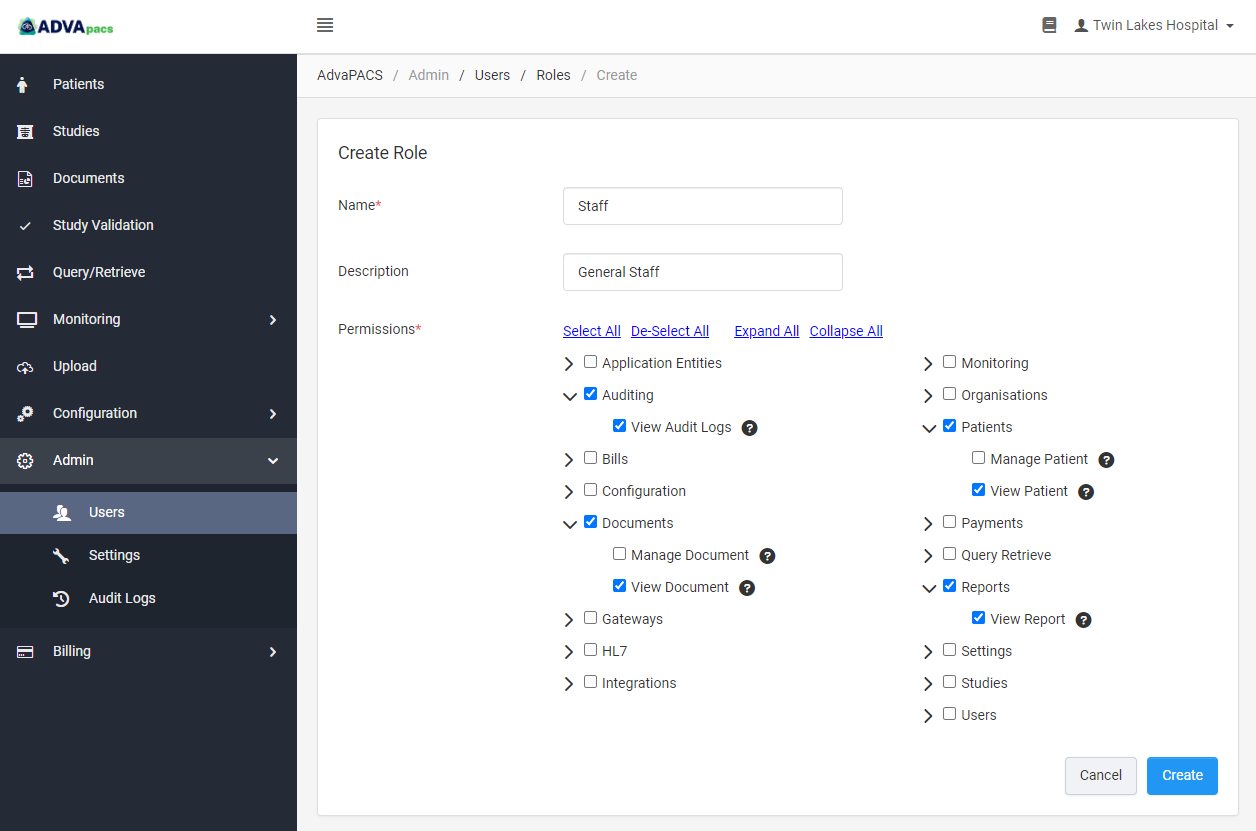
Enter the role's Name, Description, and choose the role's Permissions. Click Expand All to see the full list permissions and hover on the "question mark" beside each one to see its description. For this example, the following permissions are selected:
- View Audit Logs - allows a User to access the Audit Logs screen and view Audit Logs.
- View Document - allows a User to access the Documents screen and view Documents.
- View Patient - allows a User to access the Patients screen and view Patients.
- View Report - allows a User to view a studies Report.
-
On the bottom-right corner of the screen, click on Create to create the role.
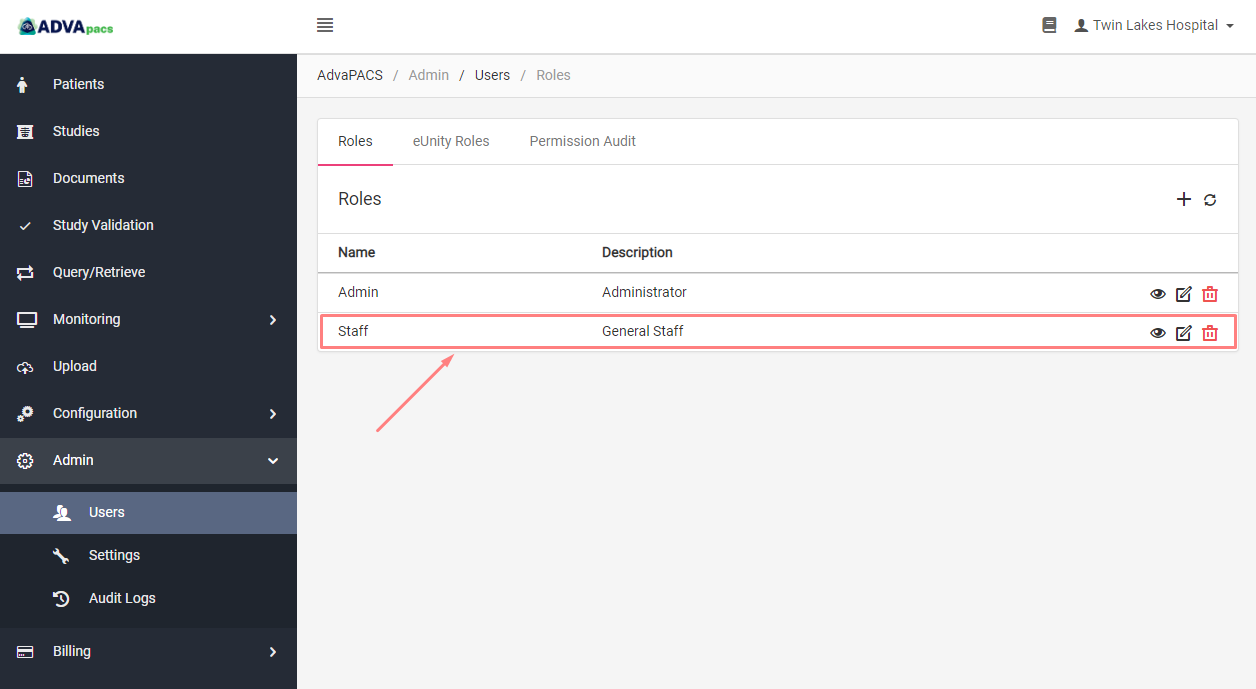
The newly created role will appear on the Roles screen. The buttons on the right allow you to view, edit, or delete the role.
Users
User accounts allow other people to access your account.
Creating a user
-
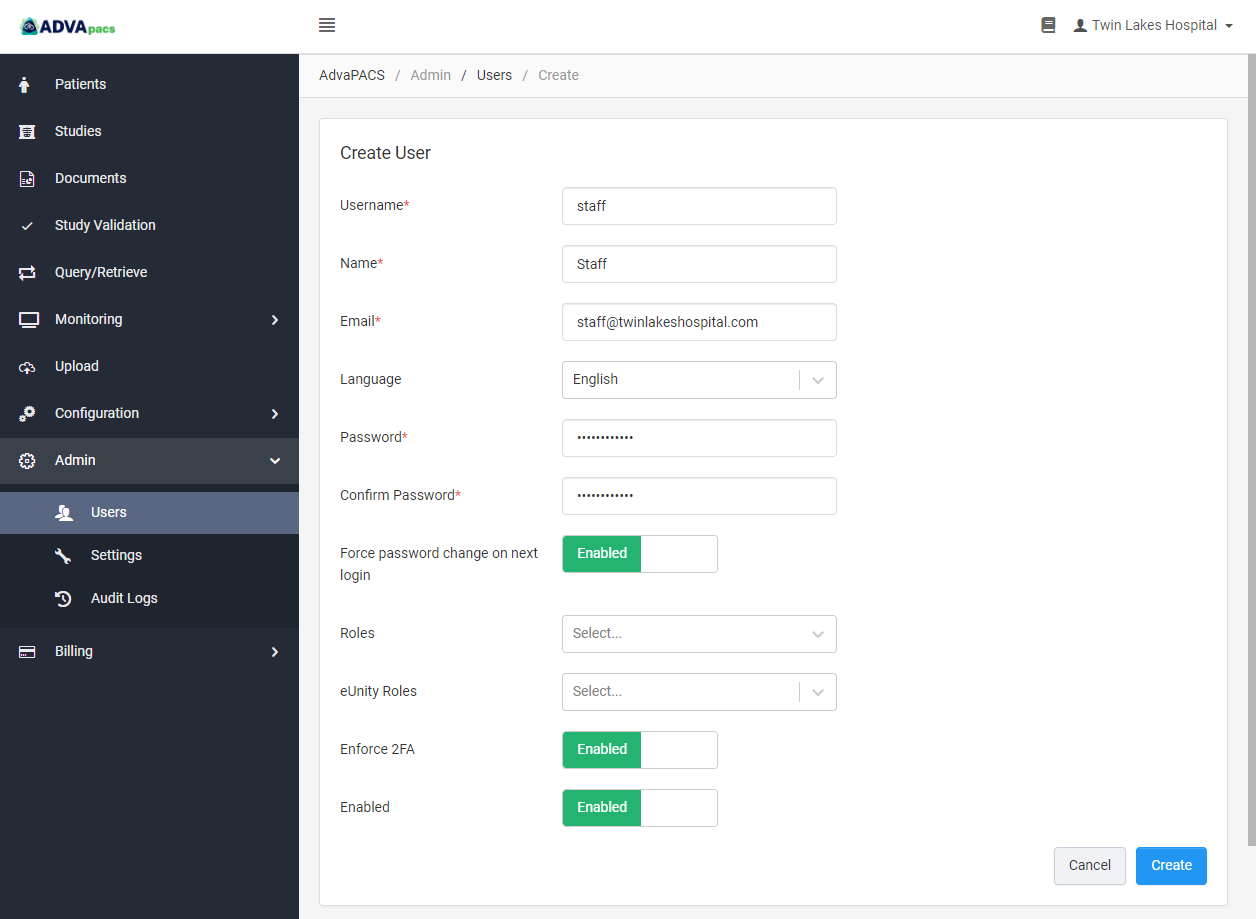
To create a user, navigate to the Users screen.
On the left navigation bar, click on Admin to expand the section, then click Users.
-
Click on the "plus" icon to create a new user.

-
Enter the user's Username, Name, Email, Language, and Password.
noteDepending on some optional features you may have enabled like Organisations or Assigning Authorities, there may also be other required fields for you to complete.
If you are creating a temporary password, enable Force password change on next login to force the user to update the password after logging in.
-
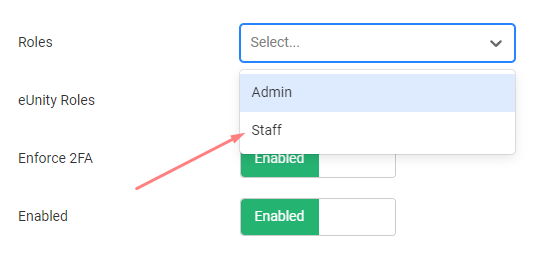
Select a role for the user. The role we had created should appear here.
-
Enforce 2FA for enhanced security. Enabling this forces the user to enroll in 2FA. If this setting is set in the account owner's account, you will not be able to disable it.

-
On the bottom-right corner of the screen, click on Create to create the user.
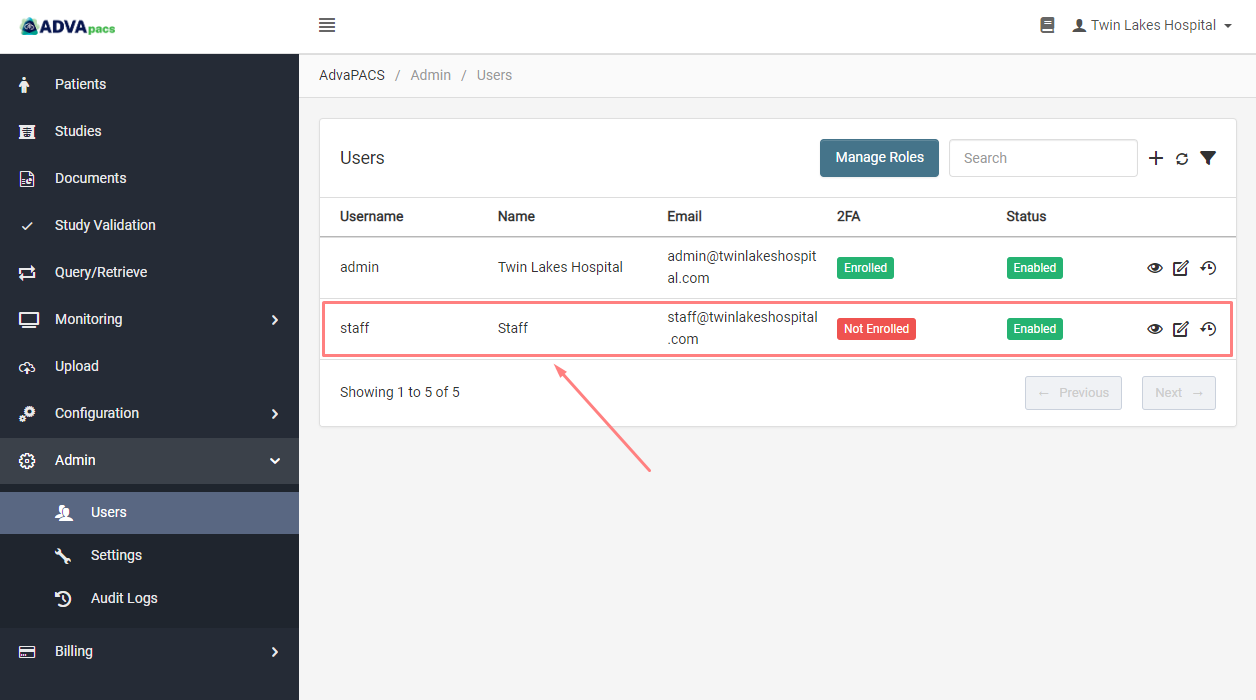
The newly created user will appear on the Users screen.
After creating users, proceed to the next article to start connecting your modalities to AdvaPACS.