Transform Rules
Transform Rules allow you to create rules to automate the process of modifying DICOM tag values in DICOM instances as they are transferred from AdvaPACS to Remote AEs, and vice versa.
This feature is useful when immediate changes to an instance's information are required for reasons such as confidentiality or organizational purposes.
Before we go into the specifics of Transform Rules, let's look at some examples of how it can be used in your workflow.
In a medical setting, as DICOM instances are exchanged between different departments and computers, there are situations that require you to modify specific information in an instance. It may be for organizing files or safeguarding sensitive information, among others.
For example, a facility might require Accession Numbers to have an EXT- prefix if the instances came from third-party facilities. Or a facility might want to standardize how contrast information is described in the instances' description. Where, instead of having a contrast information written as CT Brain w Contrast, CT Brain wC, or CT Brain w/o C, it will be CT Brain +C or CT Brain -C for ease of reading.
Manually updating each instance can be time-consuming and impractical, especially in a busy setting. As a result, it is far preferable to use a tool to delegate these tasks.
Introduction
The process of transforming or modifying DICOM tag values of DICOM instances starts before AdvaPACS sends an instance to a Remote AE or after it receives an instance from a Remote AE.
Transform Rules, therefore, involves, three general mechanisms: Filtering instances, specifying where they're modified, and modifying them.
Devices
It's important that you are familiar with the Devices involved in the process.
The devices are used in the rule to filter instances based on their source, intermediary, and destination devices. They are also used in specifying where the instances will be modified.
Particularly, they are used in the following inputs when creating a transform rule:
Study Flow
You should also be familiar with the Study Flow. Understanding it can help you know the appropriate Trigger to use in the rule.
Transform Rules Page
The Transform Rules page displays existing transform rules and contains options that allow you to search, filter, view, edit, organize, and create new rules. It is located under Configuration.
Searching Transform Rules
Use the search bar to search for existing transform rules. Take note that it only searches the rule name and description.
Filtering Transform Rules
You can also filter existing transform rules using the "Filter" button. It filters the rules based on the following:
You can combine these filters to narrow down your result.
Status
Filters existing transform rules based on their status.
Local AE
Filters existing transform rules based on the Local AE. You can select multiple Local AEs.
Source AE
Filters existing transform rules based on the Source AE. You can select multiple Source AEs.
If you can't find the rule you are looking for, you can try to refresh the list.
Cloning Transform Rules
Existing transform rules can be cloned to save time when creating new transform rules or for other purposes.
Click on a rule's corresponding "clone" icon to clone it.
Moving Transform Rules
The order in which transform rules are executed is determined by how they are organized on the Transform Rules Page.
Use the arrows to change the order of the transform rules.
Viewing Transform Rules
View an existing rule's configuration by clicking on the rule's corresponding "eye" icon.
This opens up the View Transform Rule page.
Editing Transform Rules
Edit an existing rule by clicking on the rule's corresponding "pencil" icon.
You can also edit the rule directly when viewing the rule, by clicking on the "Edit" button.
Creating Transform Rules
This section discusses the configuration options in creating transform rules.
For a step-by-step process in creating a transform rule, check out How to Create Transform Rules.
A transform rule is created by clicking on the "+" icon in the Transform Rules page.
This routes you to the Create Transform Rule page where you can configure the rule.
The interface has three sections:
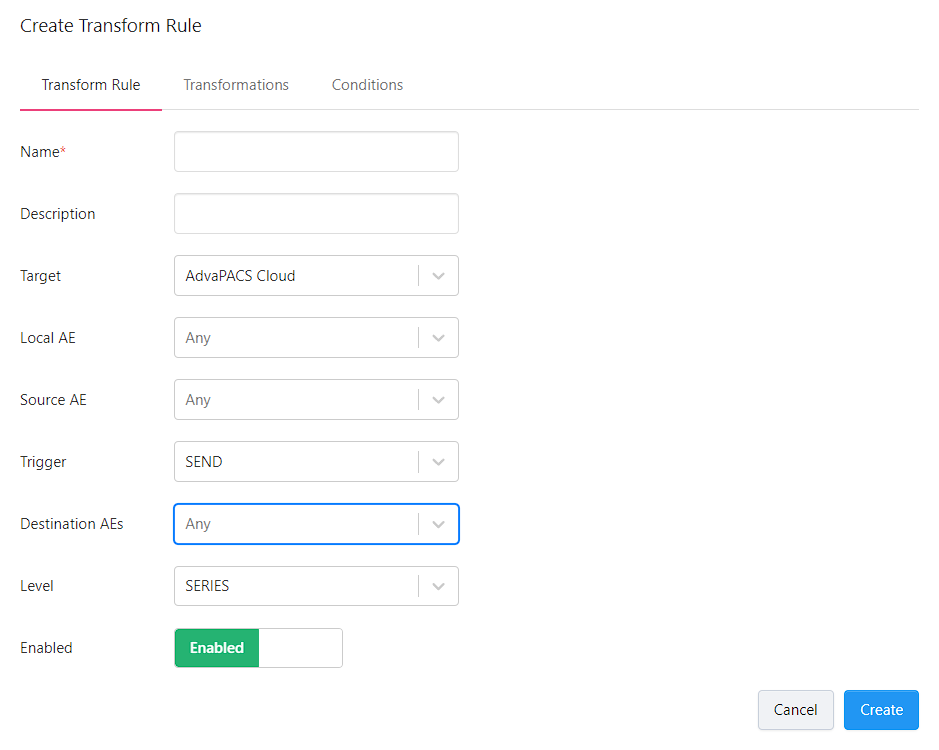
Transform Rule
The Transform Rule section allows you to configure basic information about the rule, instance filters, the device where the instances will be modified, and how the filtered instances will be modified.
Name and Description
This allows you to add a name and description for your rule.
Target
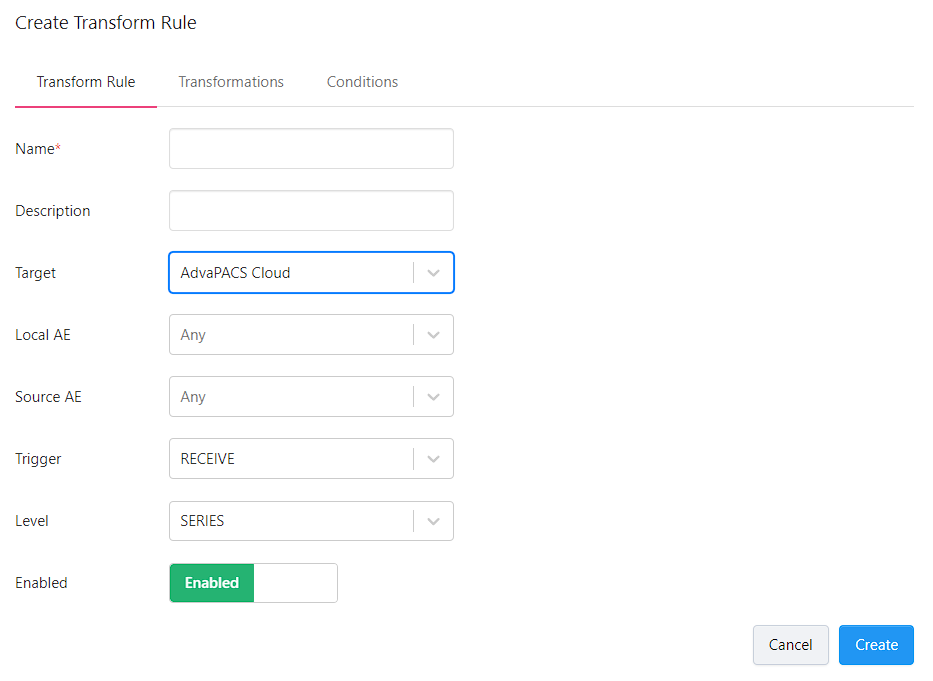
The Target is the device where the filtered instances will be modified. The purpose of selecting a target device is to provide flexibility when creating Transformations and Conditions. The available devices are:
- AdvaPACS Cloud - this selection modifies the filtered instances in AdvaPACS Cloud and gives you the default options available in the Transformations and Conditions tabs.
- AdvaPACS Gateway - this selection modifies the filtered instances in a Gateway that you select and gives you an additional option in the Transformations and Conditions tabs, called Script, which allows you to create custom scripts.
Selecting this as the Target lets you choose a specific Gateway where the instances will be modified.
For example, if the Receive trigger is selected, selecting a target means choosing the device where the instances will be modified. In this case, it can either be in the gateway or in the cloud.

Gateway
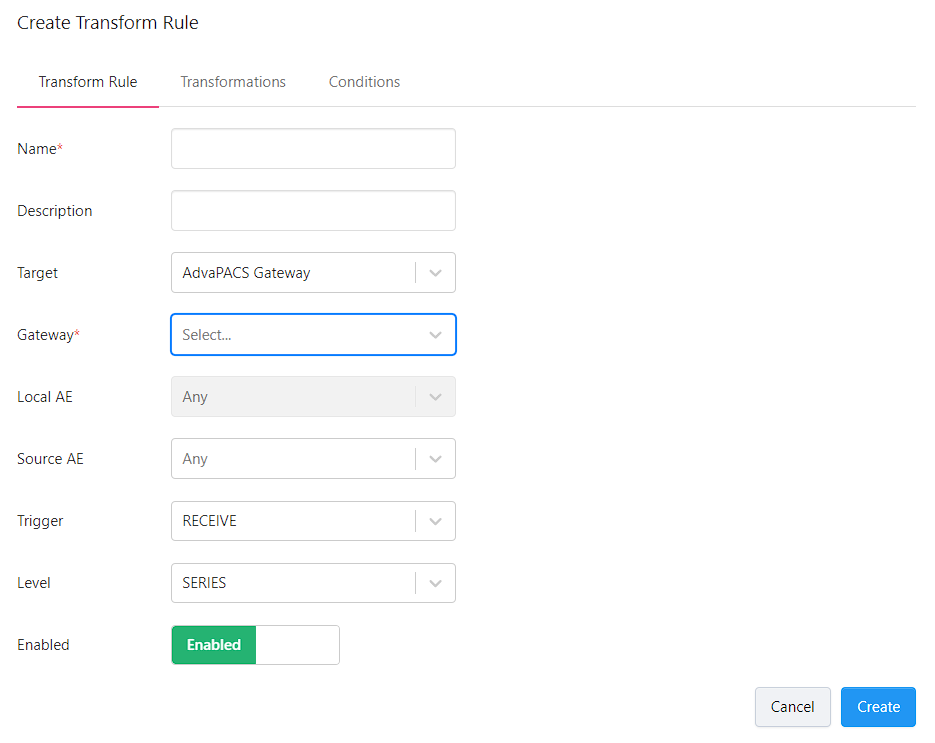
The Gateway is the device where the instances will be modified.
This option is only available if the selected Target is AdvaPACS Gateway.
Local AE

The Local AE is the intermediary device that the instances pass through as they are sent between the Source AE and the Cloud.
Selecting a Local AE filters instances to modify based on the Local AE they pass through.
Because a Gateway may contain two or more Local AEs, selecting a Local AE serves as an additional filter to instances filtered by the Source AE.
You can select multiple Local AEs.
Take note that the selected Trigger affects which Local AE will be selected. For example, if the trigger is Receive, the Local AE is the one that the instances pass through as they're received by AdvaPACS.

On the other hand, if the trigger is Send, the Local AE is the one that the instances pass through as they're sent from AdvaPACS.

Source AE
The Source AE is the Remote AE from which the instances uploaded to AdvaPACS originate.
Selecting a Source AE filters instances to modify based on their Remote AE of origin.
You can select multiple Source AEs.
All instances have an origin Remote AE, whether they are sent from AdvaPACS to Remote AE or from Remote AE to Remote AE.
This is because instances sent from AdvaPACS to Remote AE are always sent by a Remote AE to AdvaPACS first.
And as for instances sent from Remote AE to Remote AE, they are all sent to AdvaPACS first then forwarded to the destination Remote AE, as explained here.
Trigger
The Soure AE, Local AE, and Destination AE filter instances according to their origin, intermediary, and destination devices. However, filtering them using this method isn't enough because the instances do not flow in one direction. They are either sent or received by AdvaPACS. As a result, when filtering instances, you also need to specify the direction in which they are moving. Familiarizing yourself with the Study Flow can help you visualize this.
For example, if the instances you need to filter are those that are sent from AdvaPACS to a Remote AE, then, the "Send" Trigger should be selected. This trigger tells the rule to only filter instances that are sent from AdvaPACS and not include those that are received by AdvaPACS.
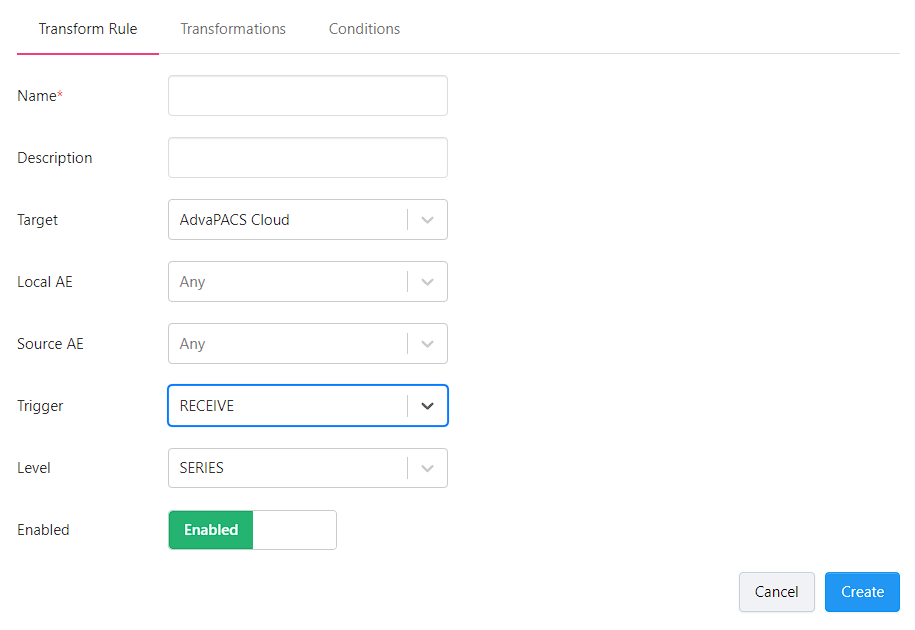
The Trigger option lets you specify the direction of the instances you want to filter based on whether AdvaPACS receives or sends the instances. It has two options:
Receive
This trigger filters instances that are sent from Remote AE to AdvaPACS. AdvaPACS "receives" the instances.

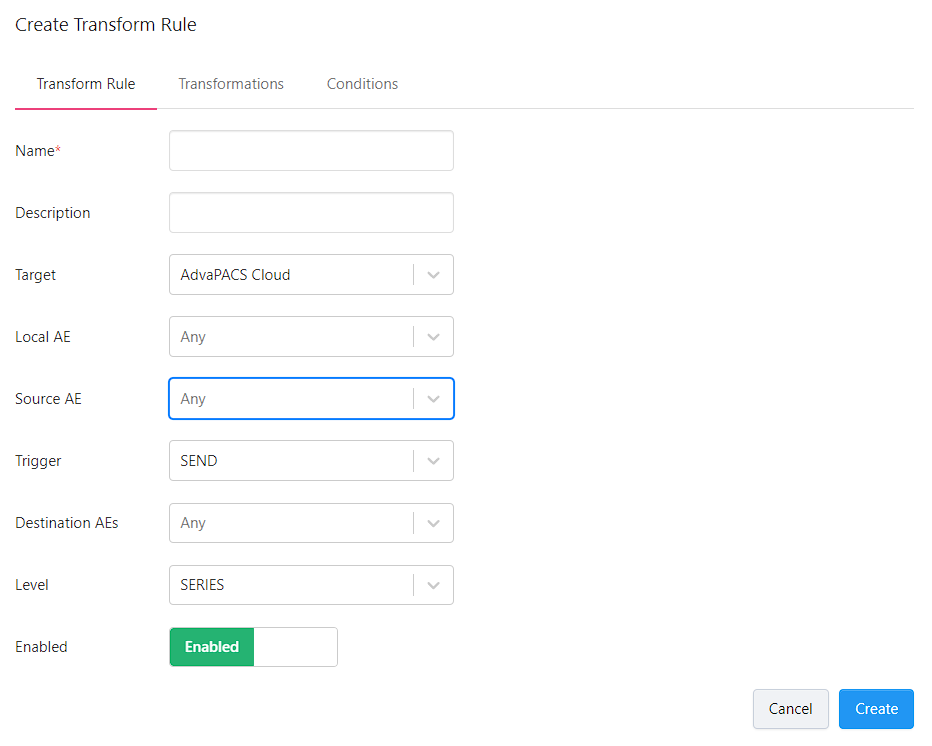
Send
This trigger filters instances that are sent from AdvaPACS to a Remote AE and Remote AE to Remote AE. AdvaPACS "sends" the instances.
-

-

While the instances in Remote AE to Remote AE technically start from a Remote AE, they are treated as sent from AdvaPACS to Remote AE.
Therefore, if you are trying to filter instances that came from a Remote AE and sent to a Remote AE, you should use the Send trigger to filter them.
The Source AE you specify takes care of filtering the instances based on the Remote AE they originally came from.
Therefore, both study flows pertains to AdvaPACS "sending" the instances.
Additionally, the Send trigger lets you choose the destination Remote AE and displays an additional option, called, Destination AE.
Destination AE
The Destination AE is the Remote AE where the instances are sent.
Selecting a Destination AE filters instances based on the Remote AE to which the instances are sent.
It serves as an additional filter to instances filtered by the Source AE and Local AE.
This option is only available if the selected Trigger is Send.
You can select multiple Destination AEs.
Level
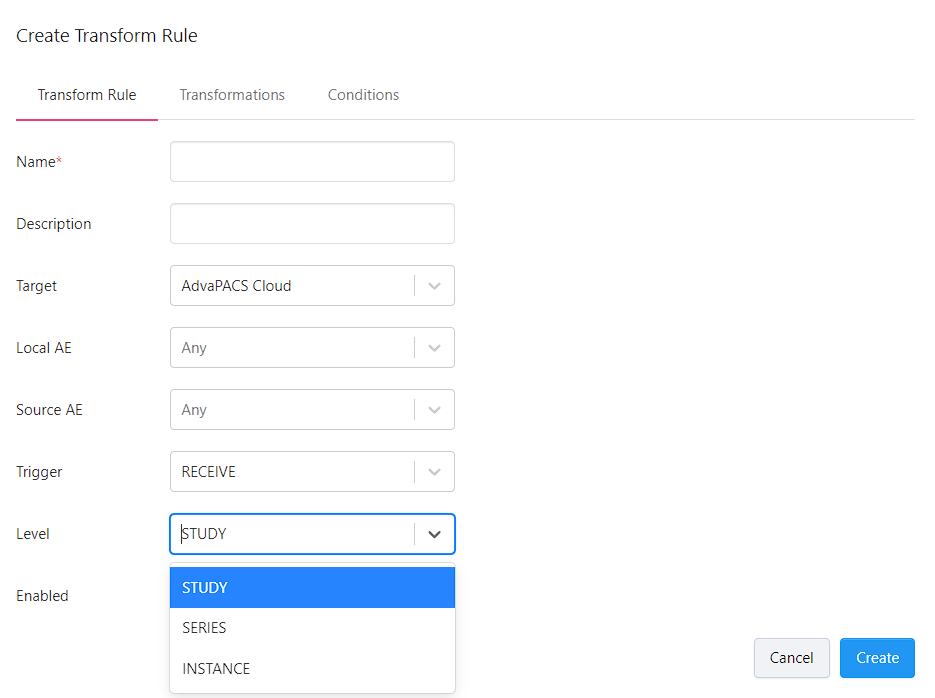
A transform rule evaluates the Conditions and applies the Transformations to instances based on the level you choose. It has three options:
-
Study - if this is selected, the Conditions are only evaluated on the DICOM tag values of the first instance of the first series of a study. If the condition evaluates to true, the Transformations are applied to all of the instances of the study. If the condition evaluates to false, it will move on to evaluate the conditions on the next study.
-
Series - if this is selected, the Conditions are only evaluated on the DICOM tag values of the first instance of each series in a study. If the condition evaluates to true, the Transformations are applied to all of the instances of the series. If the condition evaluates to false, it will move on to evaluate the conditions on the next series in the study.
-
Instance - if this is selected, the Conditions are only evaluated on the DICOM tag values of each instance in a study. If the condition evaluates to true, the Transformations are applied to the instance. If the condition evaluates to false, it will move on to evaluate the conditions on the next instance in the study.
Enable
Turns the rule on or off.
Transformations
The Transformations section allows you to specify modifications to apply to the filtered instances.
Transformations are applied to instances based on the Level specified. And are only applied if the Conditions evaluate to true.
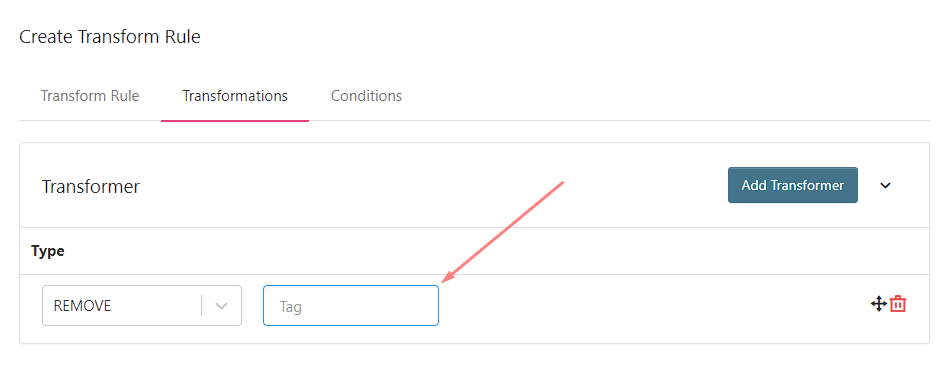
Transformations allows you to create Transformers that has the following types:
Remove
Remove a DICOM tag value in an instance.
Enter the DICOM tag that you wish to remove.
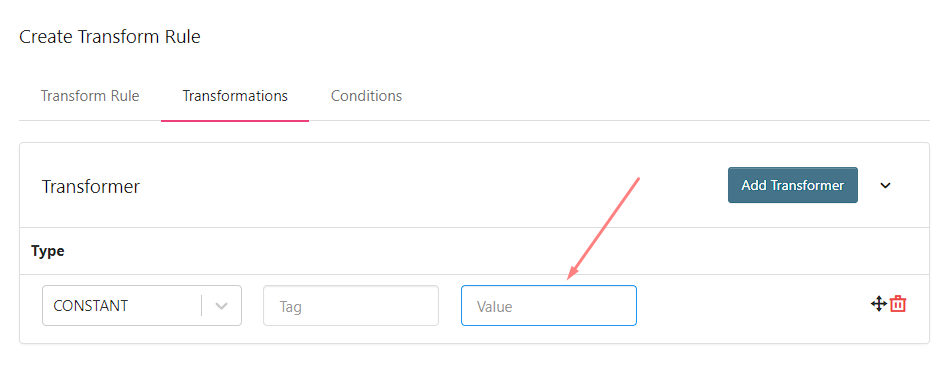
Constant
Add or replace a DICOM tag value in an instance.
Enter the DICOM tag that you want to add a value to.
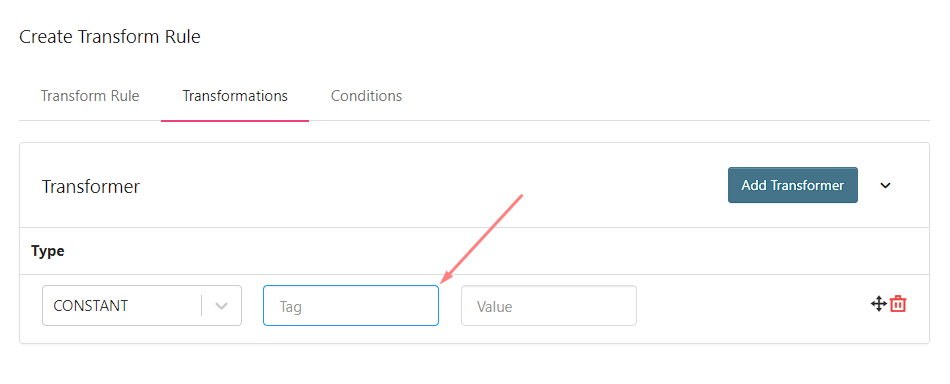
Enter the value that you want to add to the selcted DICOM tag.
Regex
Modify DICOM tag values in instances using regex.
Enter the DICOM tag that you want to modify.

Enter a regex to select the specific characters that you want to modify in the selected DICOM tag.

Enter the value you want to replace the selected characters with.

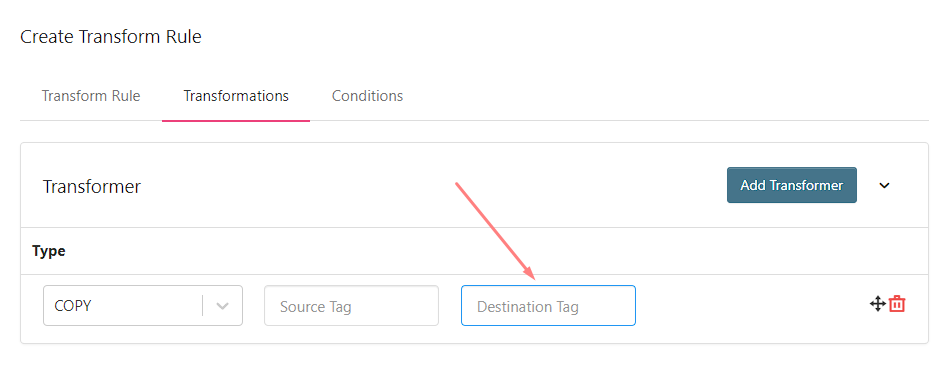
Copy
Copy a DICOM tag value of an instance to another DICOM tag of the same instance.
Enter the DICOM tag whose value you want to copy.
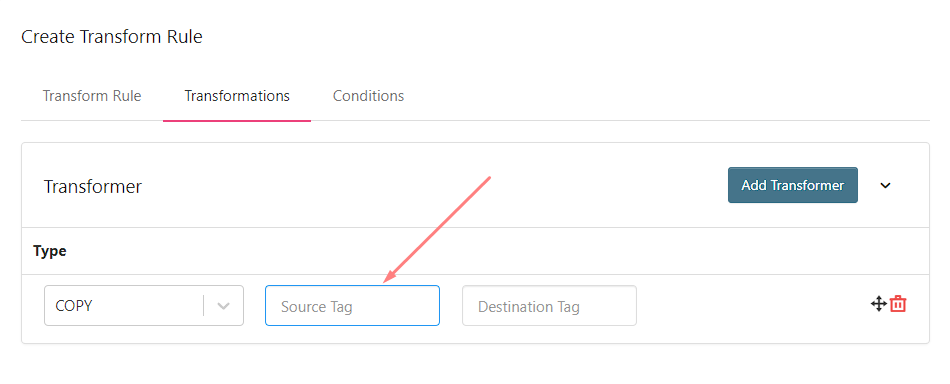
Enter the DICOM tag where you want to paste the copied value.
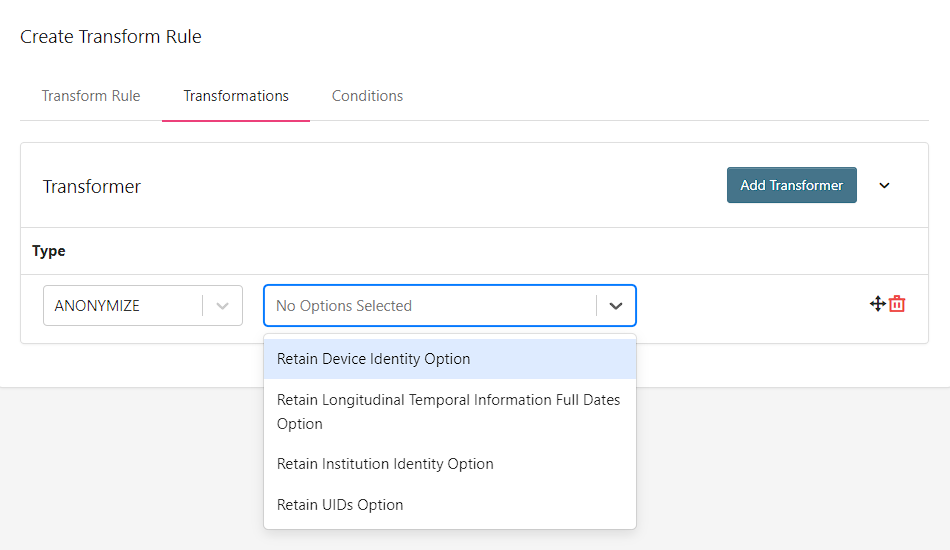
Anonymize
This allows you to anonymize DICOM tag values. It uses the DICOM Supplement 142: Clinical Trial De-identification Profile in anonymizing specific DICOM Tags.
It has the following options:
- Retain Device Identity Option
- Retain Longitudinal Temporal Information Full Dates Option
- Retain Institution Identity Option
- Retain UIDs Option
Select your preferred option.
Script
This is only available when the Target specified in the rule is AdvaPACS Gateway.
Use a script in modifying DICOM tags.
This allows you to modify DICOM tags with greater flexibility and helps tailor your modifications to your specific needs.
Clicking on the View Script button will show the Script Editor where you can write custom scripts using the Rhino Javascript Engine.
Conditions
The Conditions section allows you to use conditional statements to specify when to run the rule and/or further filter out instances to apply the transformations to.
For more information, see Conditions.