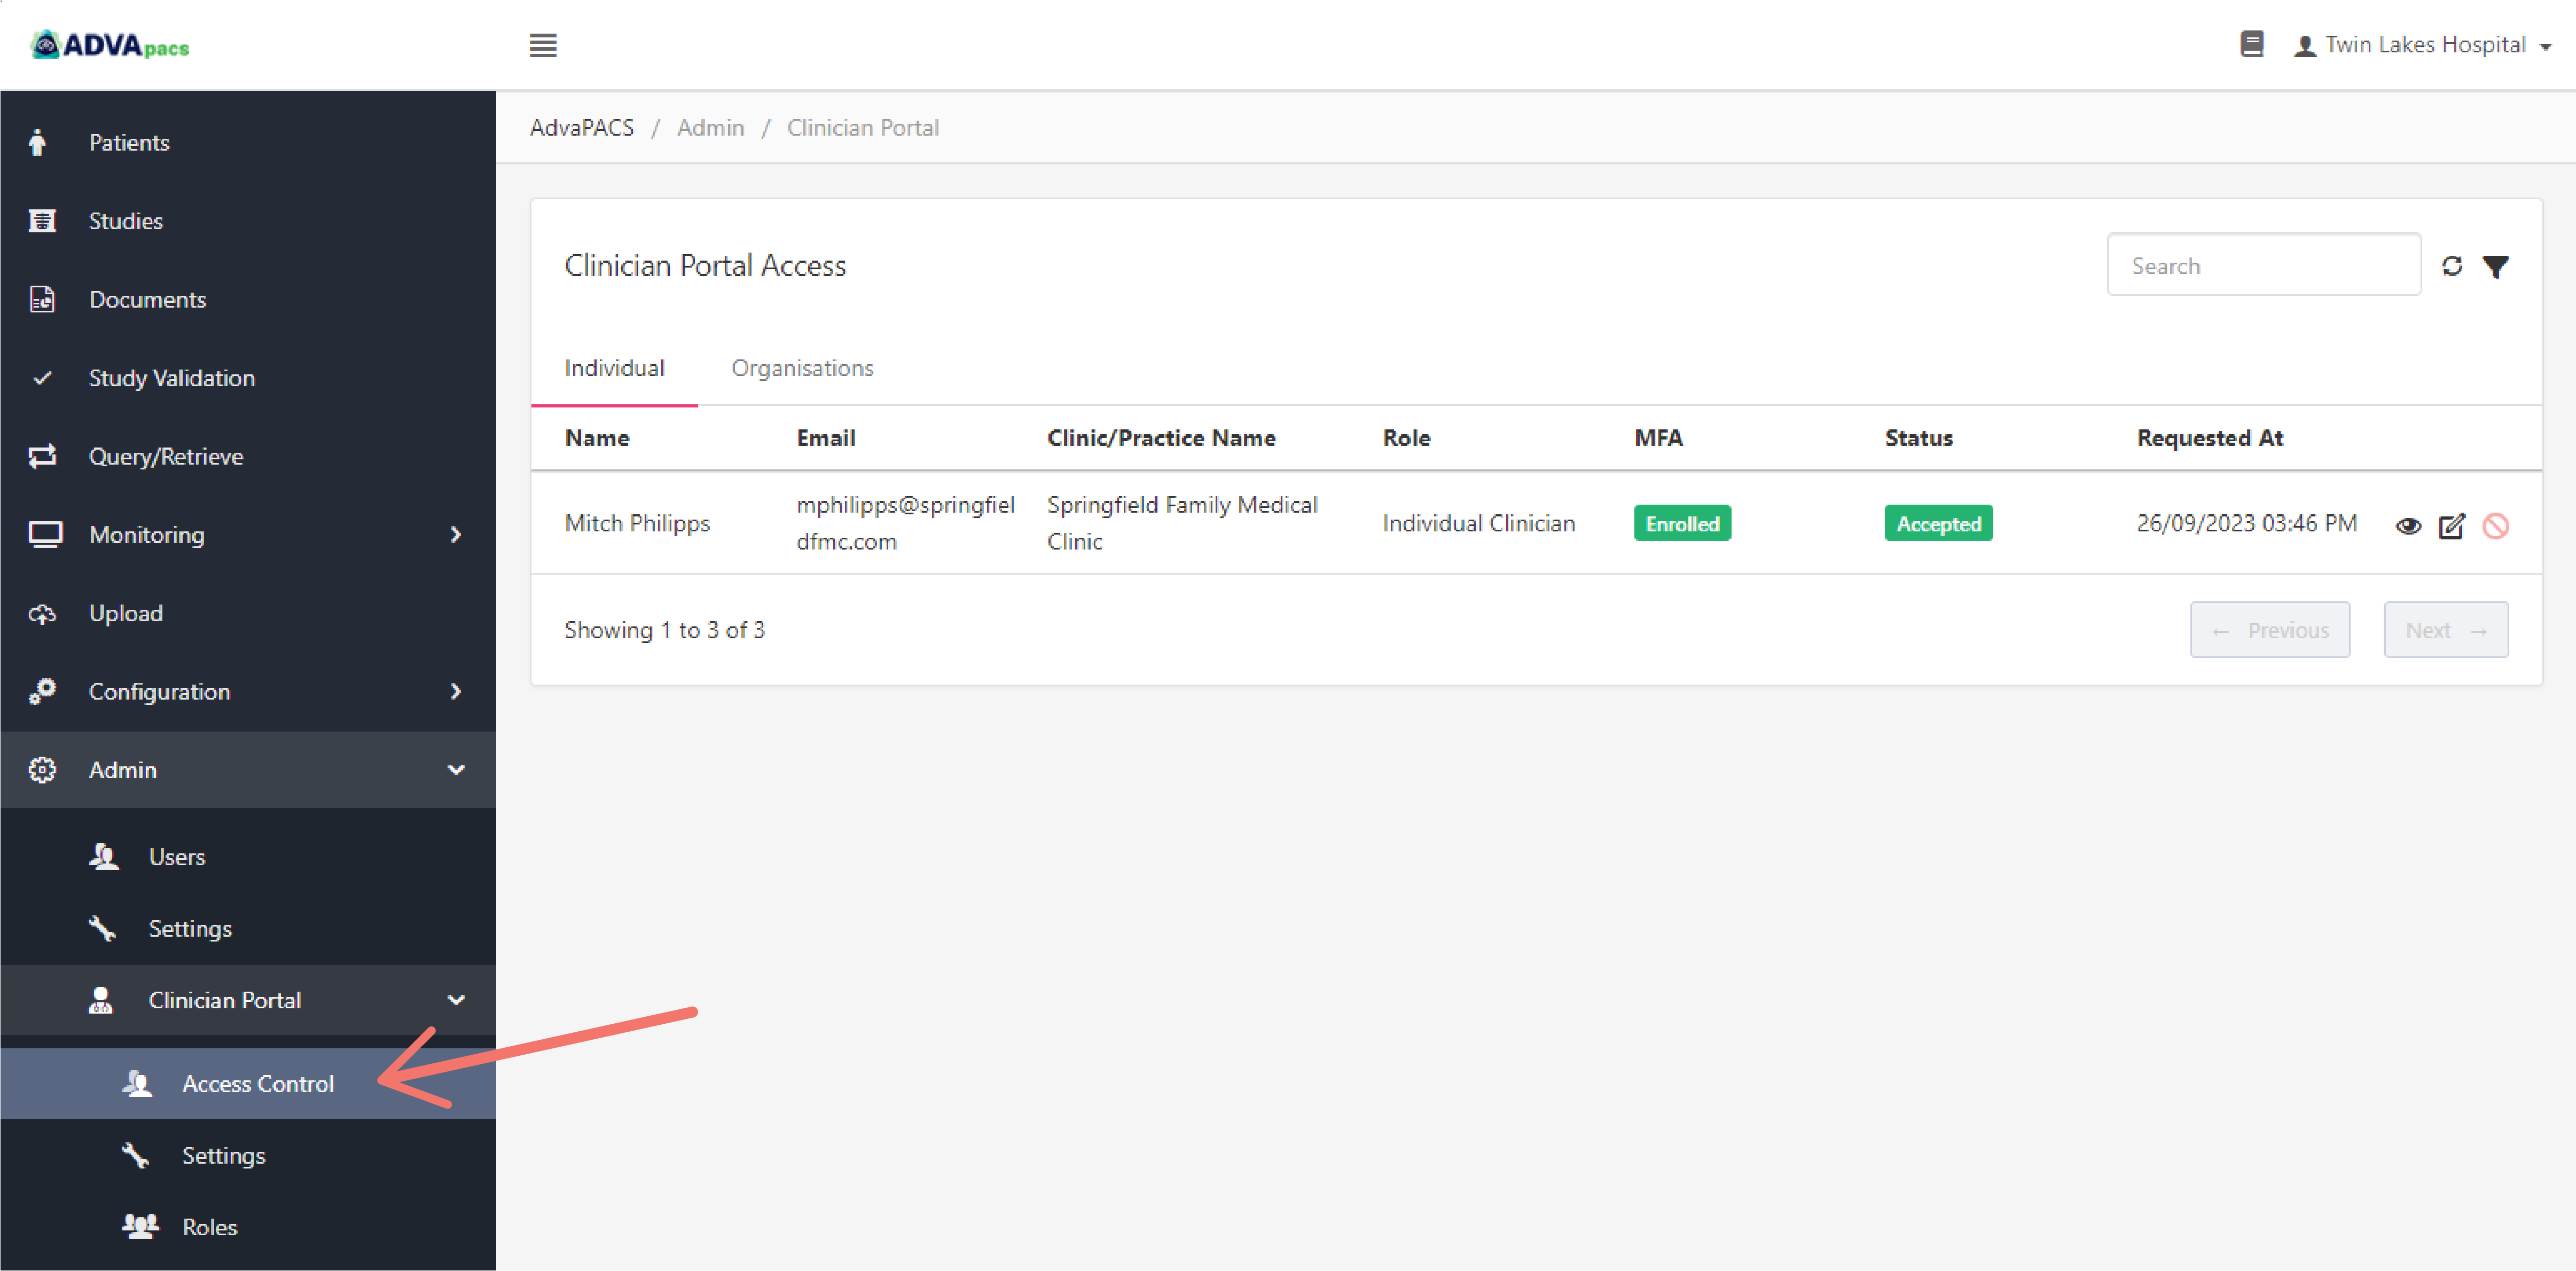
Access Control
The Clinician Portal has two types of user accounts: Individual and Organisation.
Individual user accounts allows clinicians to manage their own account. This is the recommended account for clinicians who are not affiliated with a larger organisation.
Organisation accounts allows an administrator to manage a number of clinician user accounts within an organisation. It has administrative tools and different authentication options to manage the account and their users. This is the recommended account for clinicians who are part of a larger organisation.
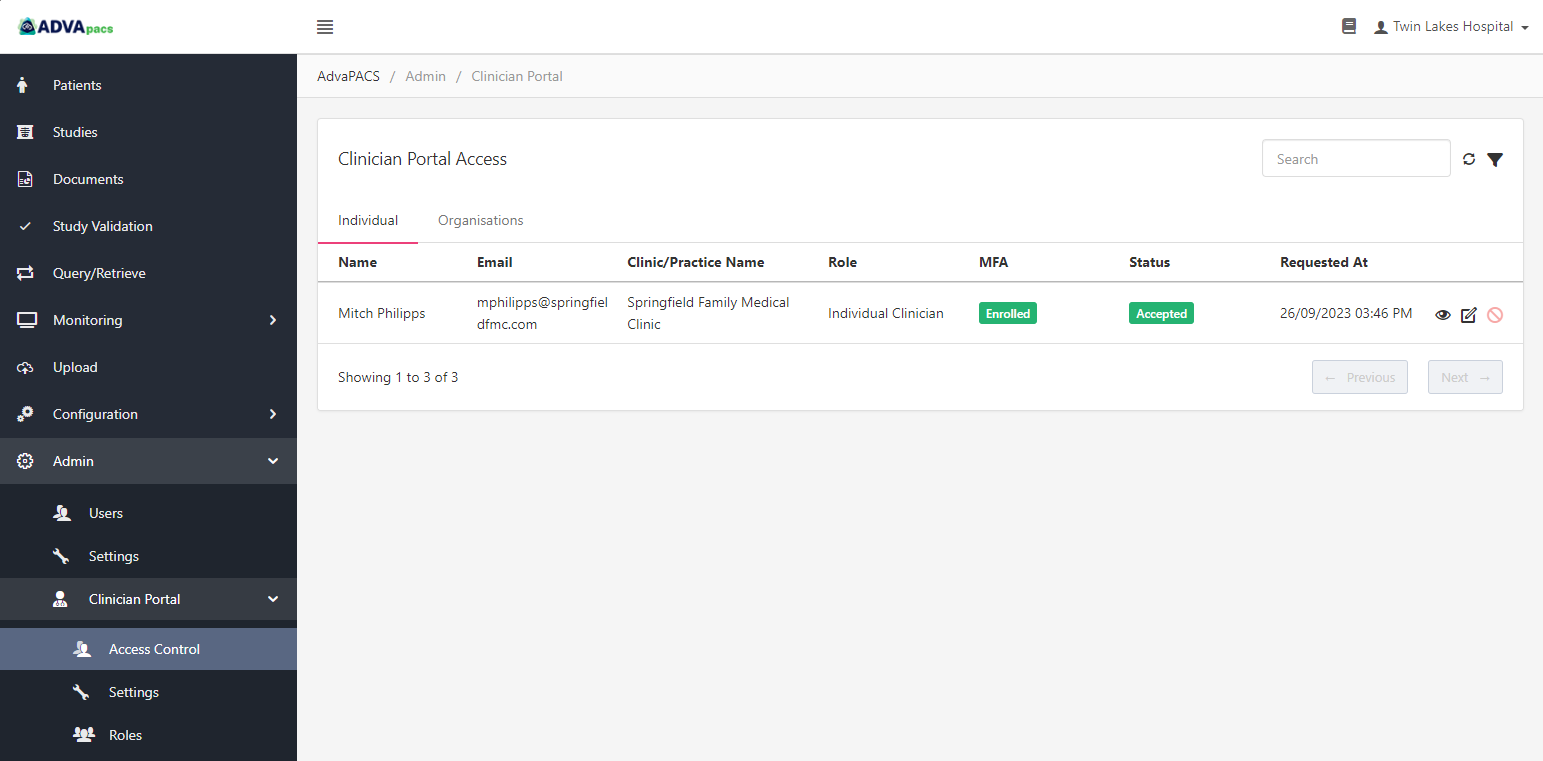
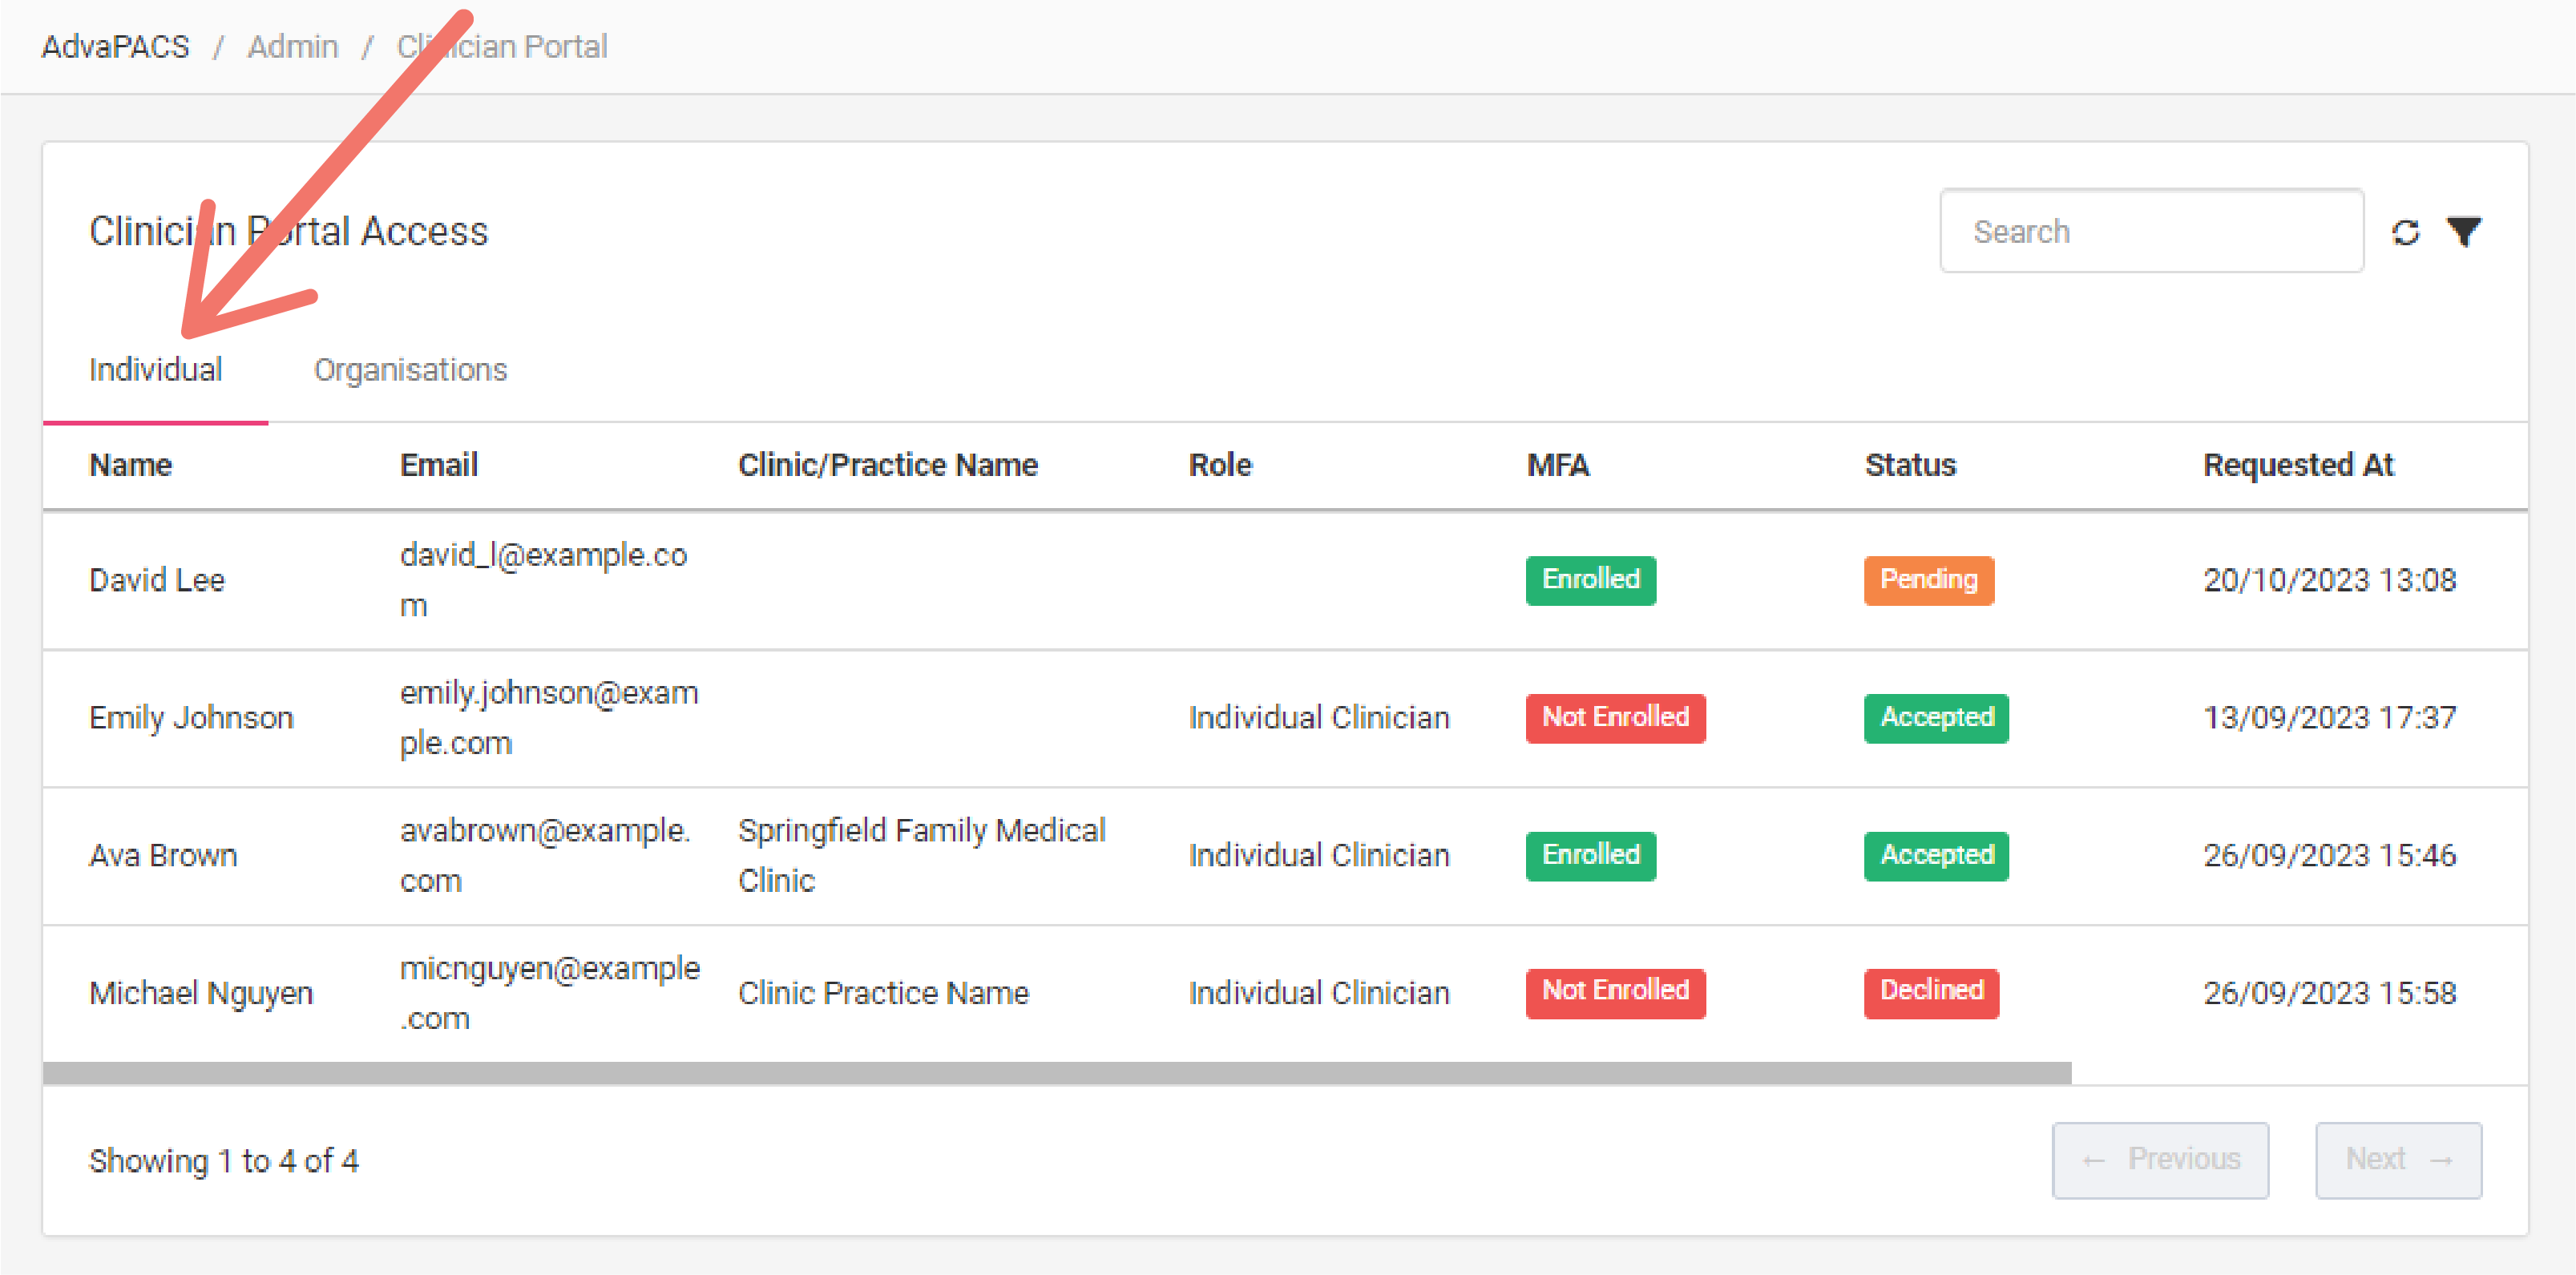
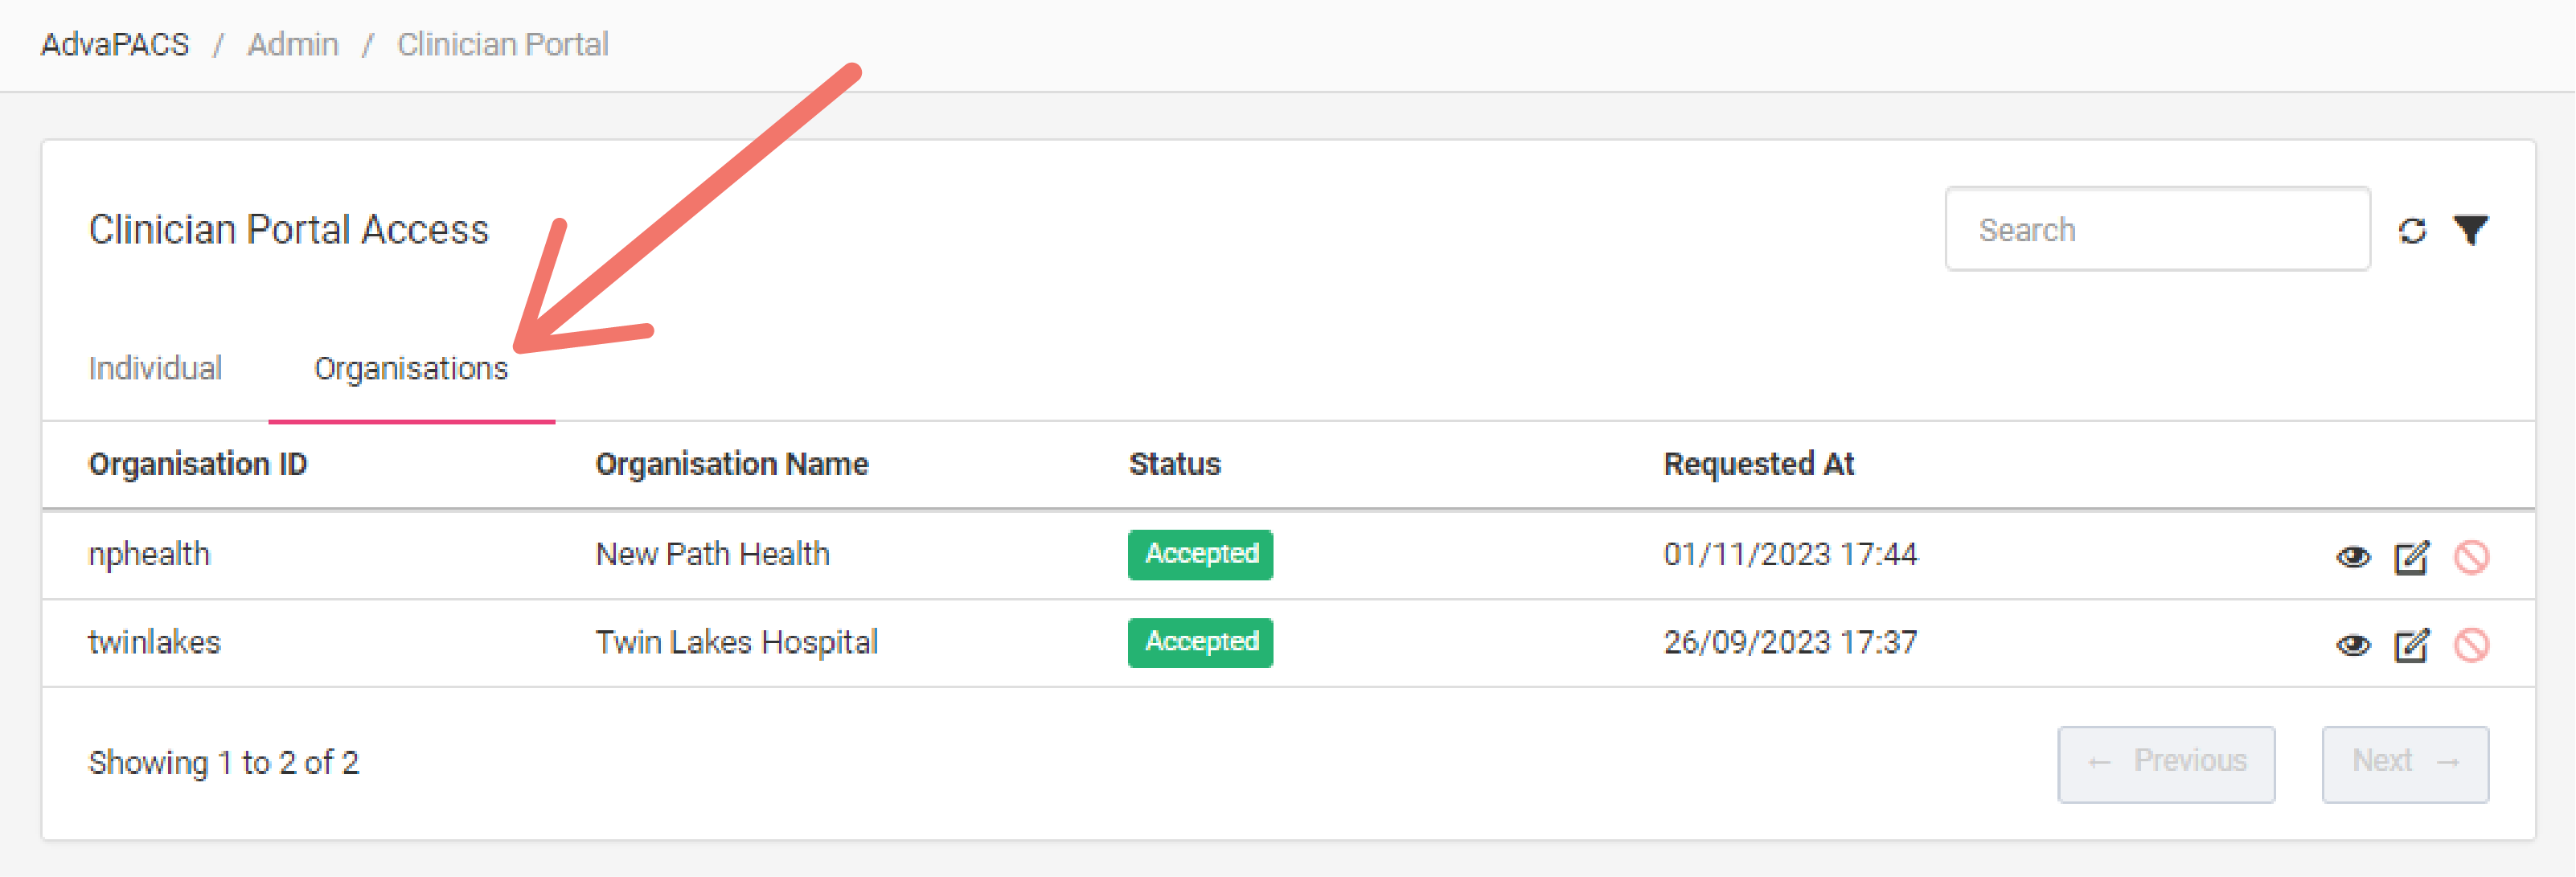
Clinician Portal users who request access to your patient studies are displayed in the Access Control listing table where you can manage them.

The table is organized according to the types of Clinician Portal accounts:
-
Individual
-
Organisations
Granting access to a user
When a user requests access, you must first assign them a role with the appropriate permissions. This is a critical step because the role assigned to a user primarily controls how the user can access studies and features. Misconfigured roles could unintentionally grant users access to studies and features that should have remained restricted to them.
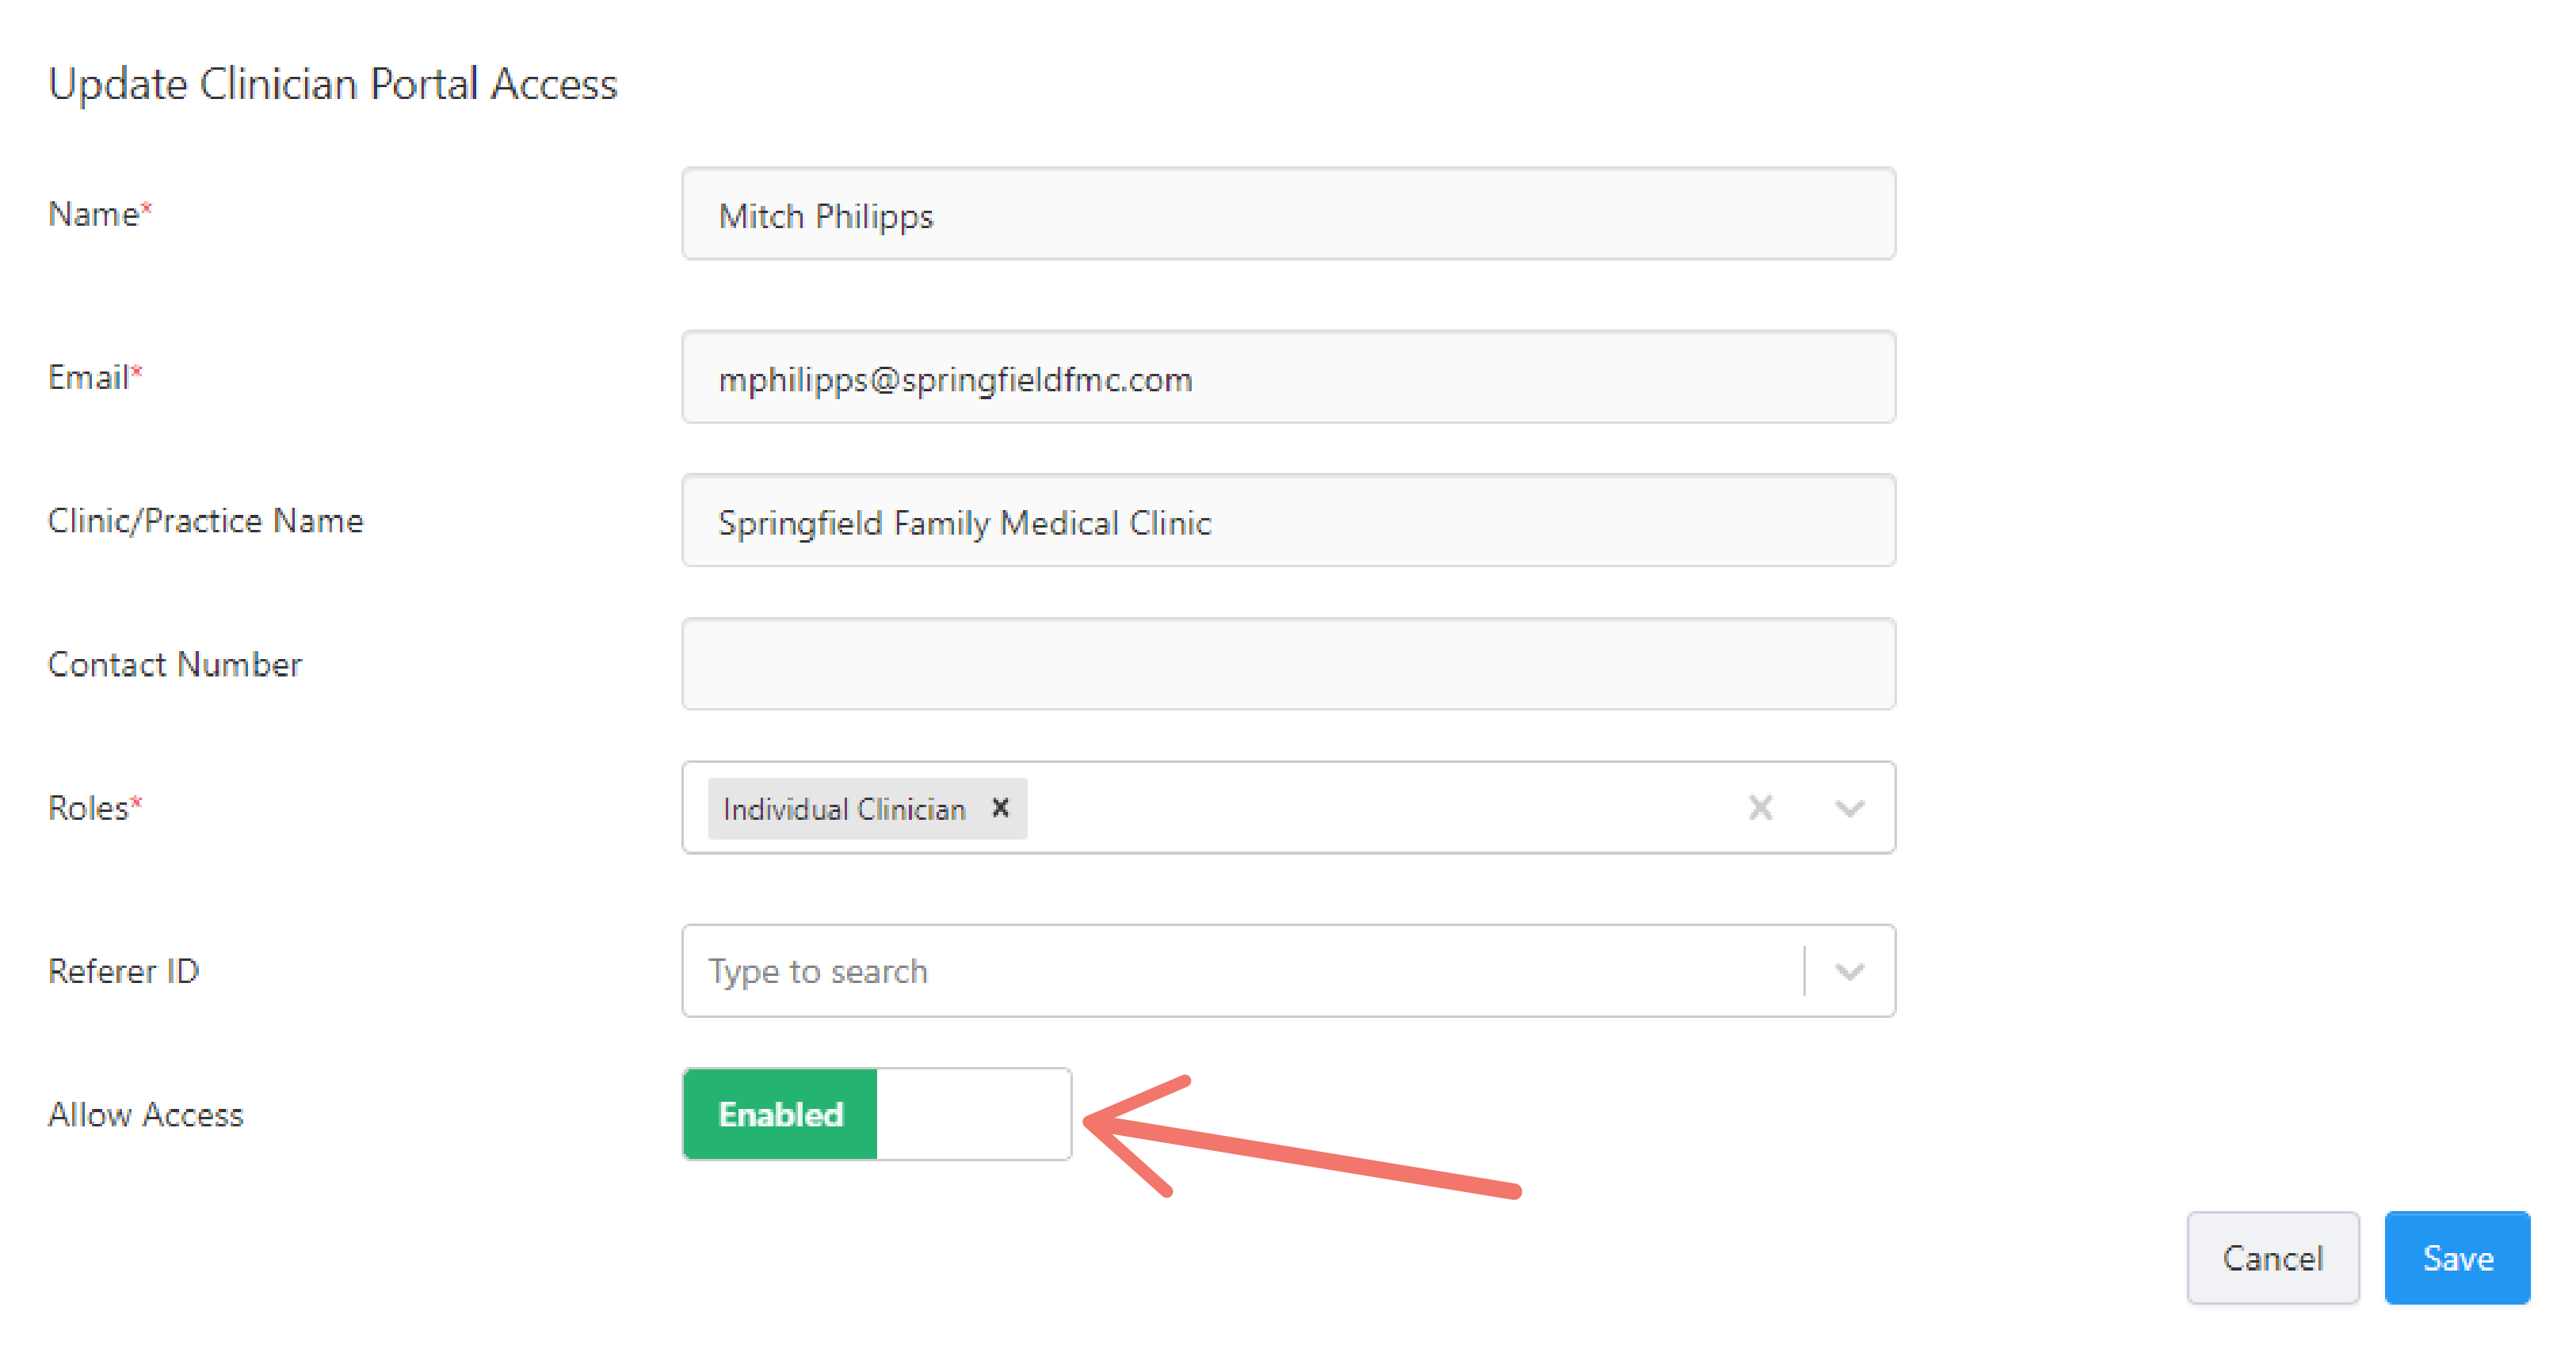
Once a role is assigned, enable the Allow Access Option option in a user to finally grant them access.
Allow Access Option
This is the main control to grant a user access to studies and features according to their assigned role.
Before enabling this option, make sure to check the user's assigned role and its permissions to ensure they only have access to studies and features that they need to. To check a user's role or assign one, see Assigning Roles
Steps to enable Allow Access in a user
-
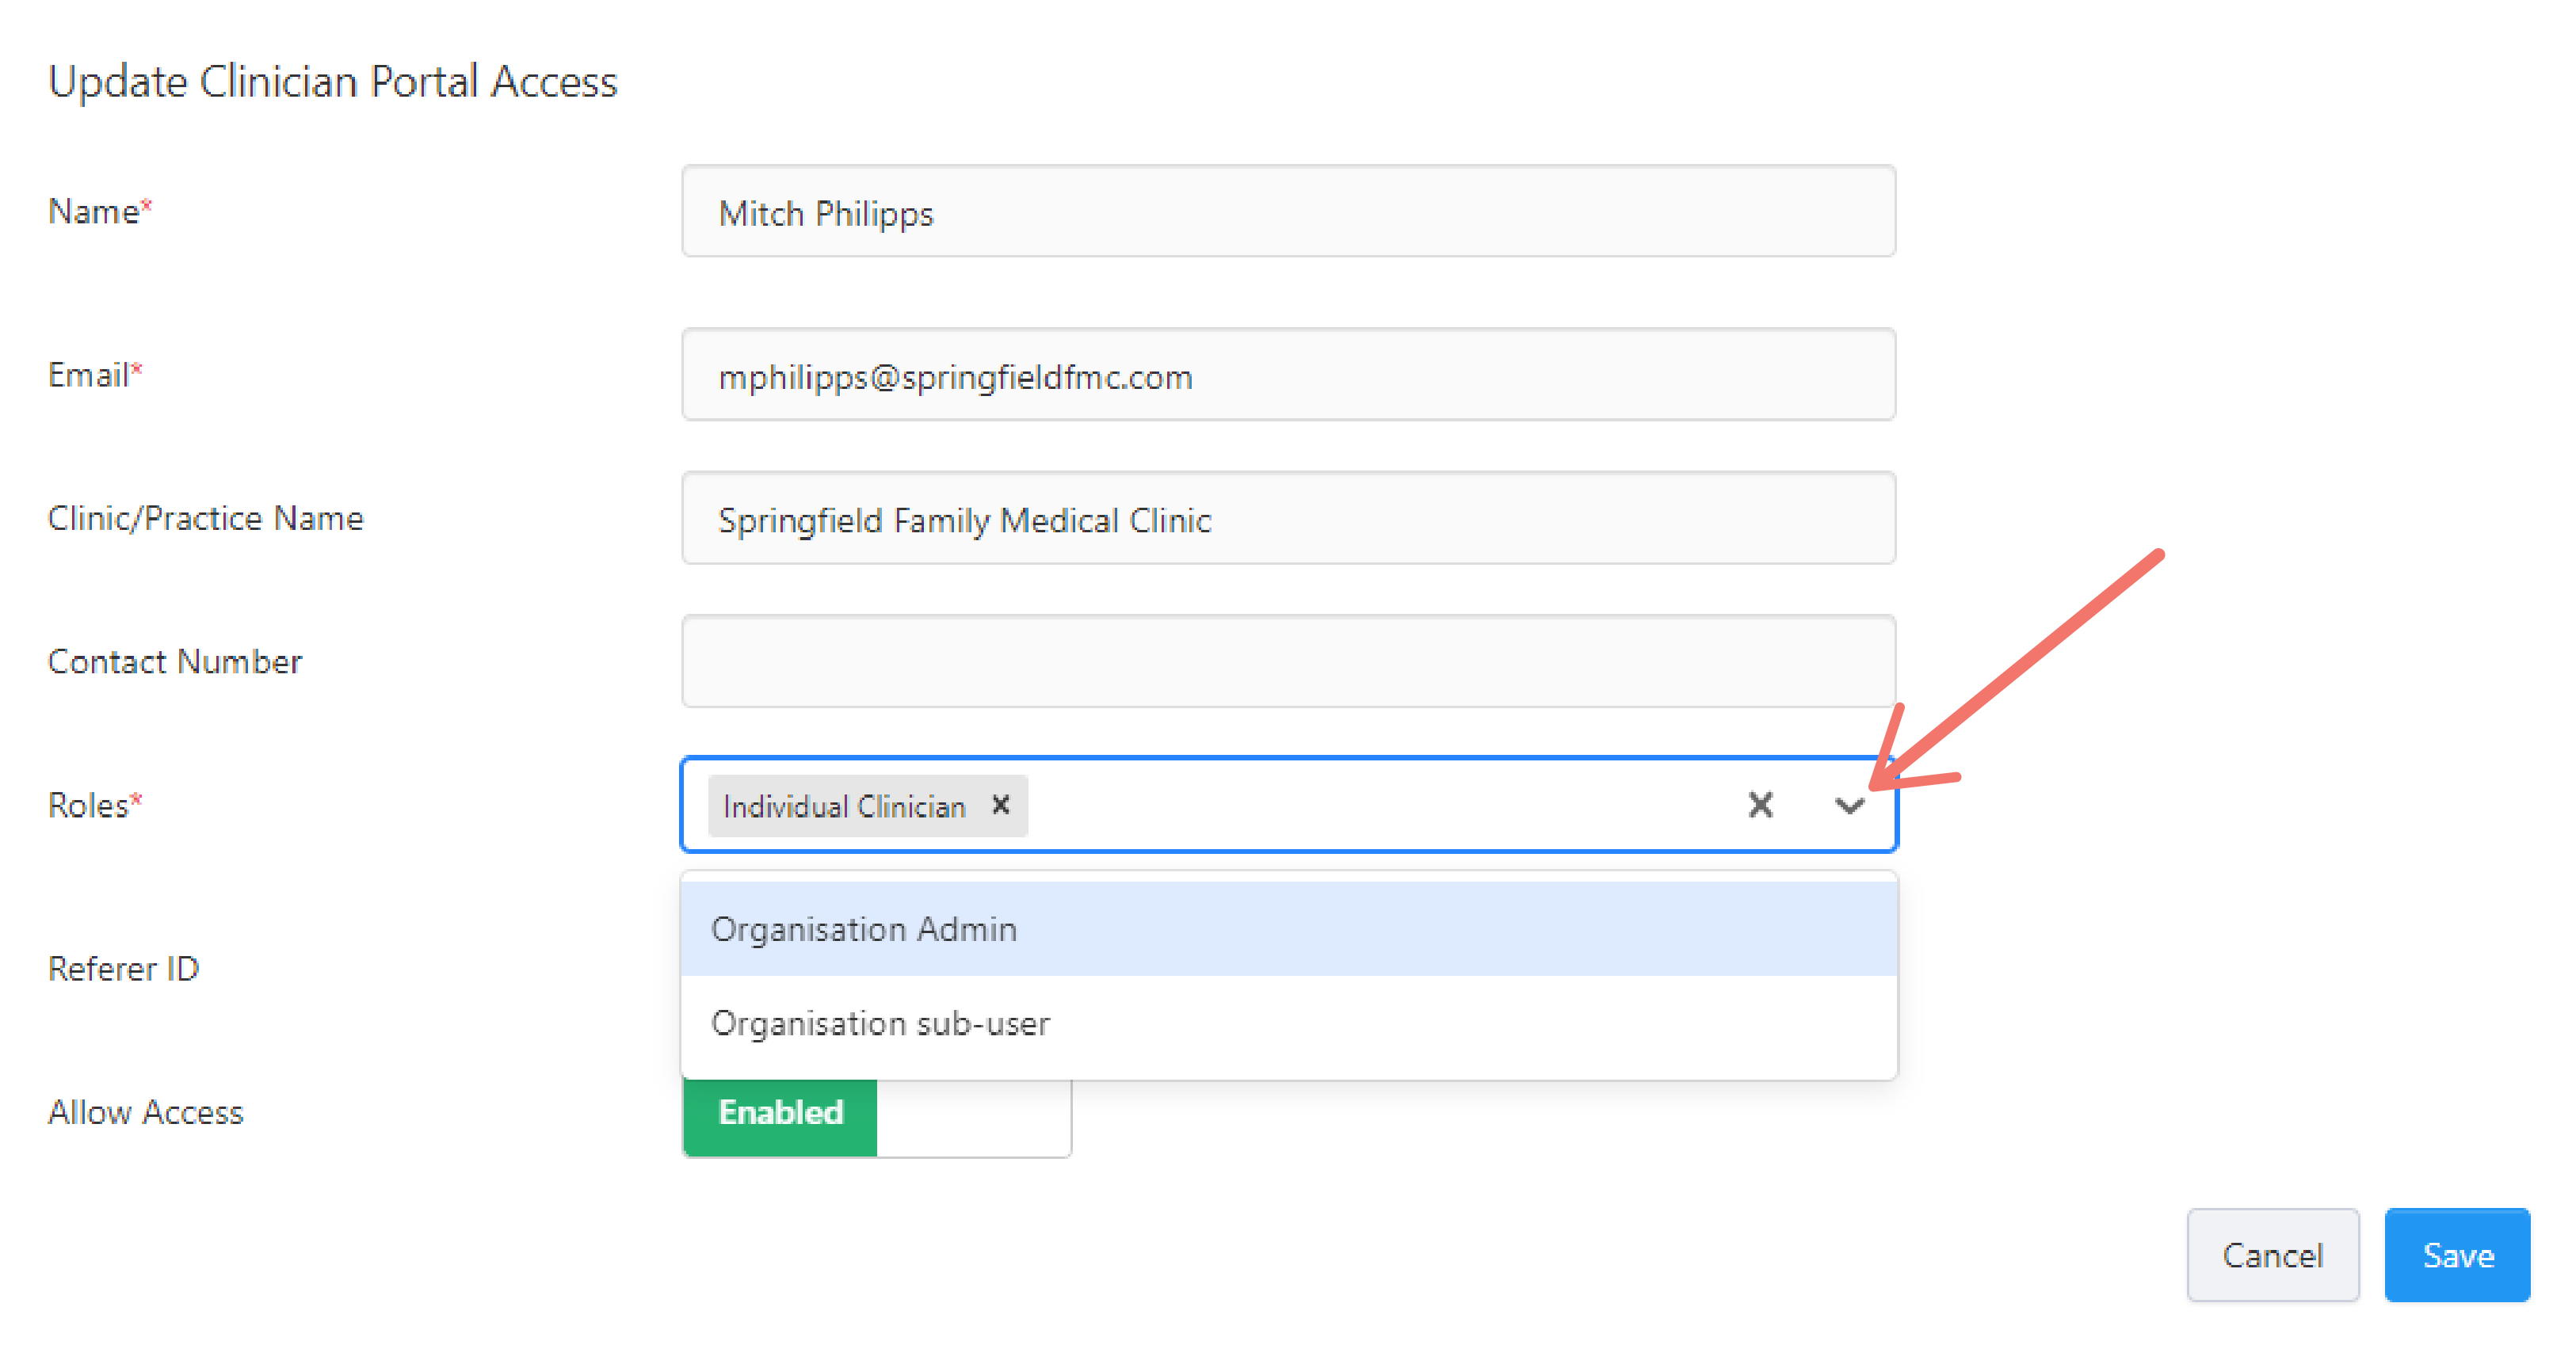
To allow or decline access, click on the "edit" button on the clinician to whom you want to allow access.

-
Toggle the Allow Access switch to Enabled, and click Save.
Assigning Roles
Clinician portal users' access to studies and features is controlled by the role assigned to them.
If you do not have a role created, create a role first or edit an existing role's permissions according to your preferences. Once you have created a role, follow the steps below to assign it to a user.
Users can only gain access to studies and features based on their assigned role if the Allow Access Option is enabled on their account.
Steps to assign a role to a user
-
Navigate to the Access Control screen.
-
Click the "edit" button on the clinician to whom you want to assign a role.
-
Click on the Roles dropdown menu, select a role, and click Save.
Referred Access
This allows a user to automatically gain access to studies with a Referrer ID that matches their Referrer ID.
To grant a user with this type of access, follow the steps below to assign them with a Referrer ID. Any study that matches the assigned a user's assigned Referrer ID, automatically grants them access to the study.
Users can only gain referred access to studies and features if:
- The user has the Access Referred Studies permission is enabled on their assigned role. To edit role permissions, see Editing Role Permissions.
- The Allow Access Option is enabled on the user.
Steps to Provide Referred Acccess
-
Click the "edit" button on the clinician to whom you want to provide Referred Access to studies.
-
Search and add the referrer ID, and click Save.
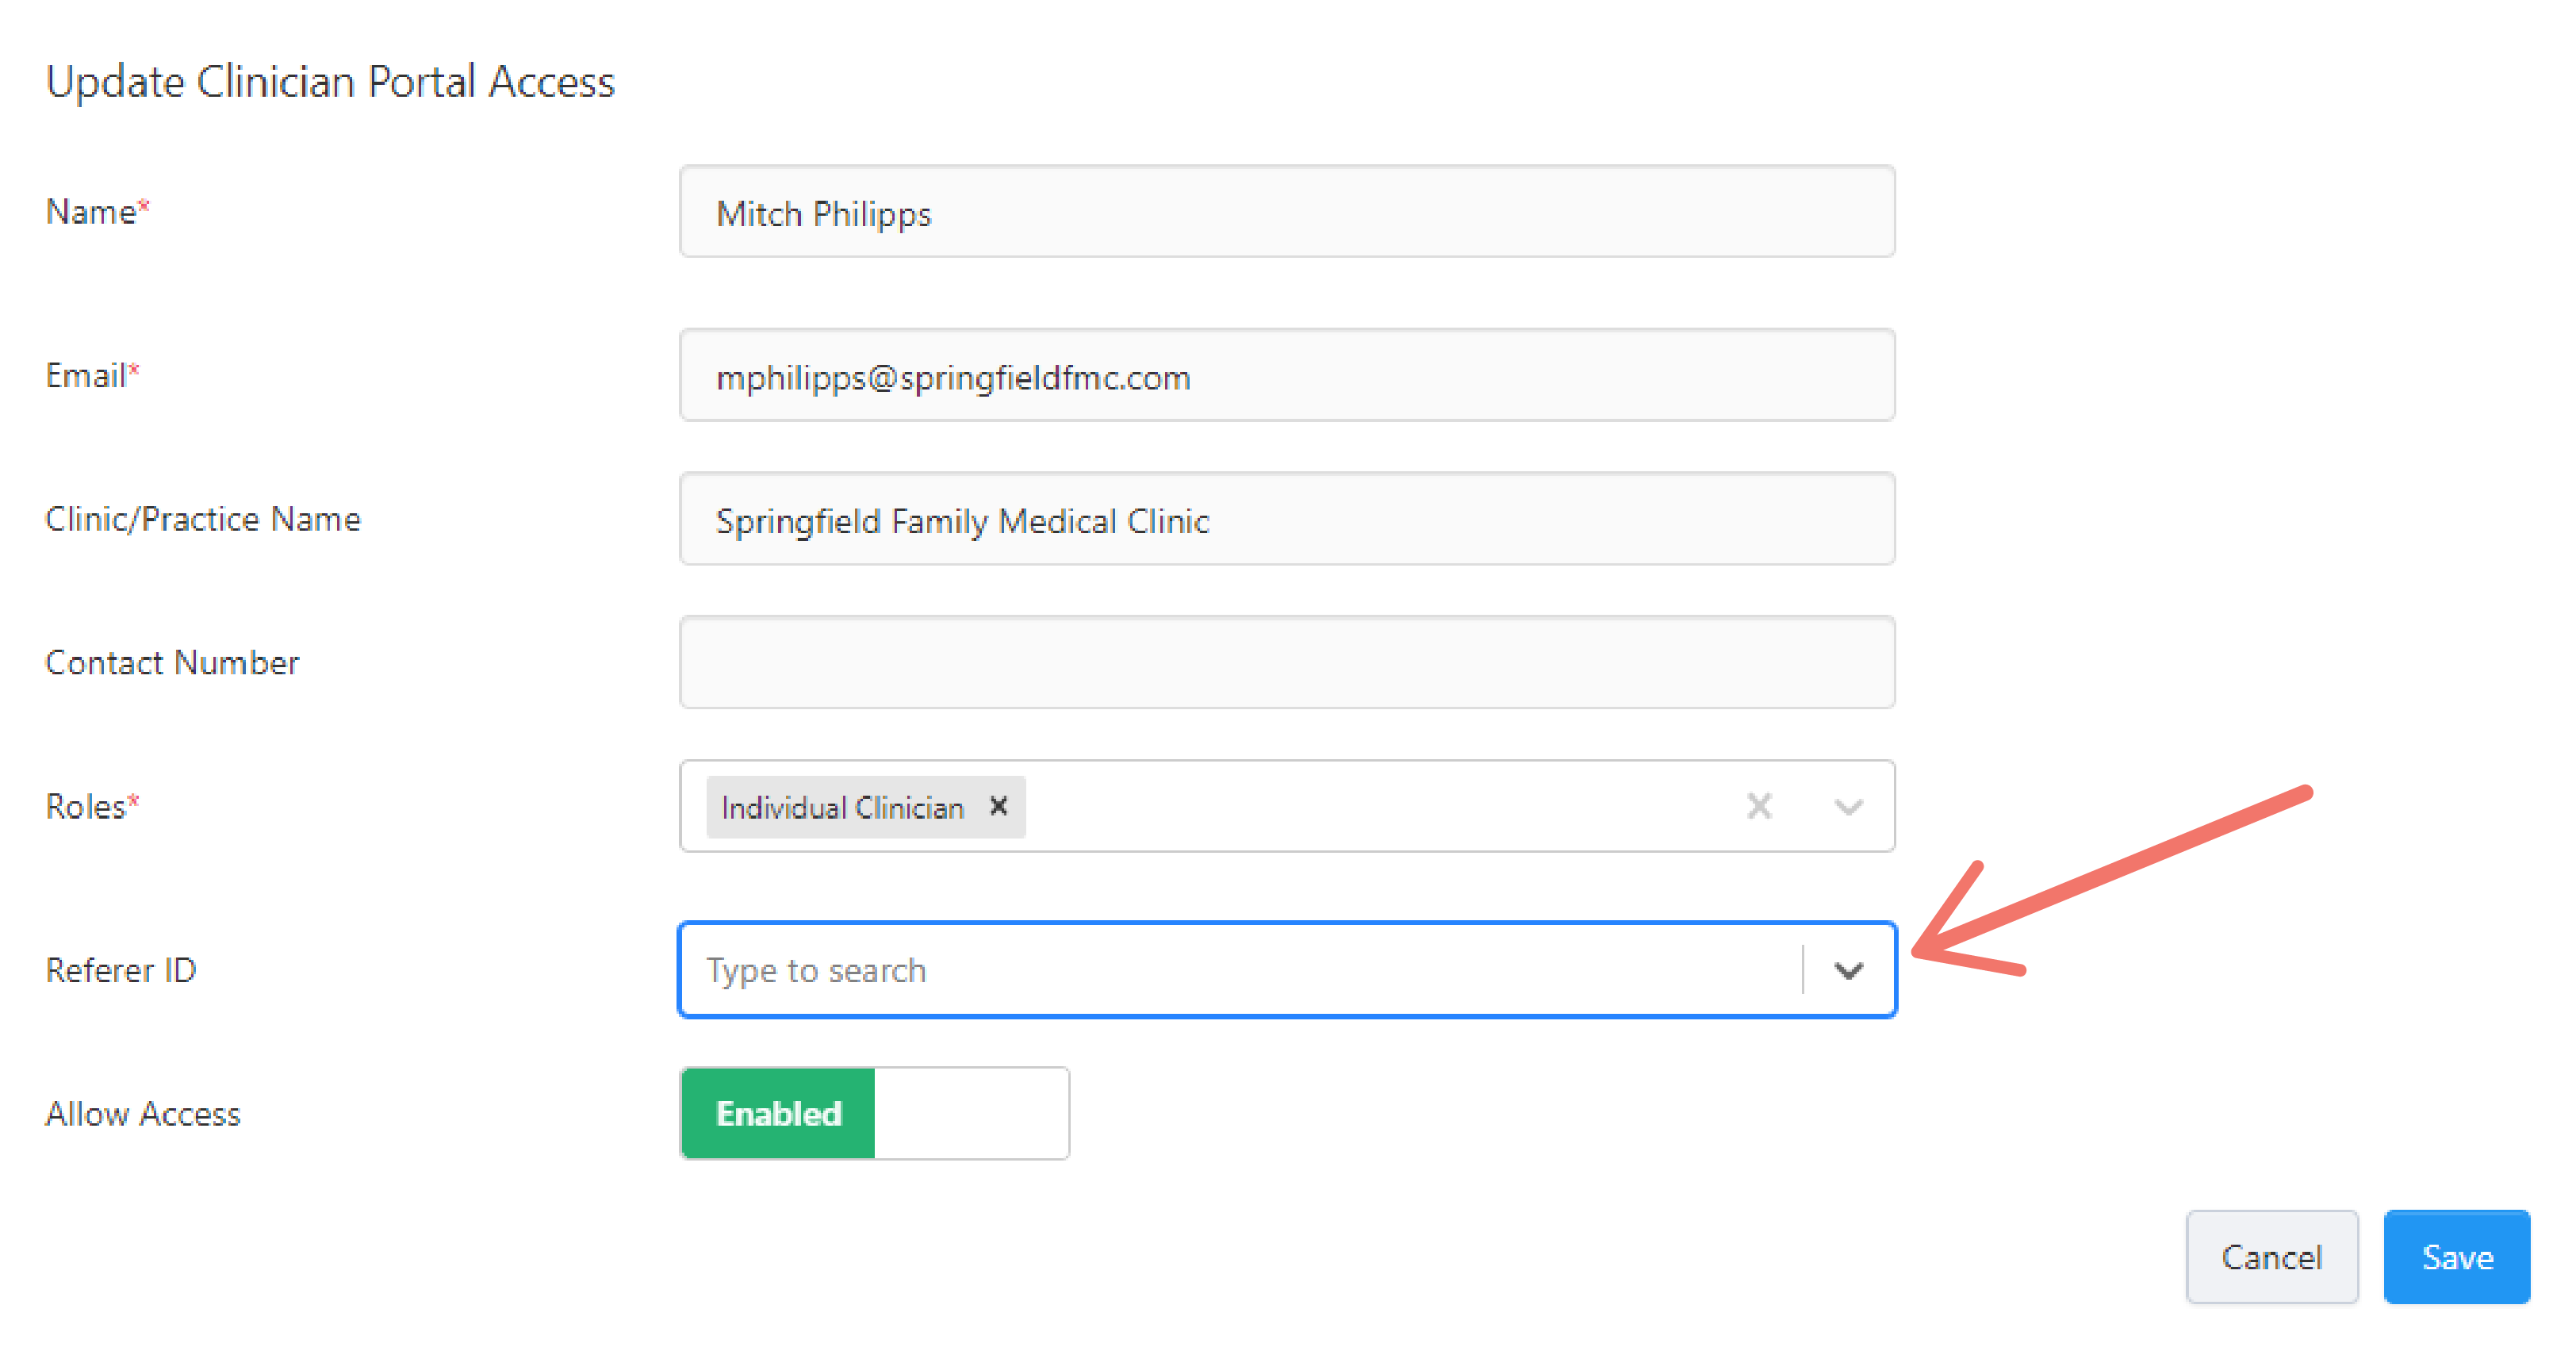
This gives the clinician access to studies in which they are the referring clinician.