How to Manually Upload DICOM Files
This article guides you through the process of uploading DICOM files to AdvaPACS from your work or personal computer or from third-party services, such as, Box, Dropbox, and Google Drive.
Before you begin, we recommend that you have a basic understanding of the Upload feature.
The Upload page interface may differ between AdvaPACS tenants who have connected AEs and those that have none. However, the upload process remains the same. The only difference is that AdvaPACS tenants without AEs do not have the option to select a Local AE or a Remote AE, as shown below.
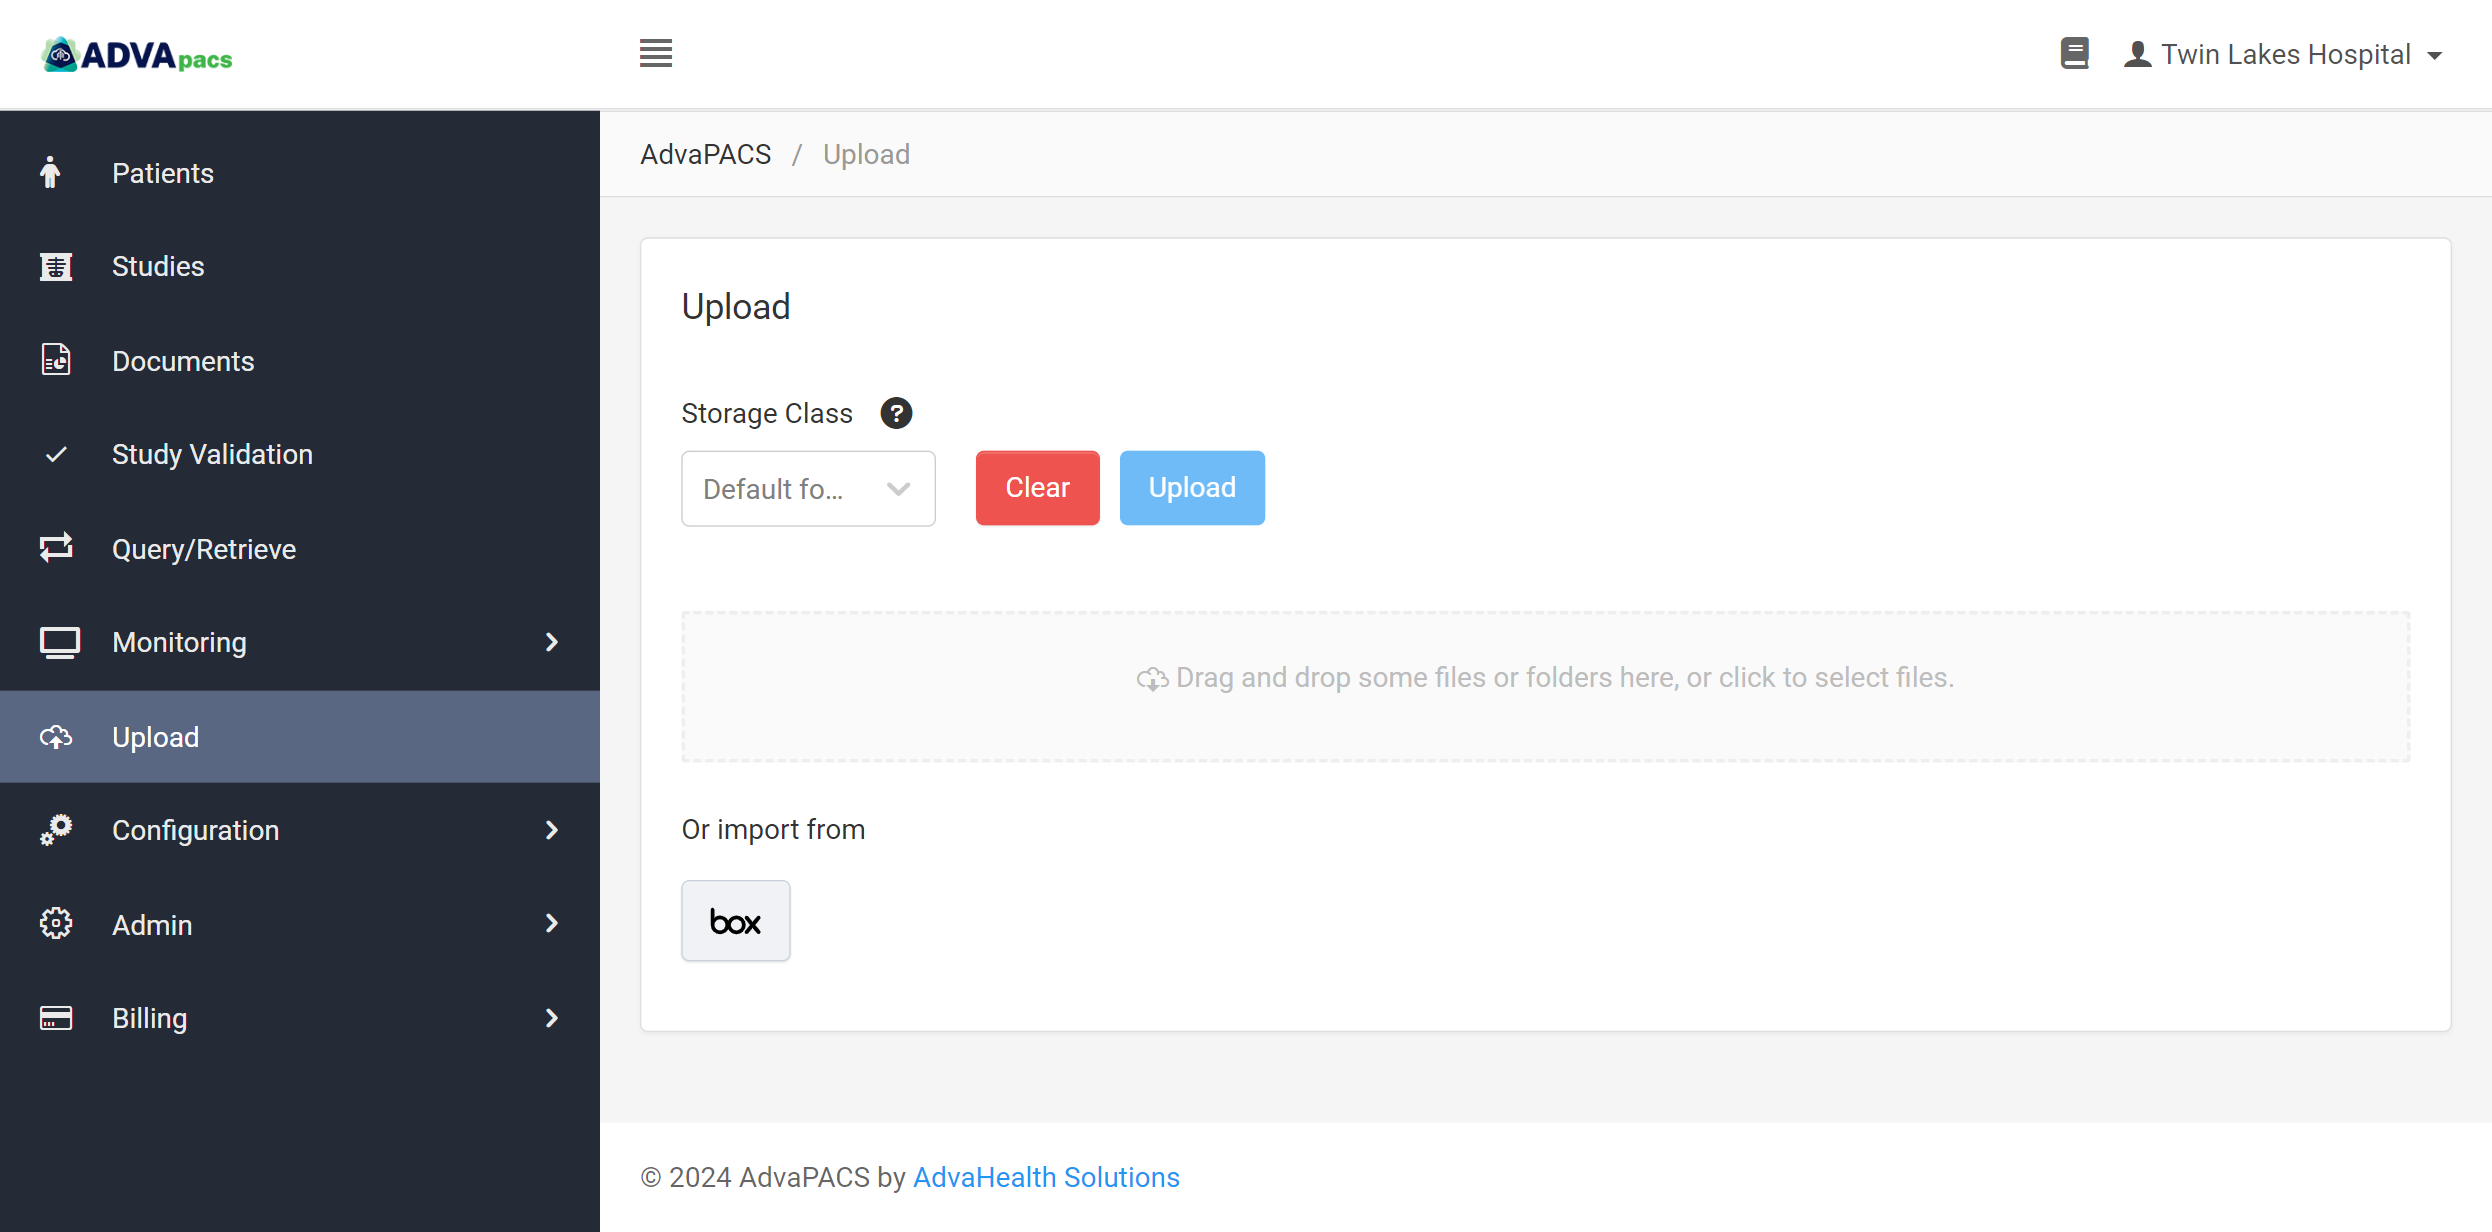
The following sections outline the steps on uploading DICOM files to AdvaPACS based on where they are currently stored:
Upload from work or personal computer
To upload DICOM files from your work or personal computer, follow the steps below. You may safely skip steps that do not apply to you (for example, if you do not have connected AEs, the Local AE and Remote AE options are unavailable).
-
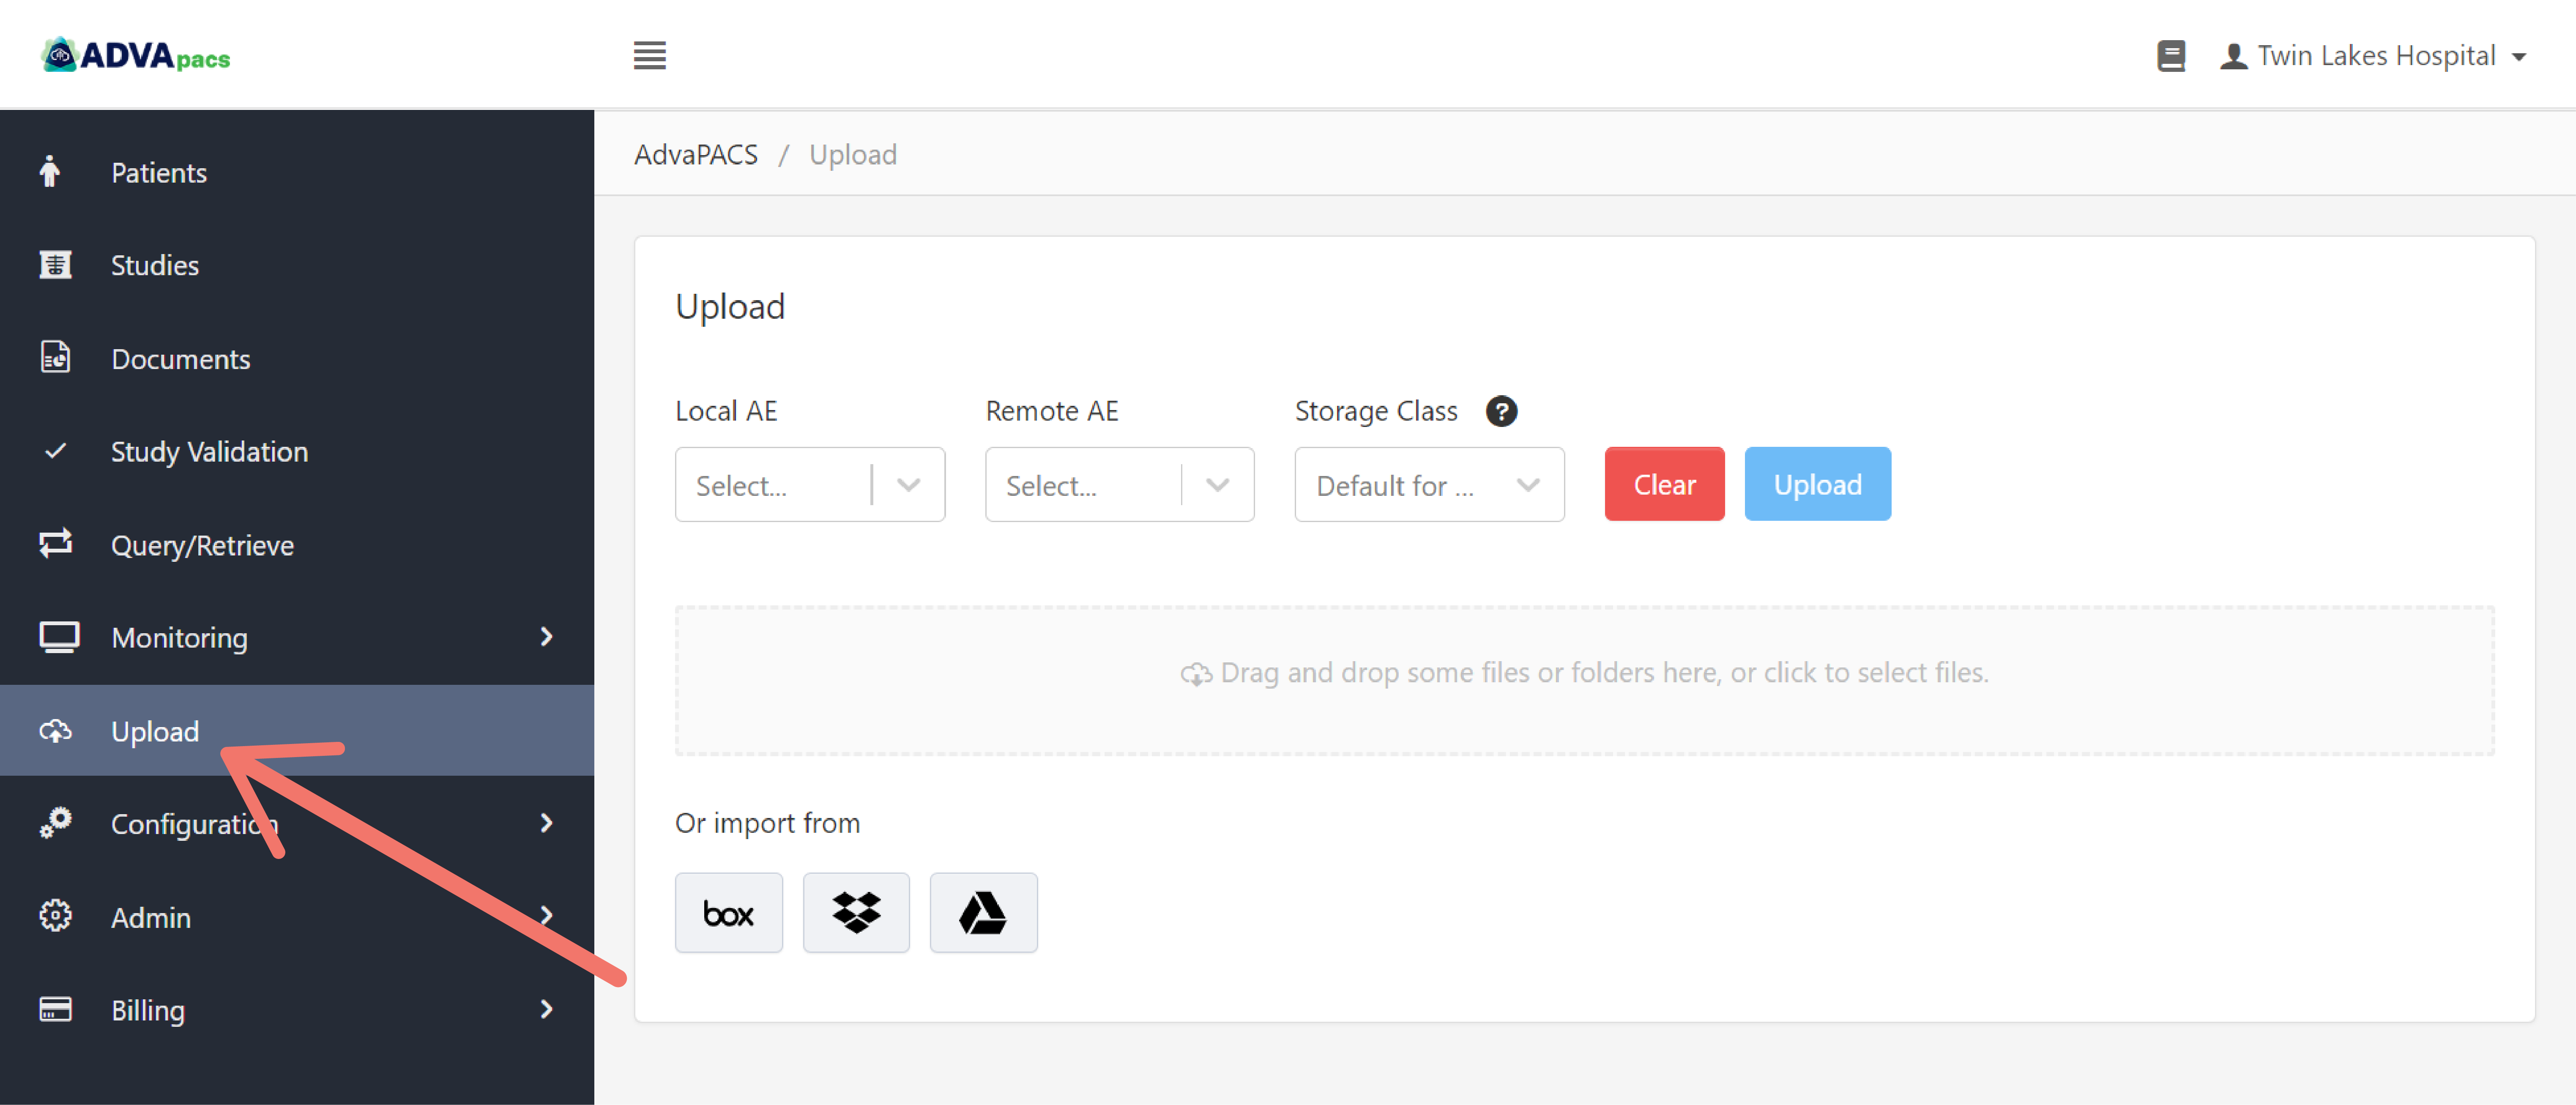
Navigate to the Upload page.
-
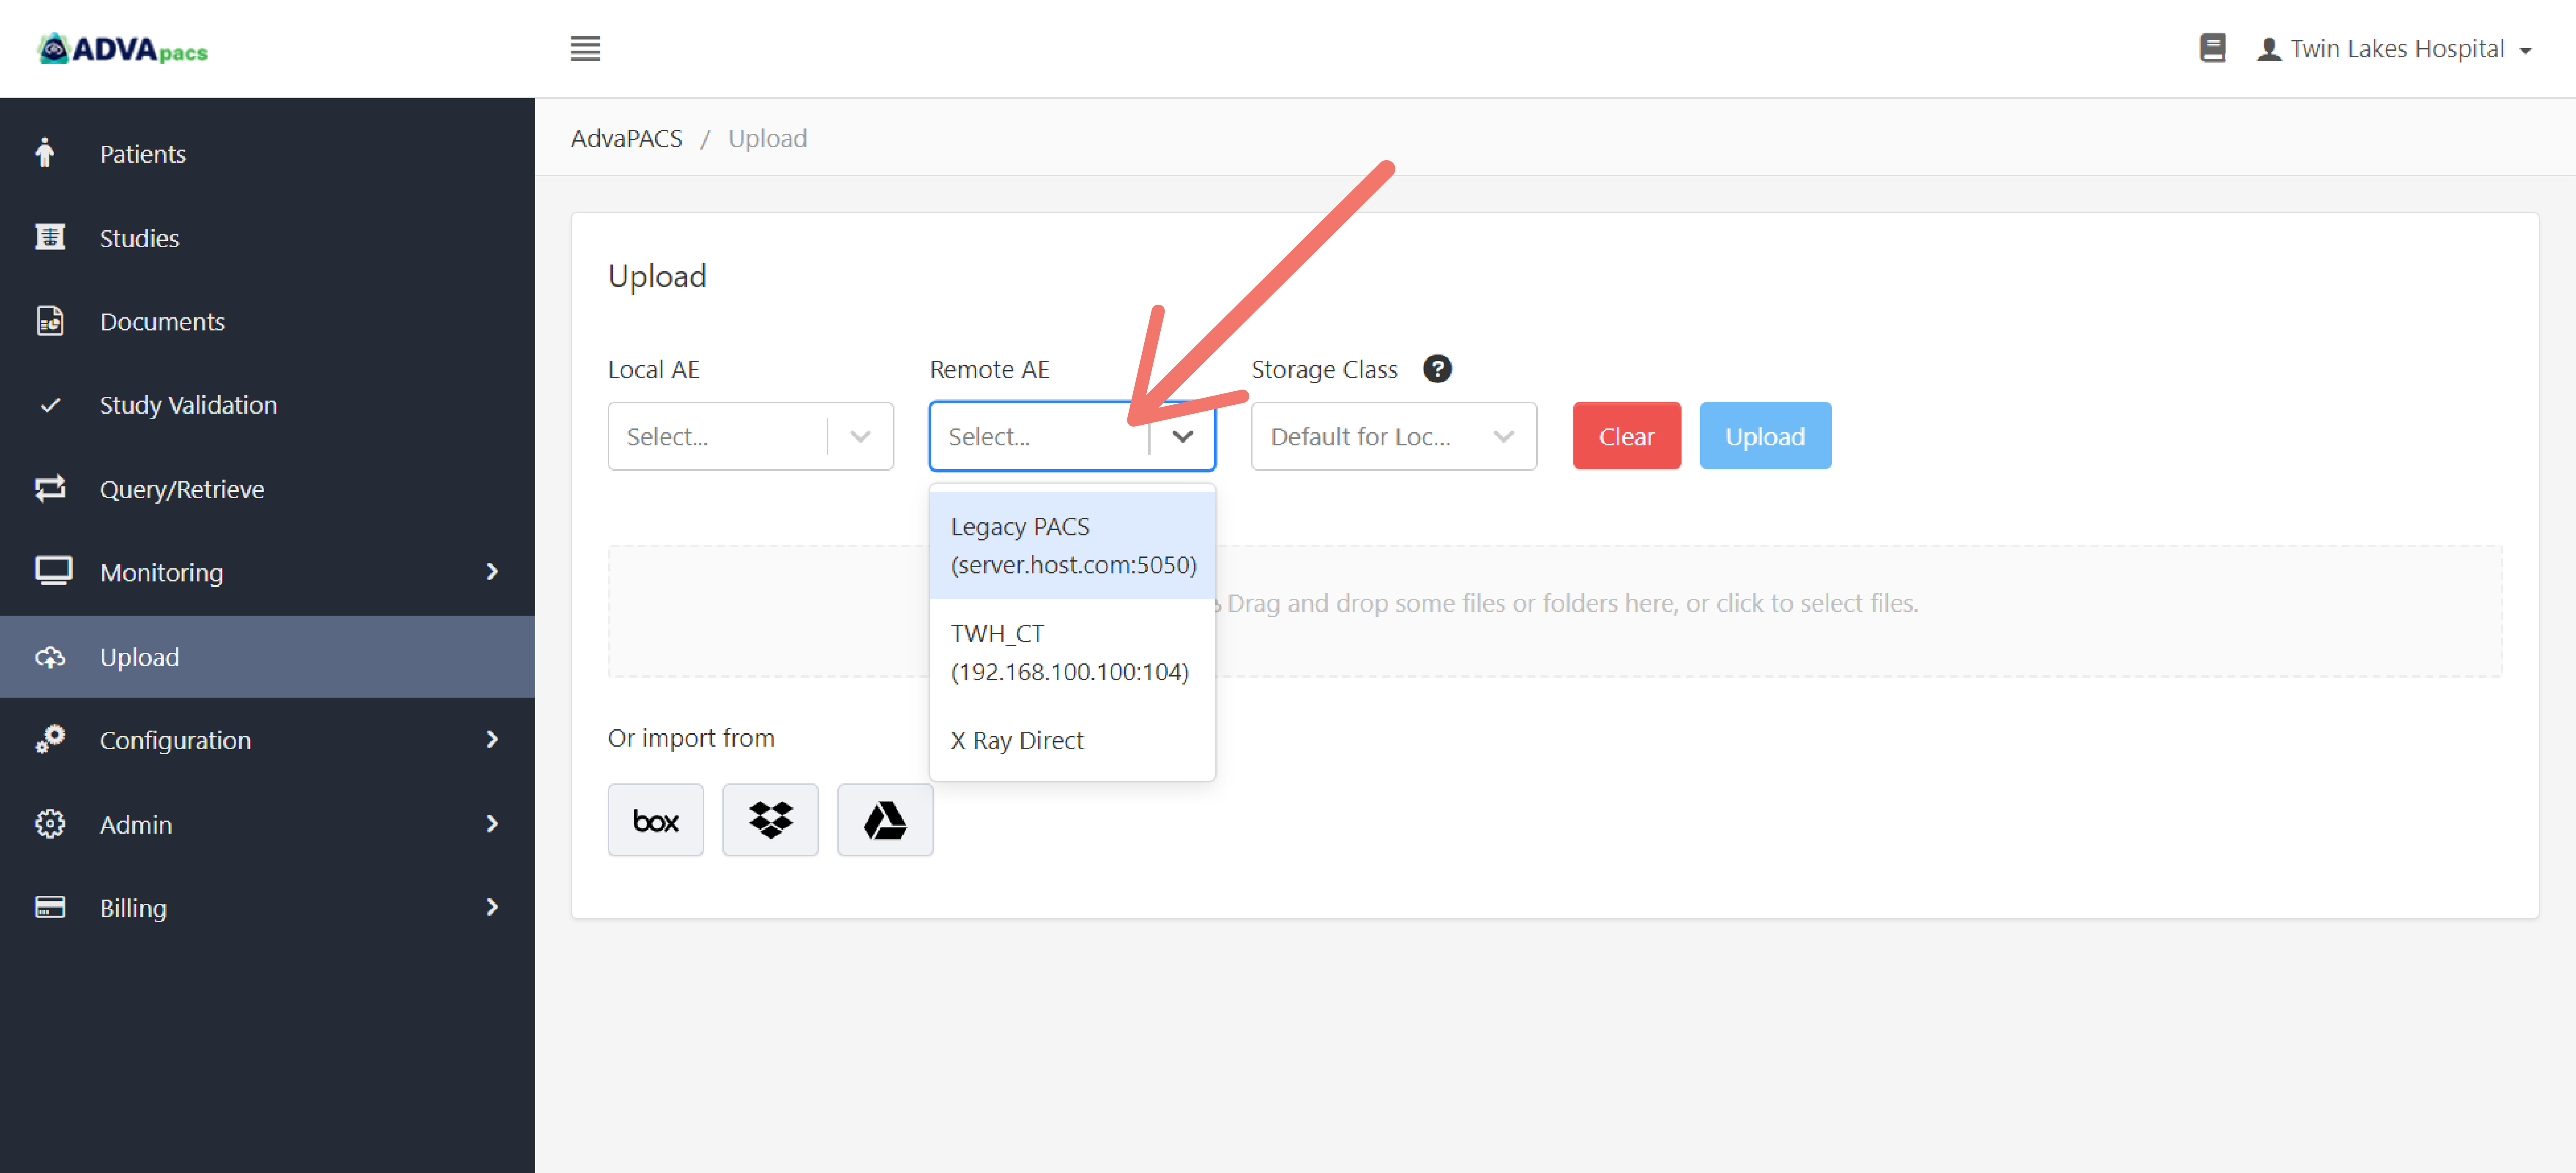
Select a Remote AE. The studies to be uploaded will assume this Remote AE as its modality of origin.
-
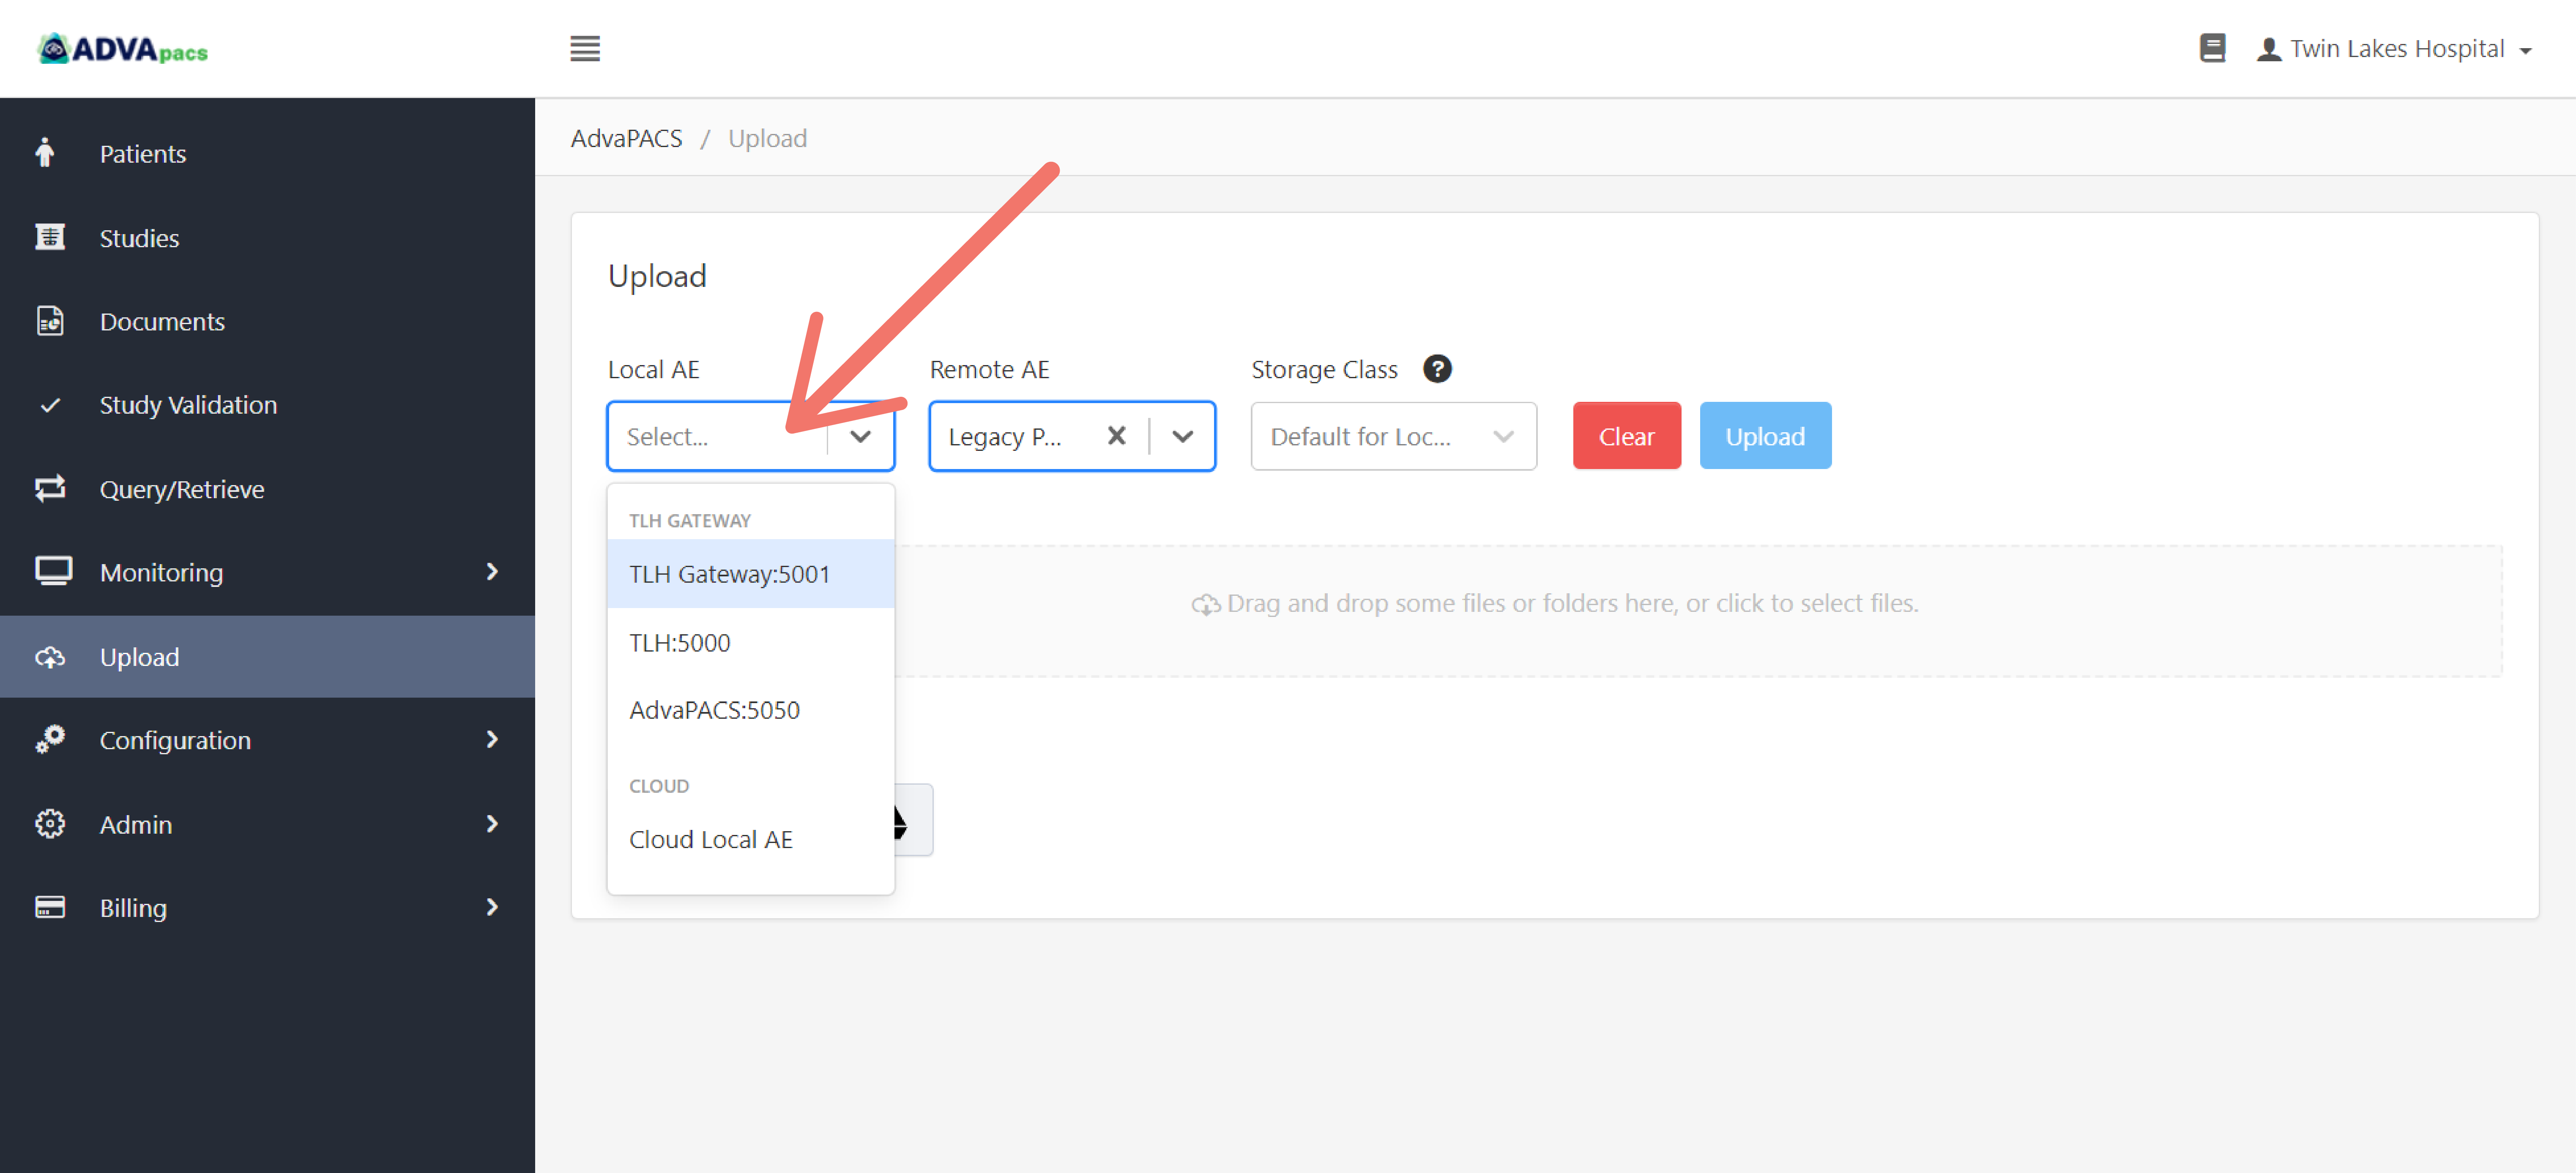
Select a Local AE. The studies to be uploaded will assume this Local AE as the server that forwards the studies to AdvaPACS from the Remote AE. Make sure this Local AE is connected to the selected Remote AE.
-
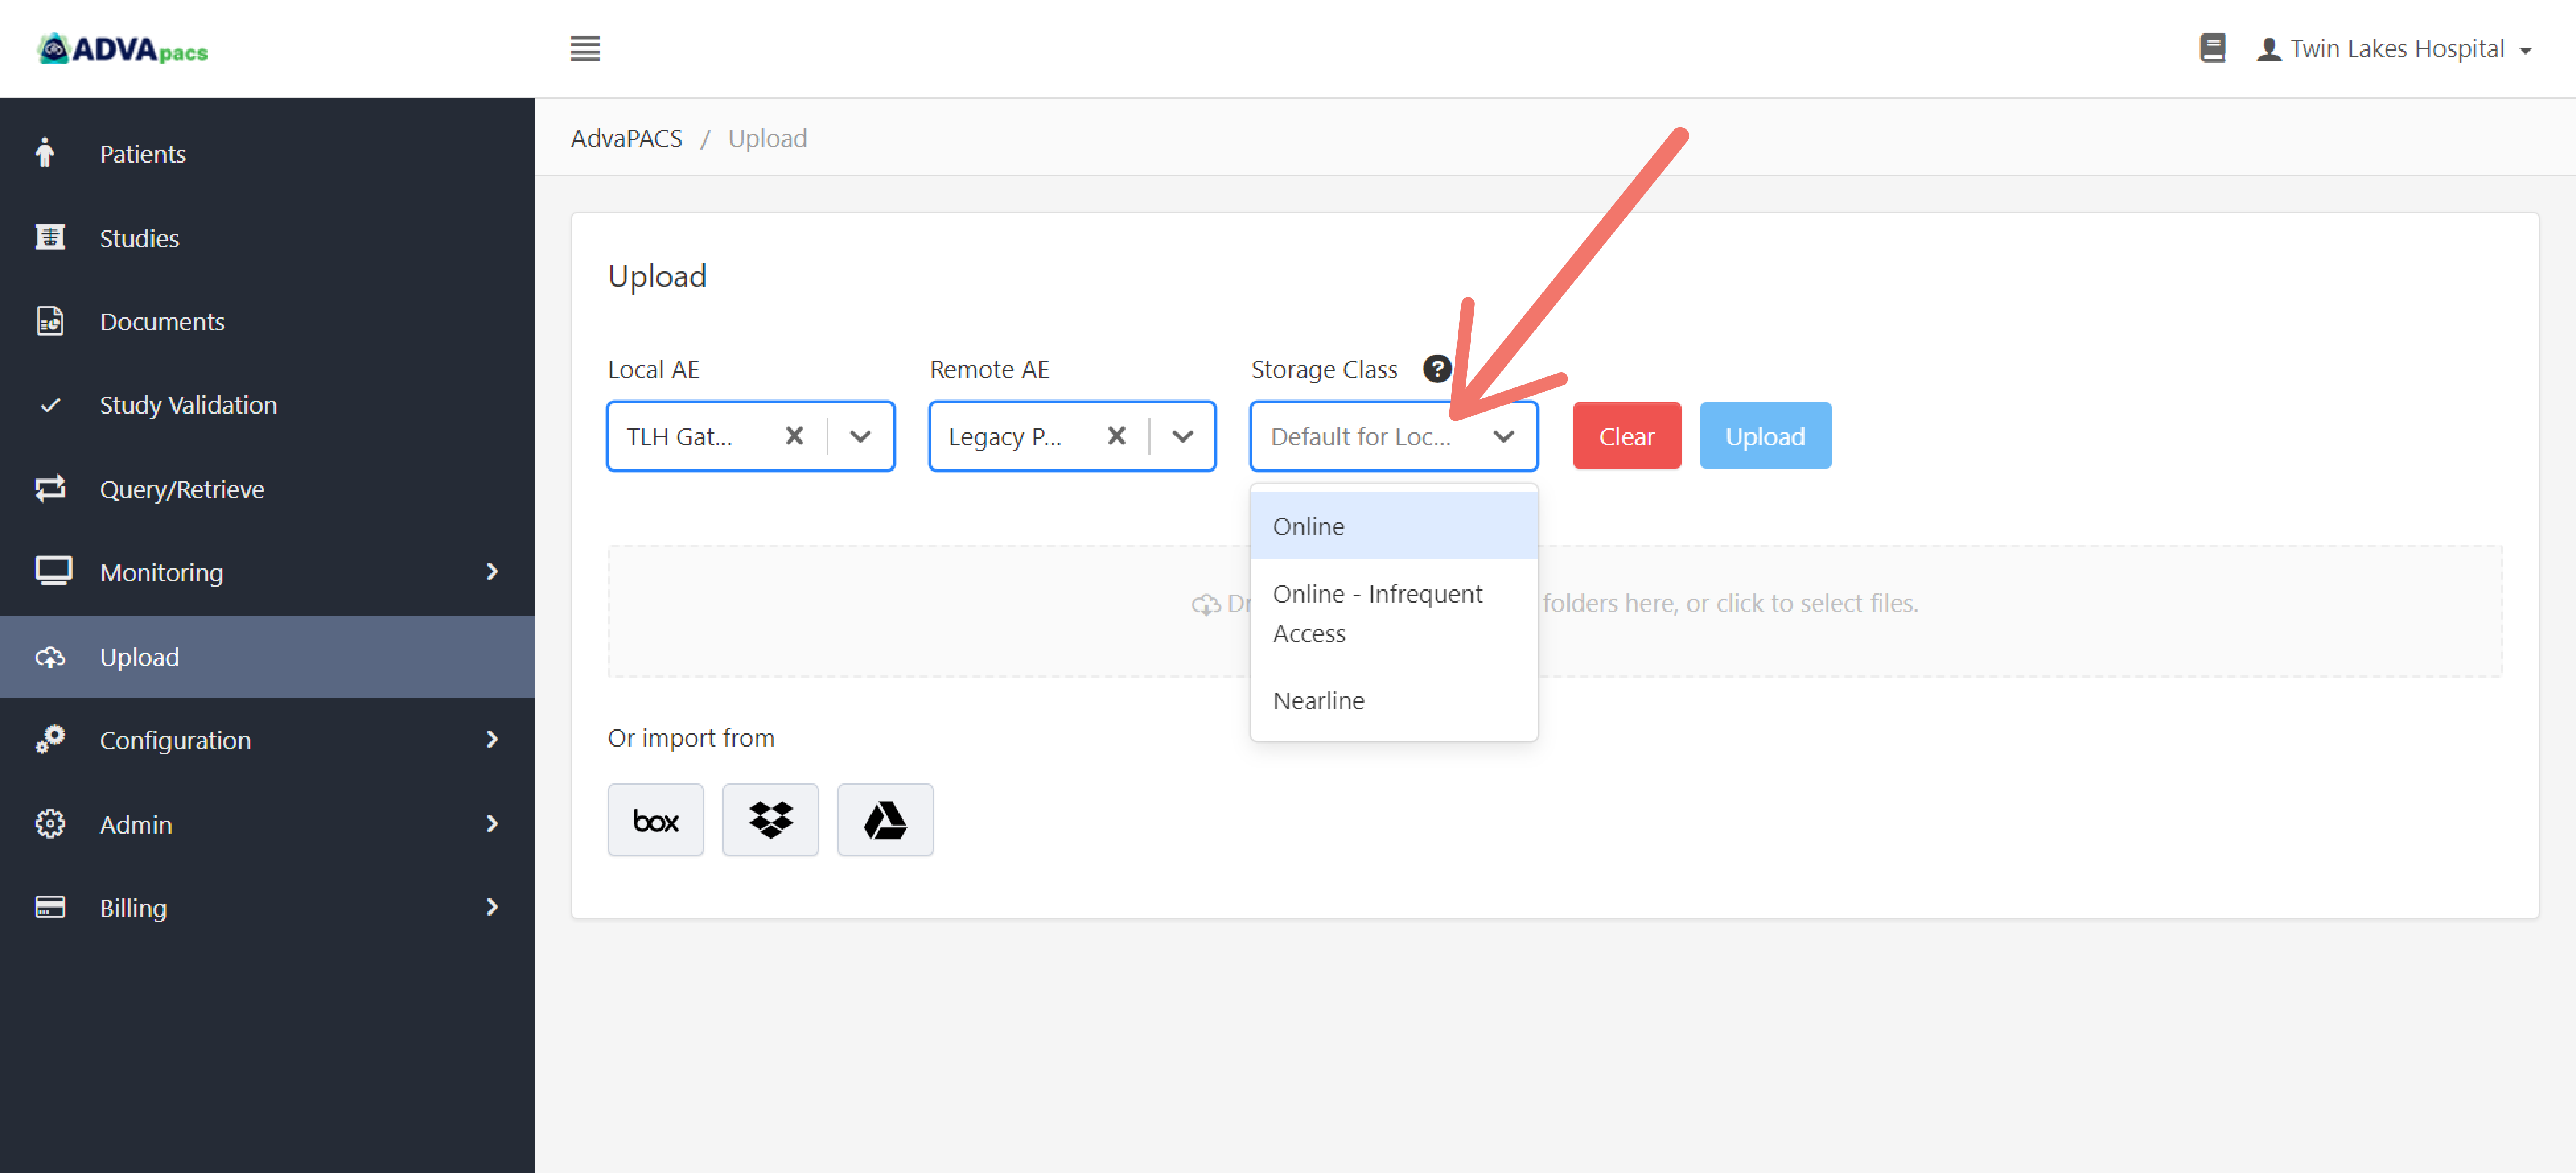
To store the studies in the default Storage Class of the selected Local AE, do not select a Storage Class. If you prefer a different Storage Class, select one from the drop-down menu.
-
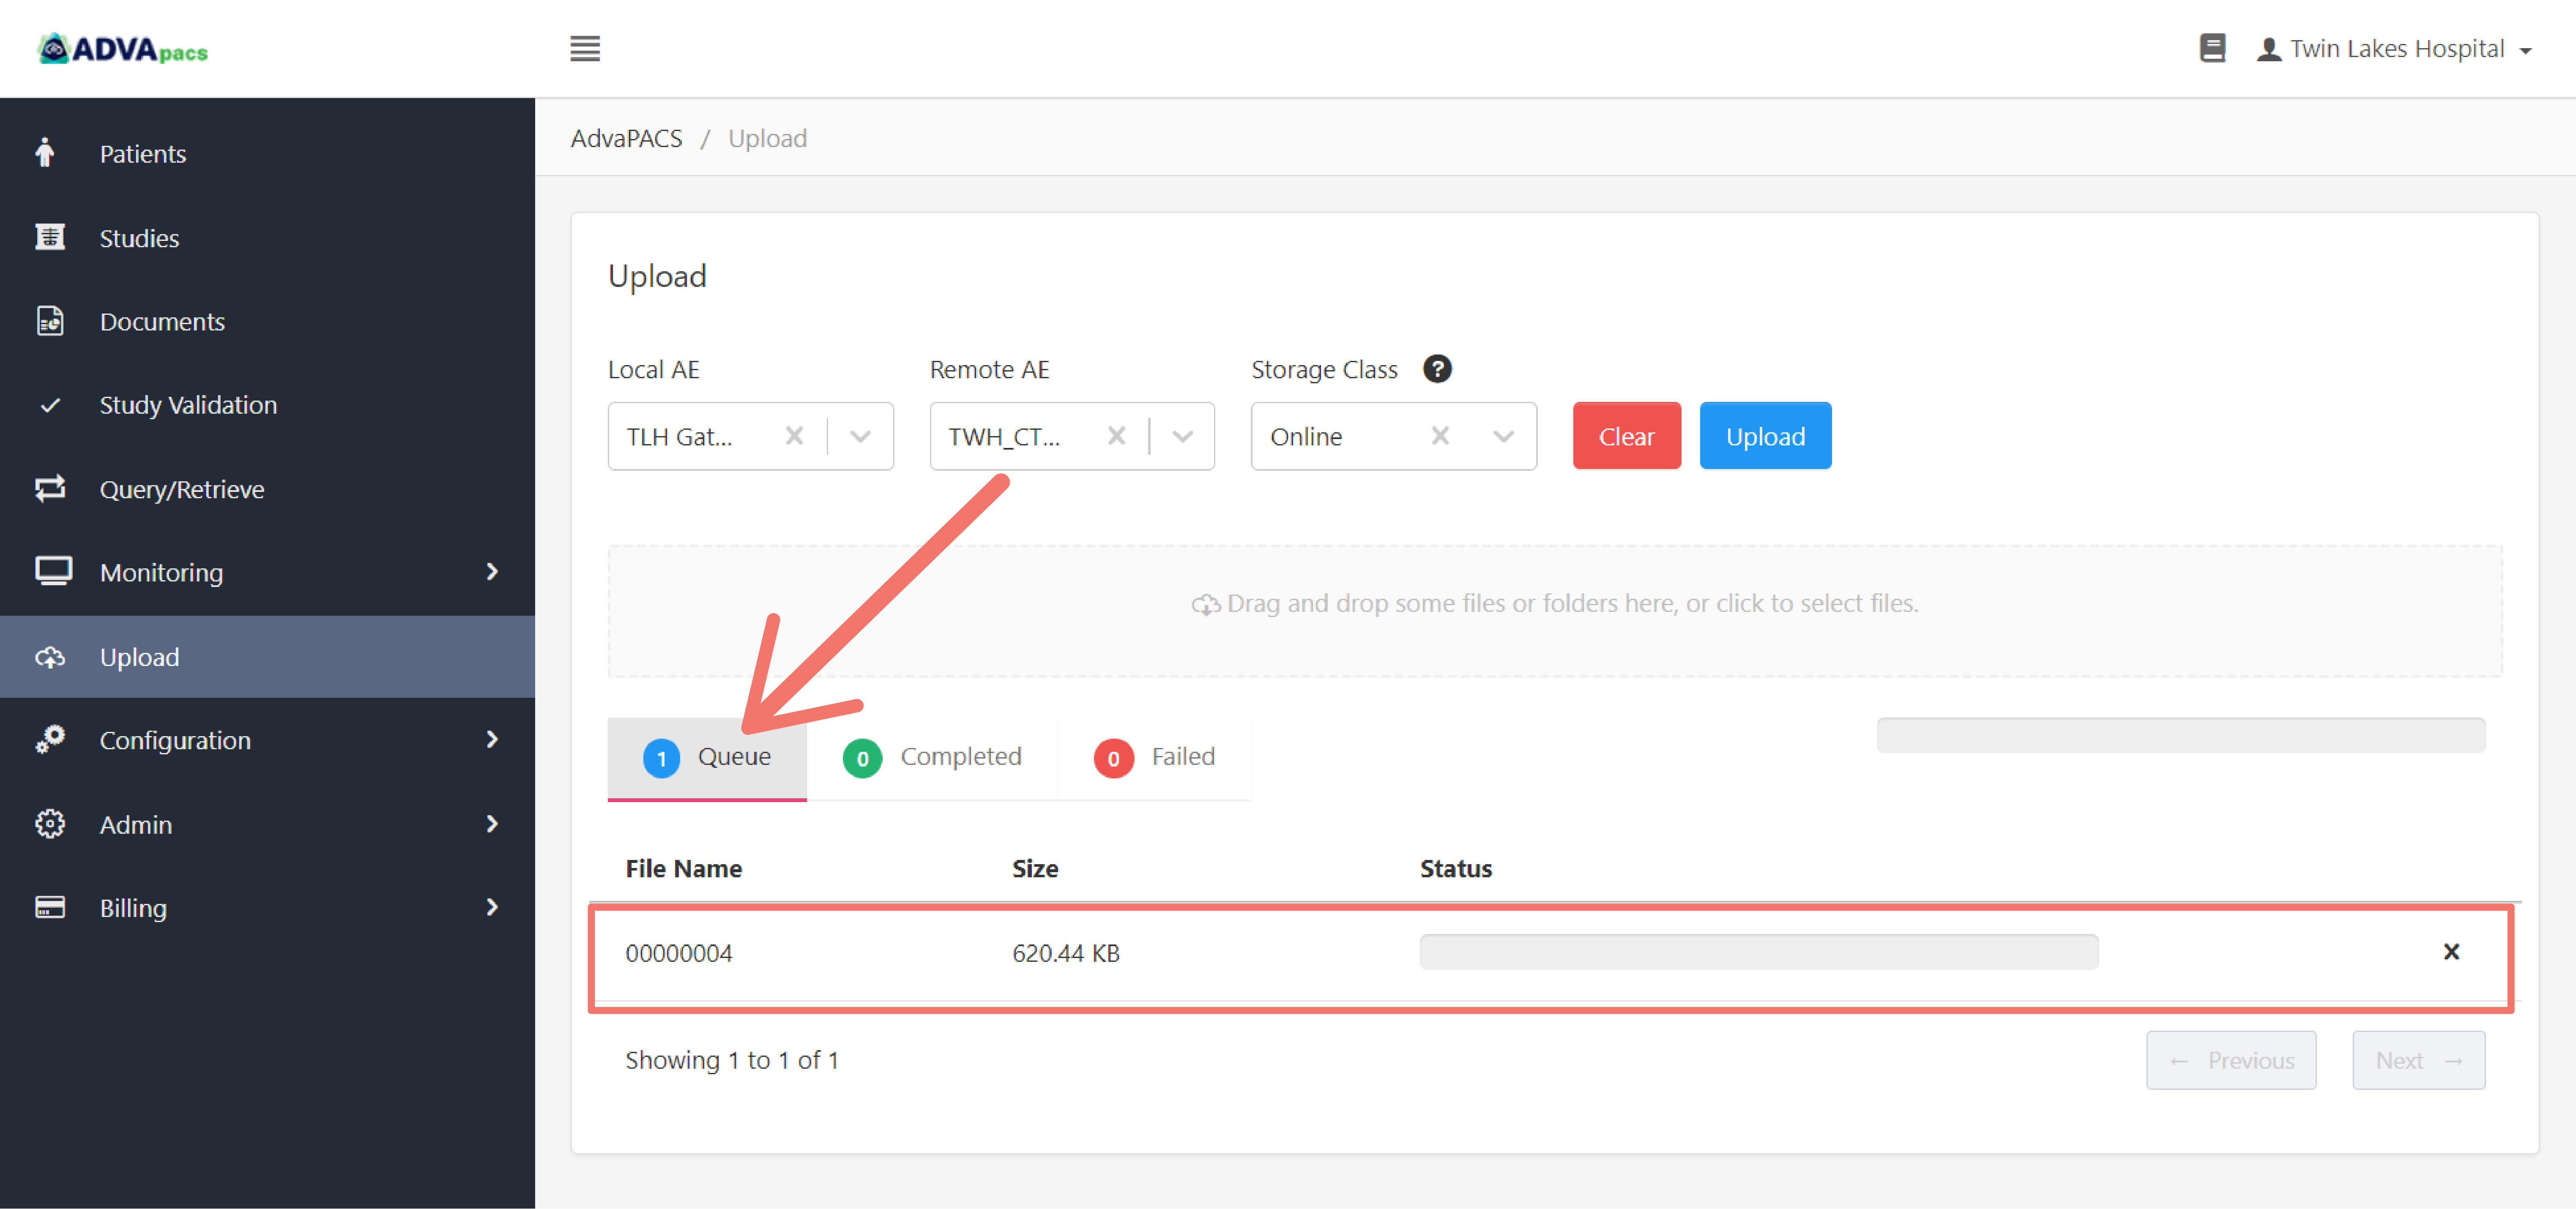
To upload files, drag and drop files or click the upload box to select files to upload.
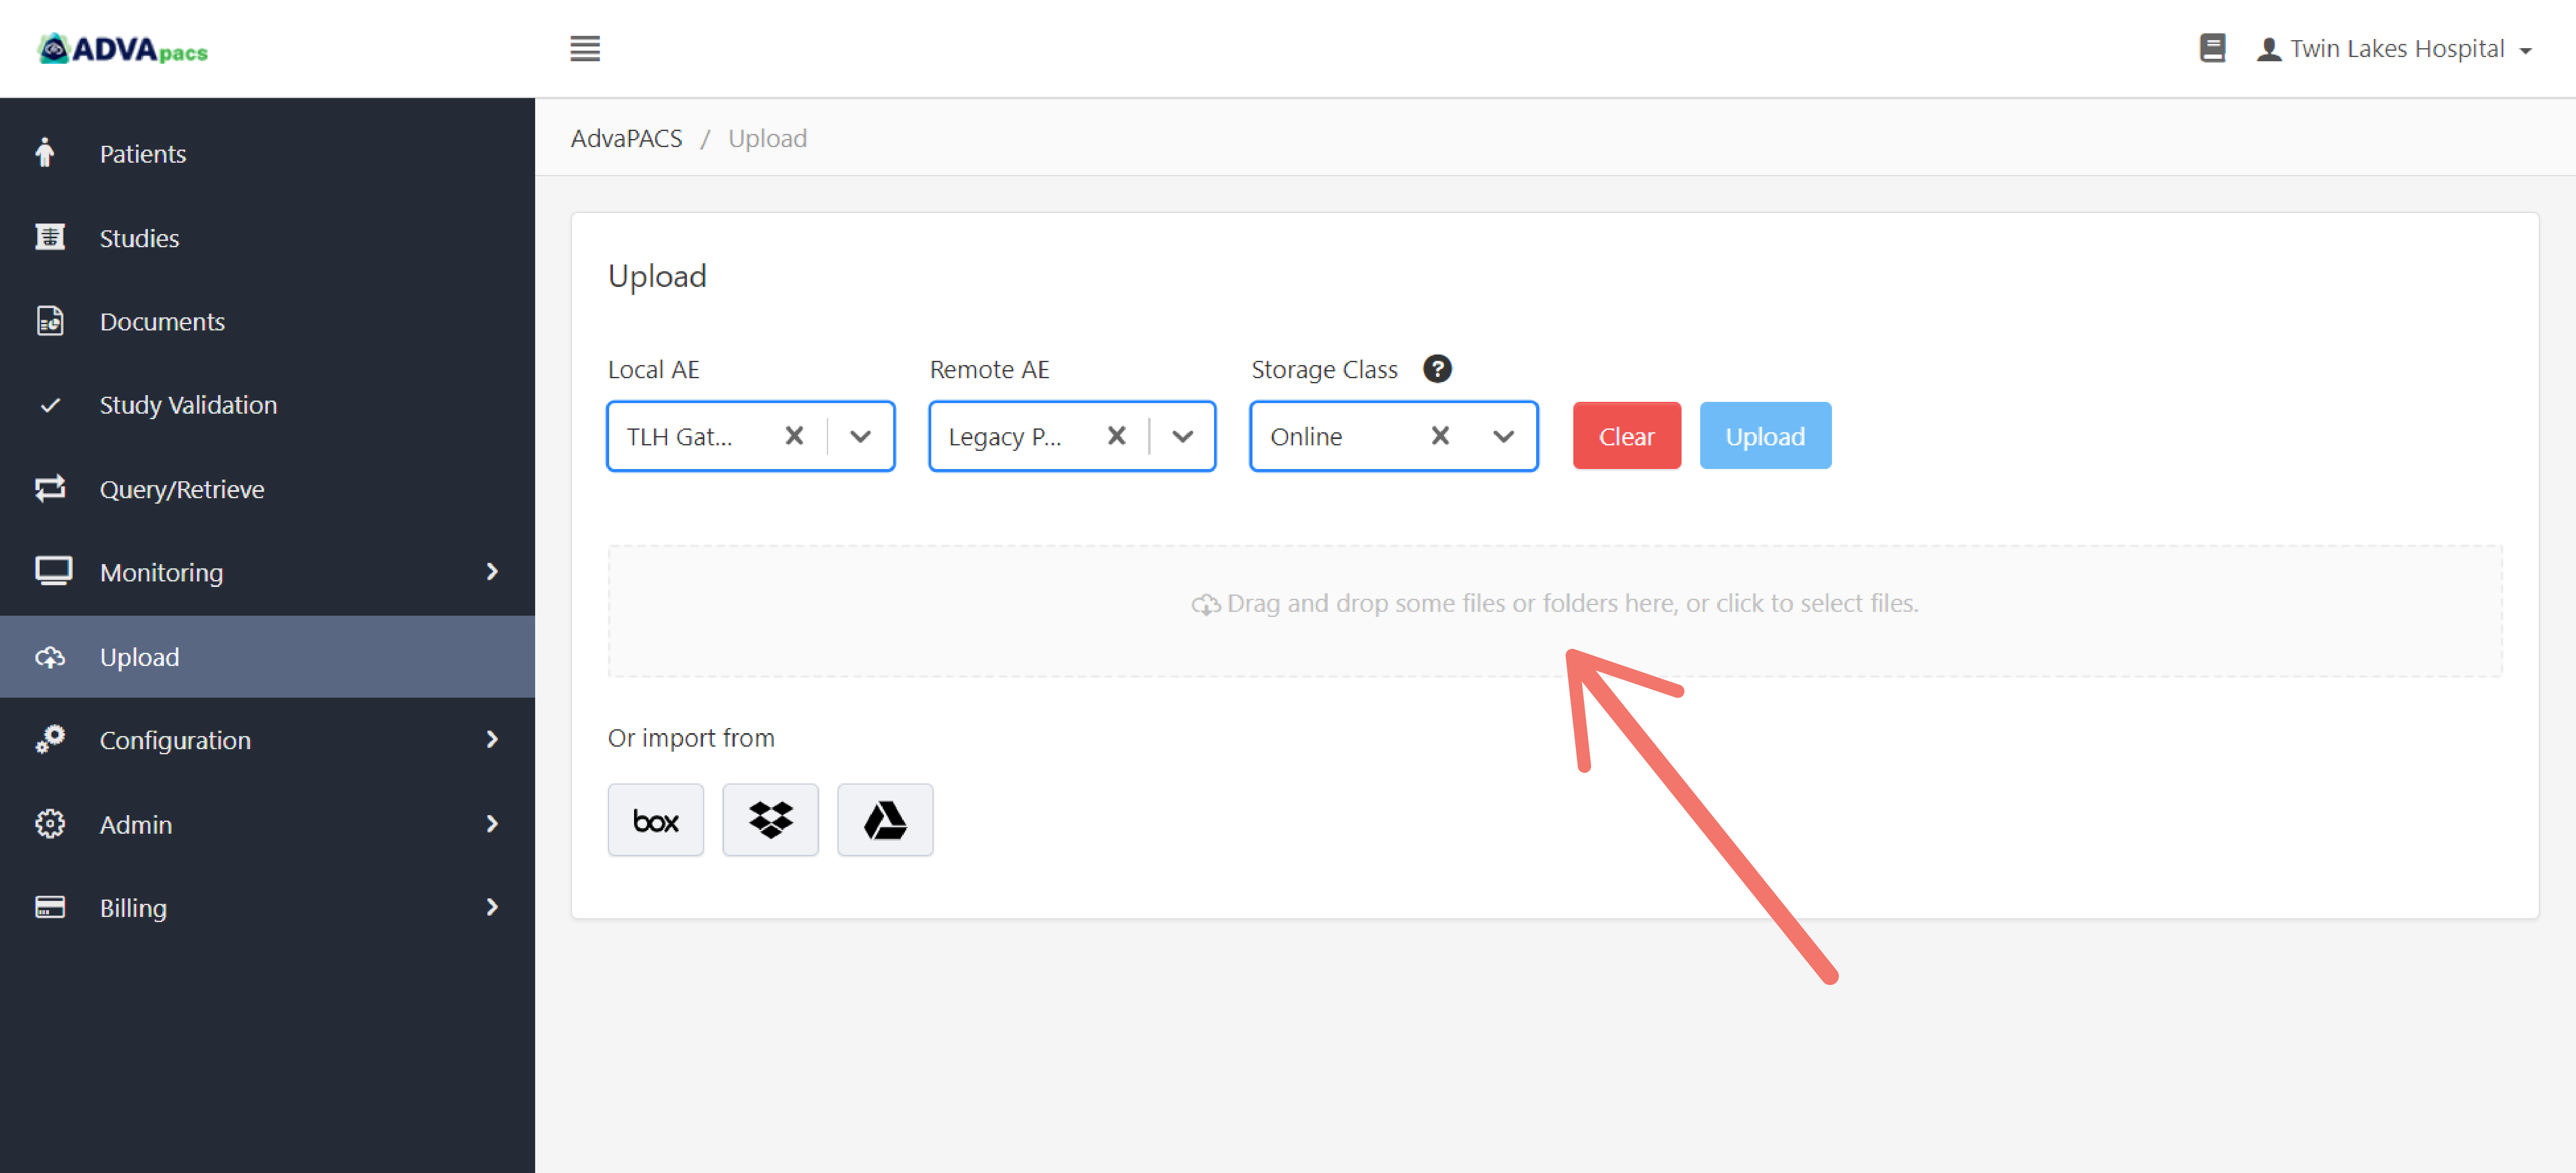
Selected files will appear in the Queue section.
-
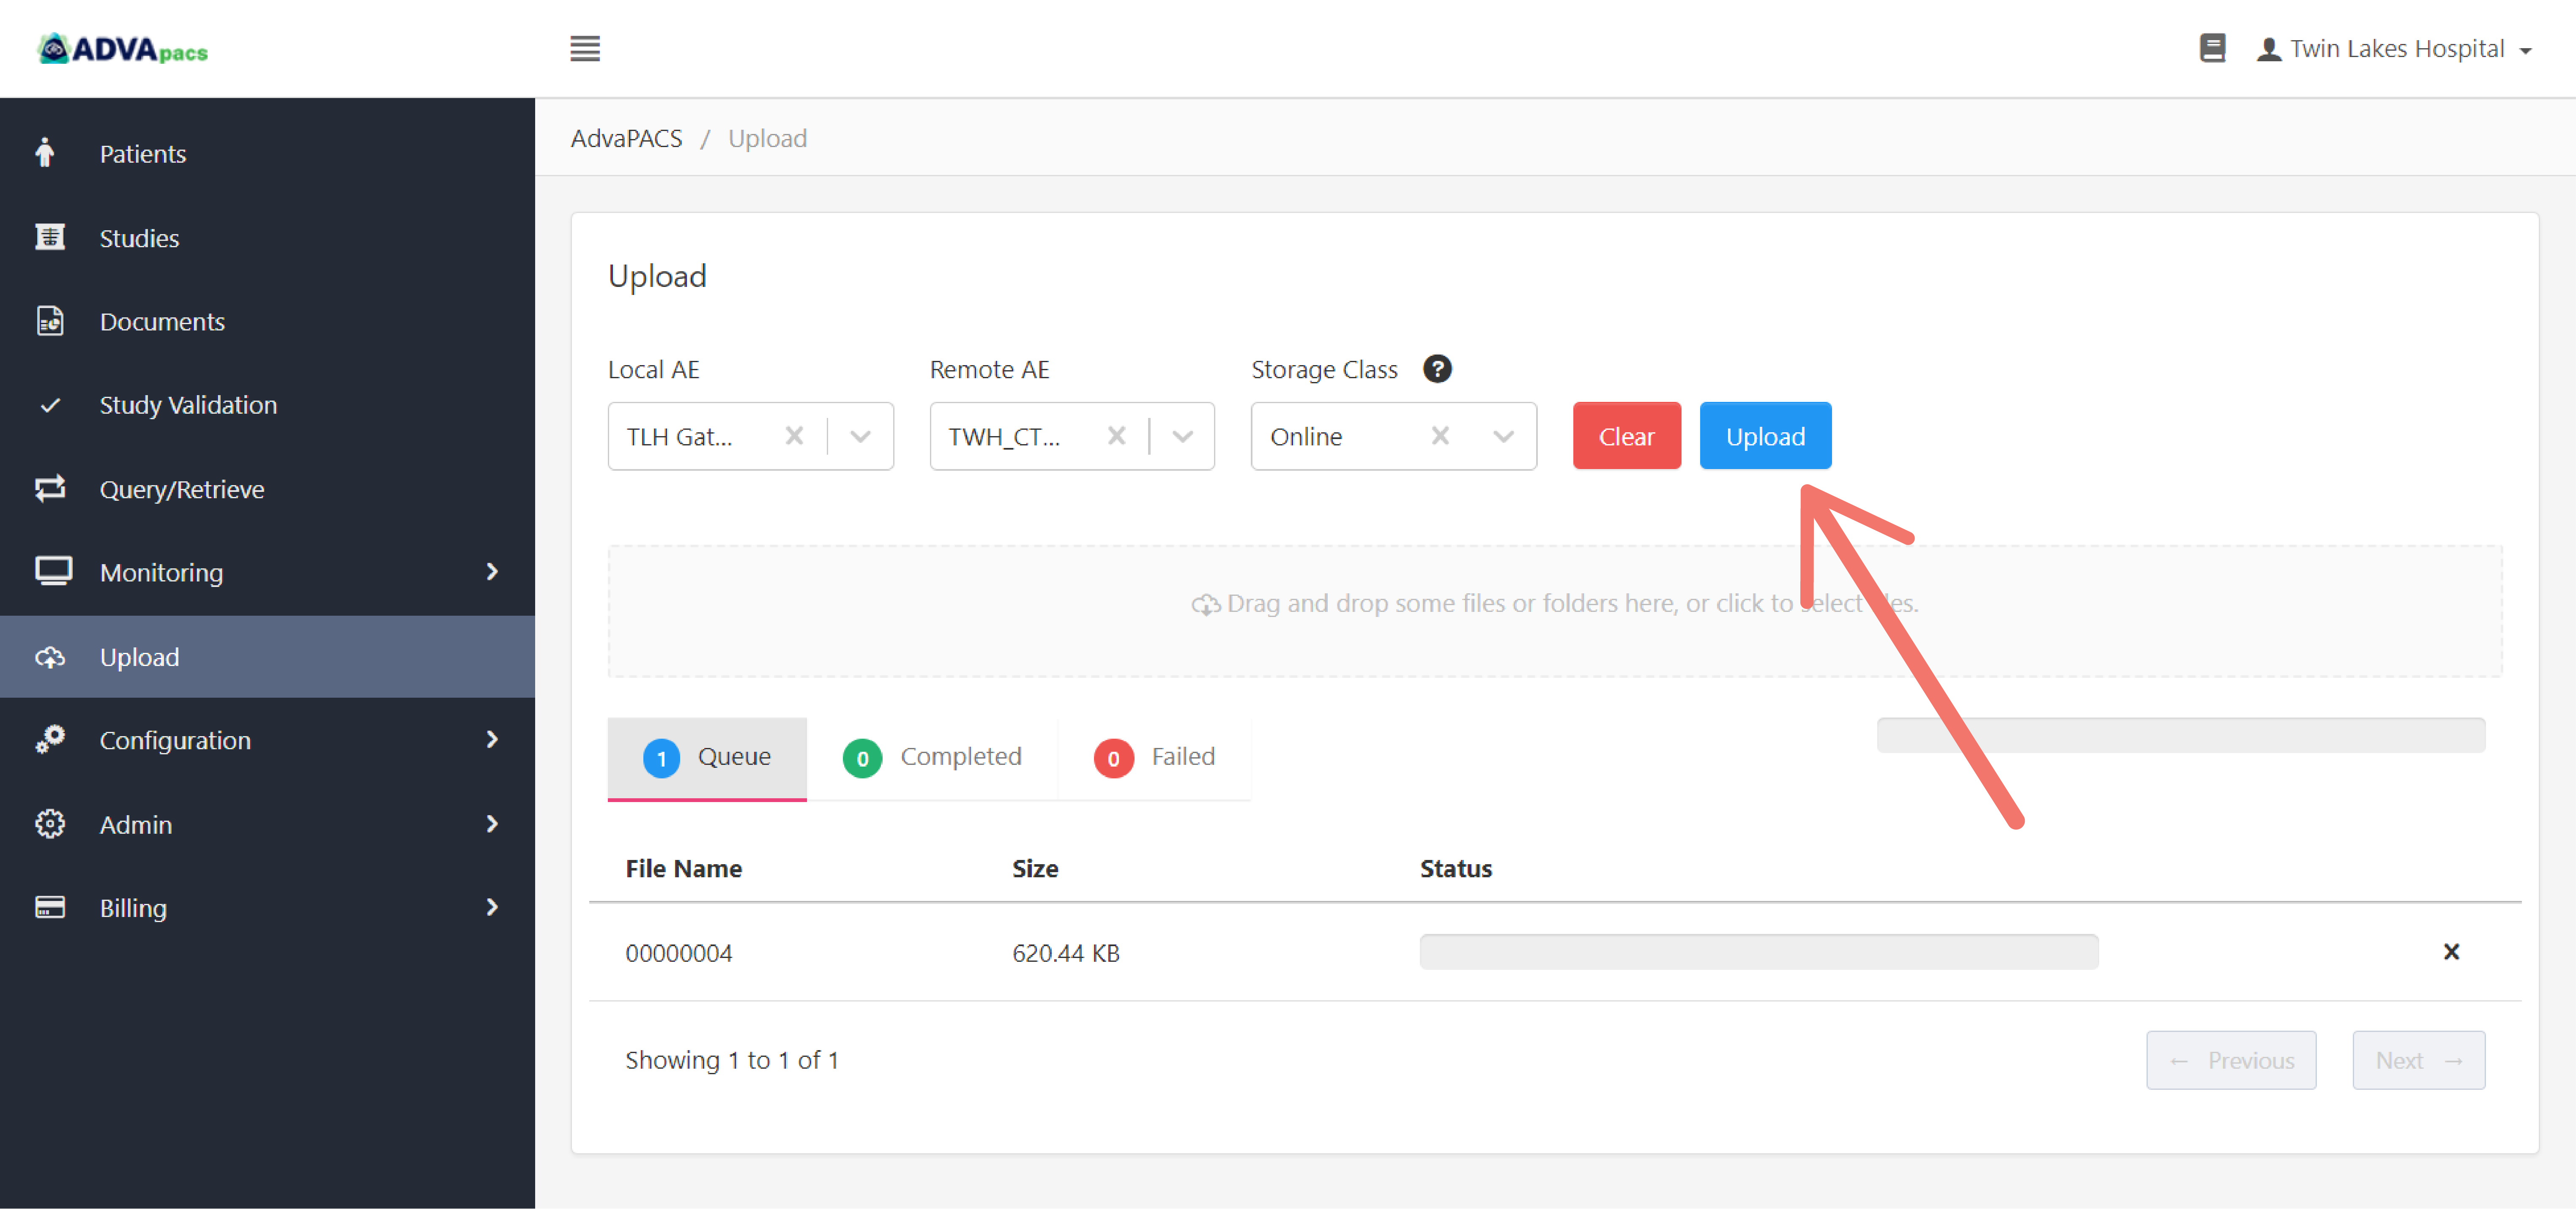
Click Upload.
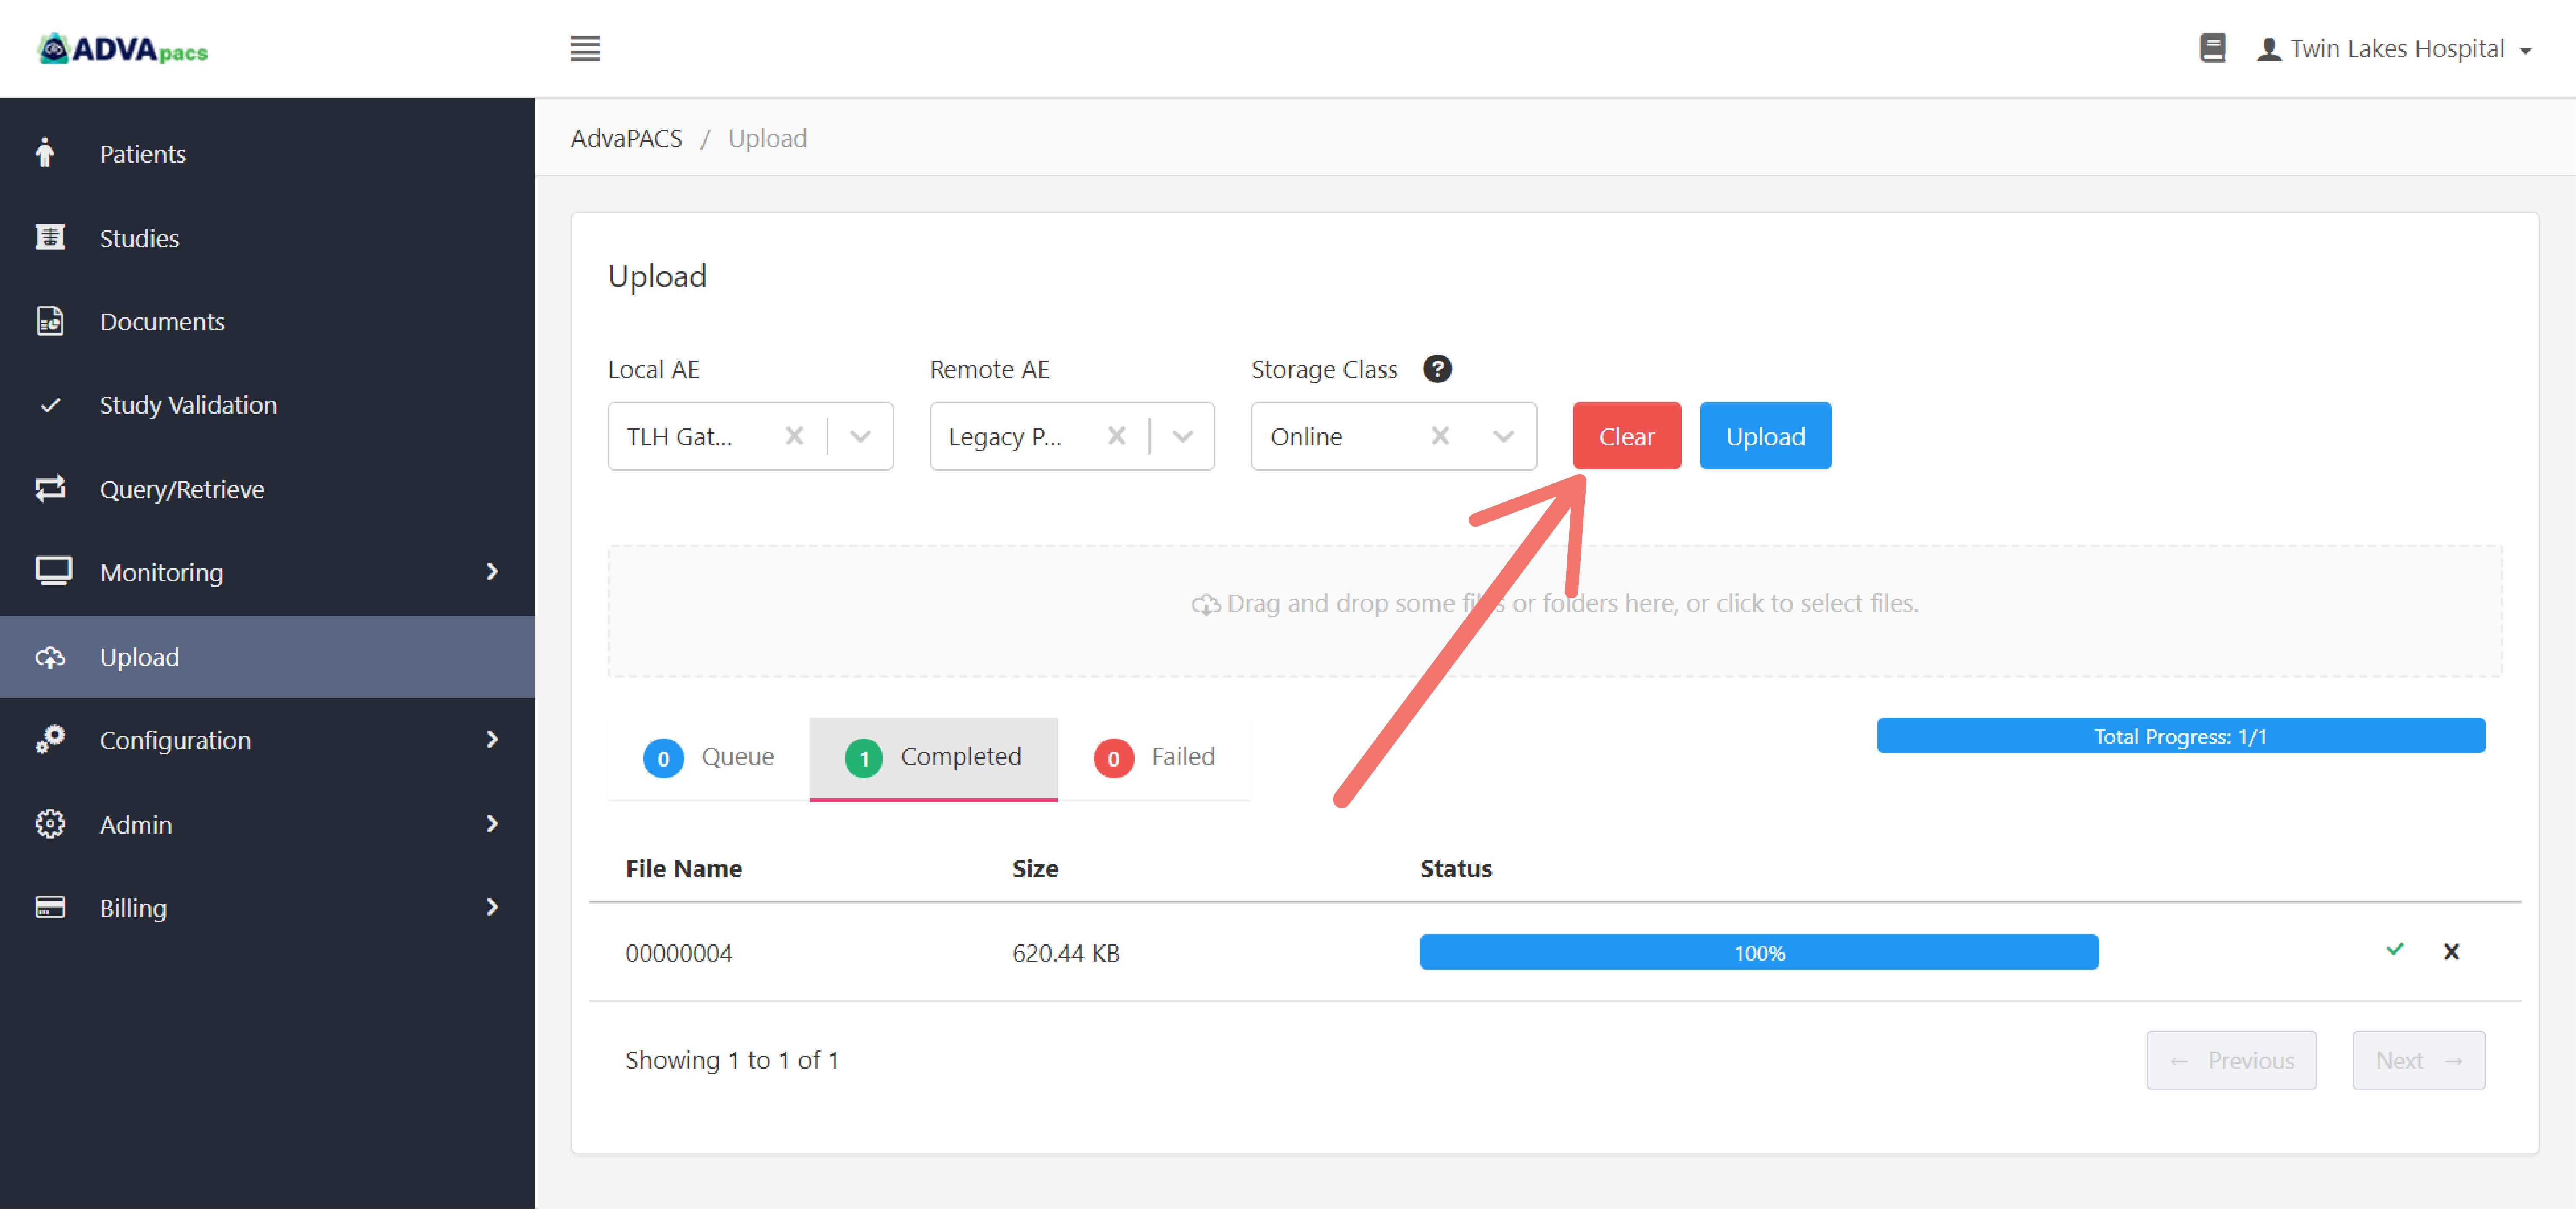
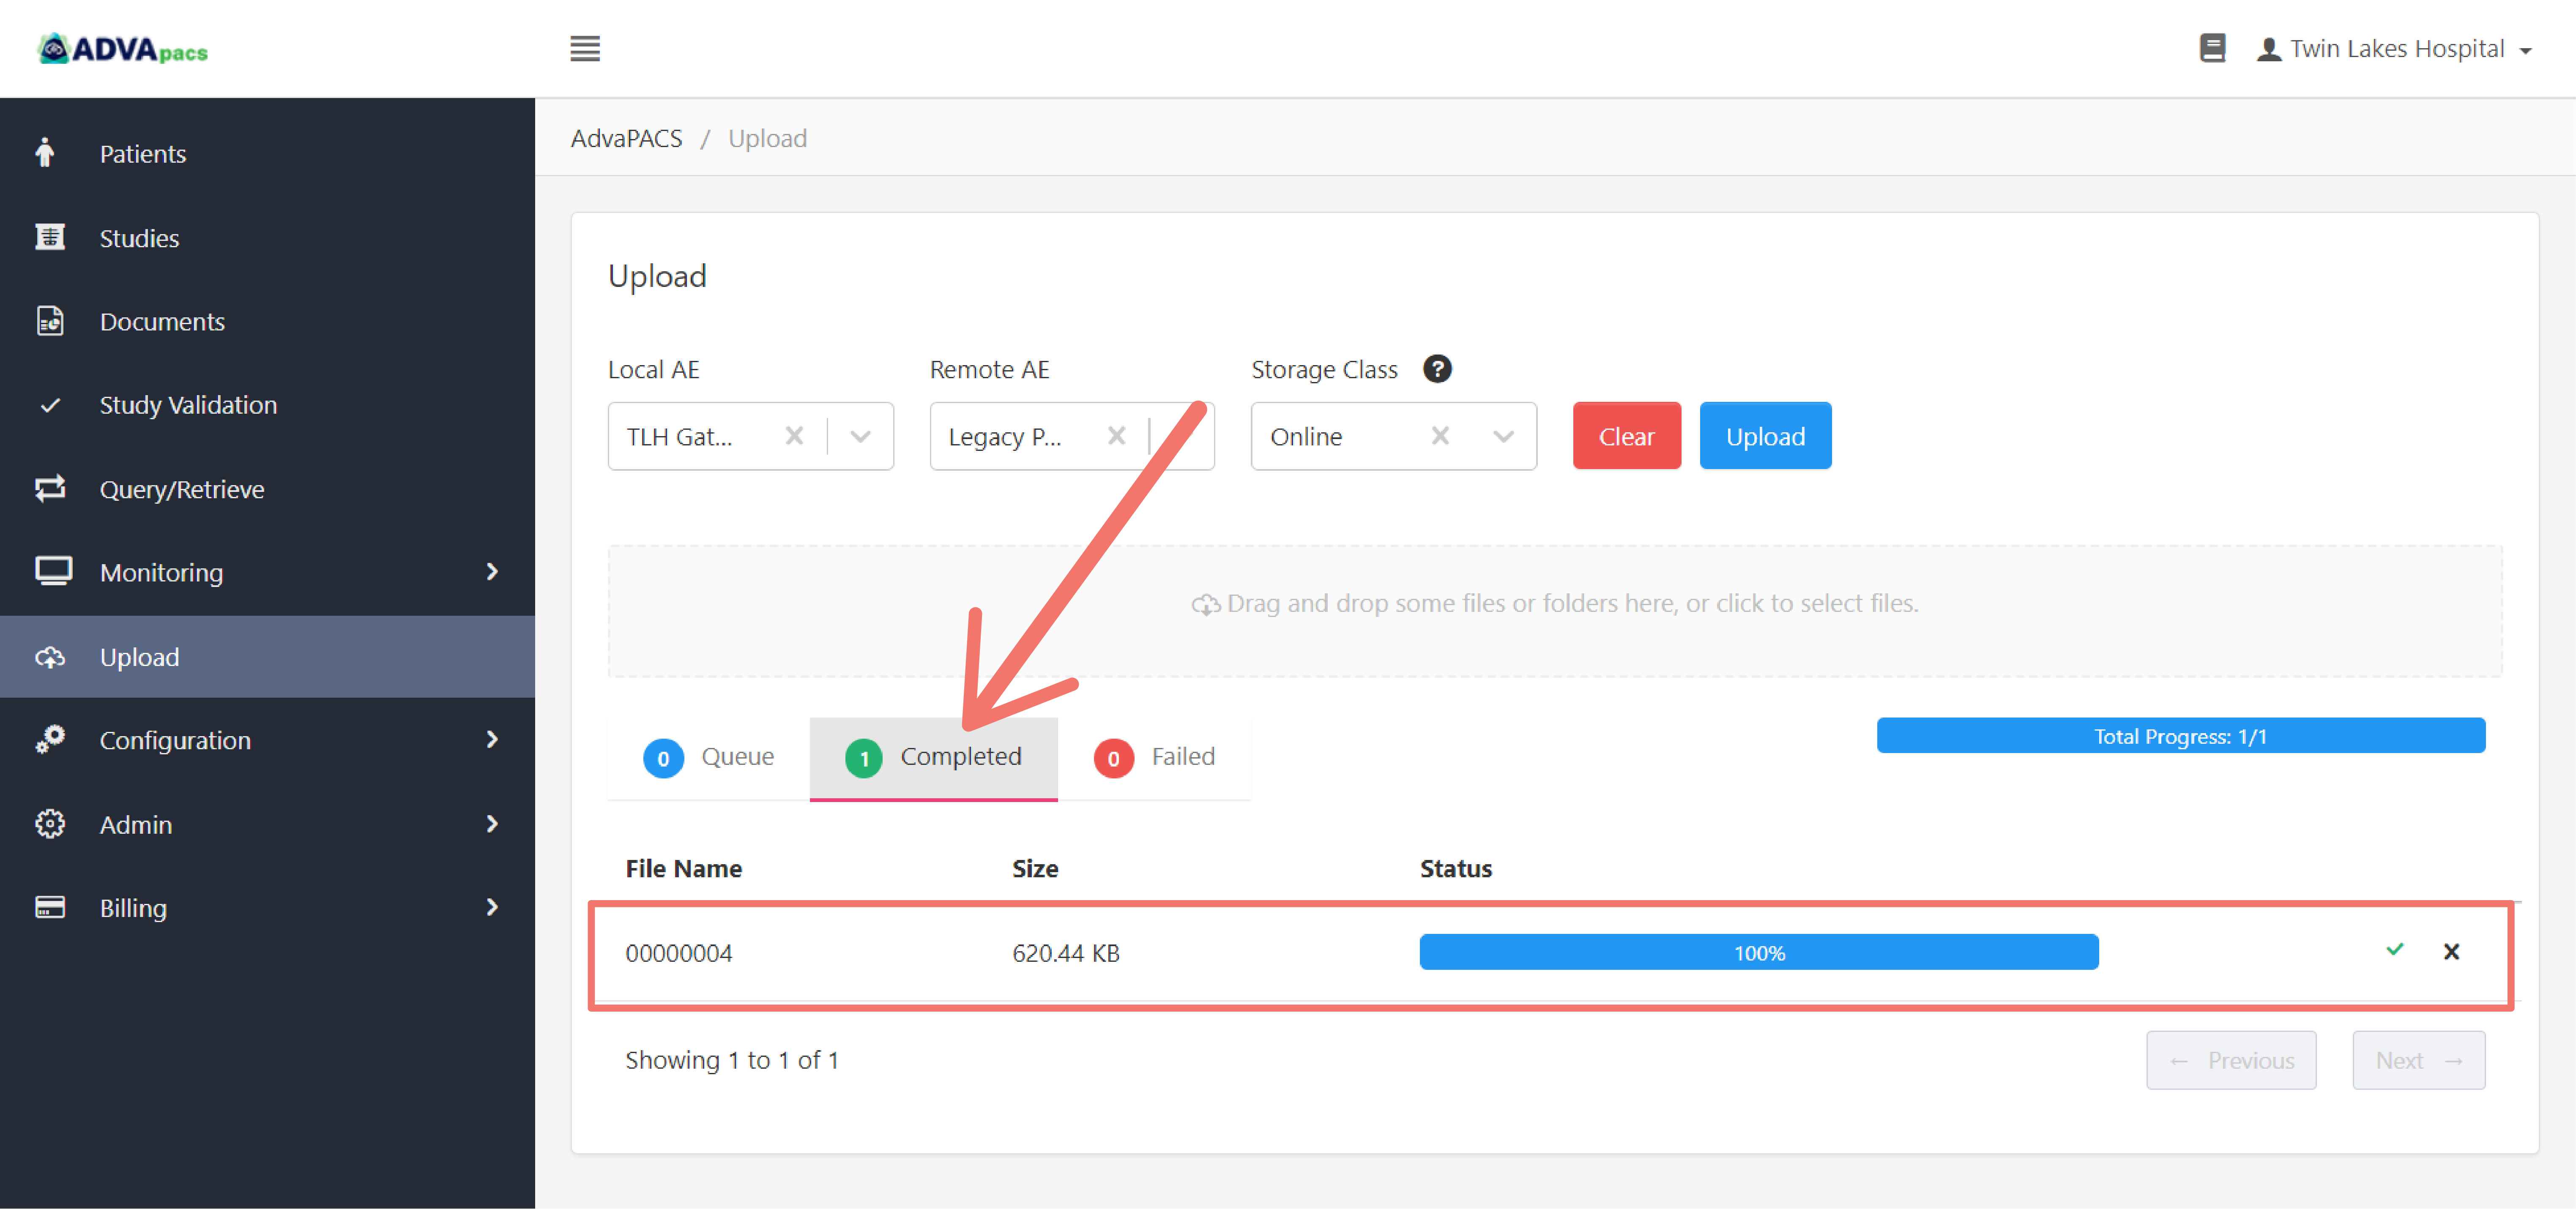
Successfully uploaded files will appear in the Completed section.
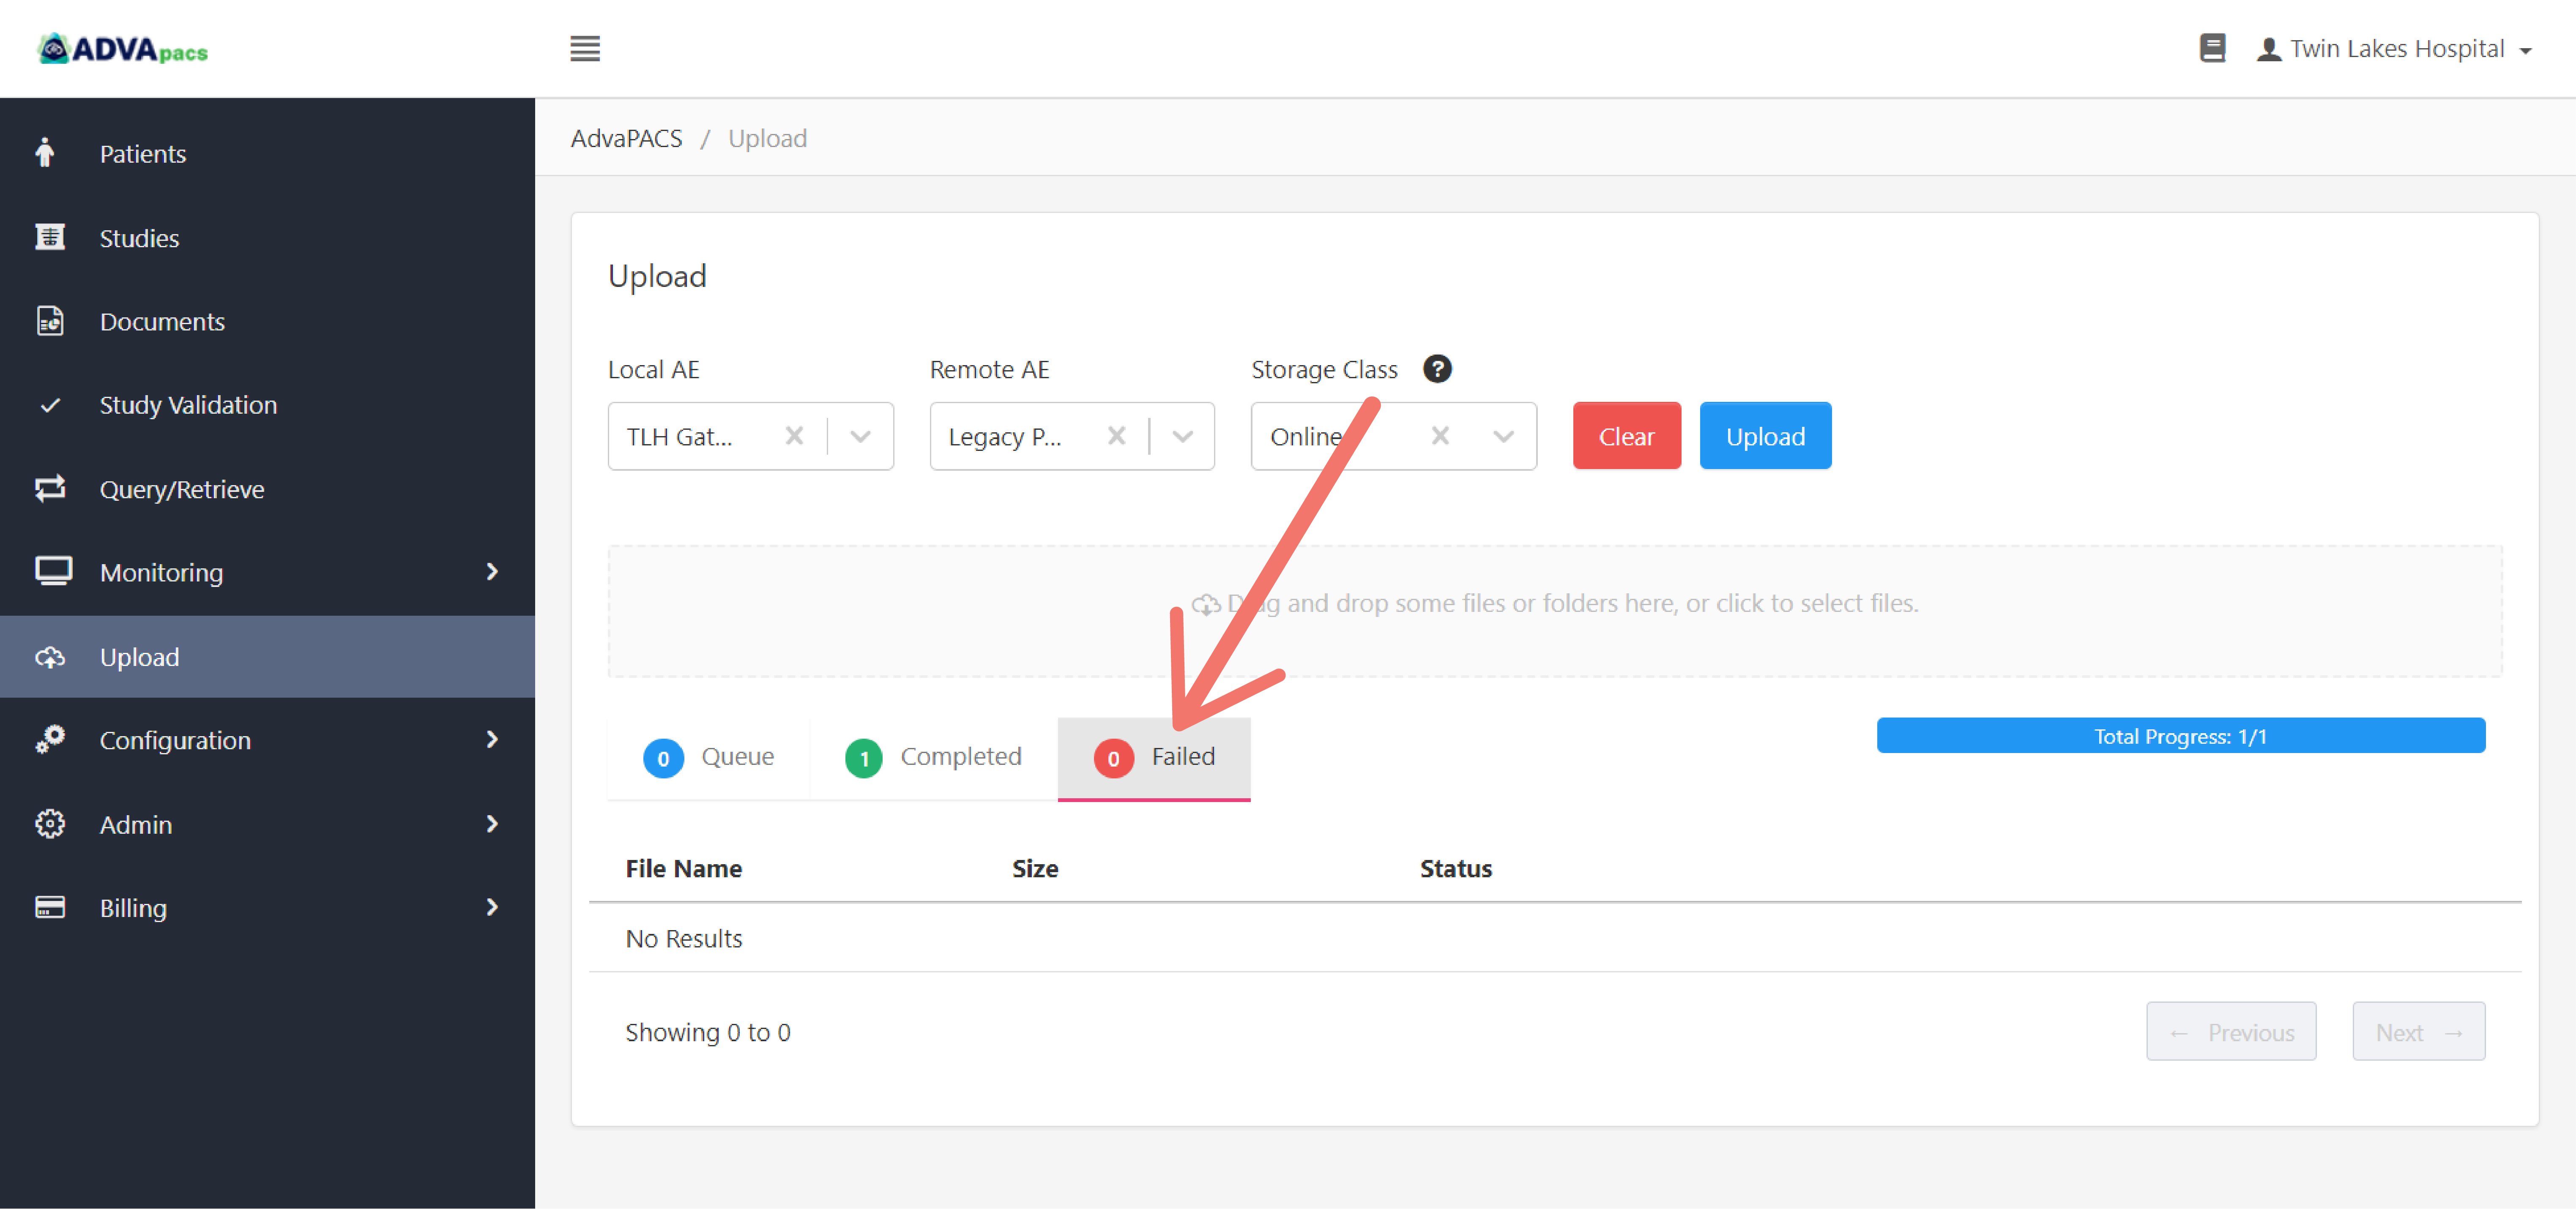
Unsuccessfully uploaded files will appear in the Failed section.
-
To reupload unsuccessful files, in the Failed section, click the "retry" button.
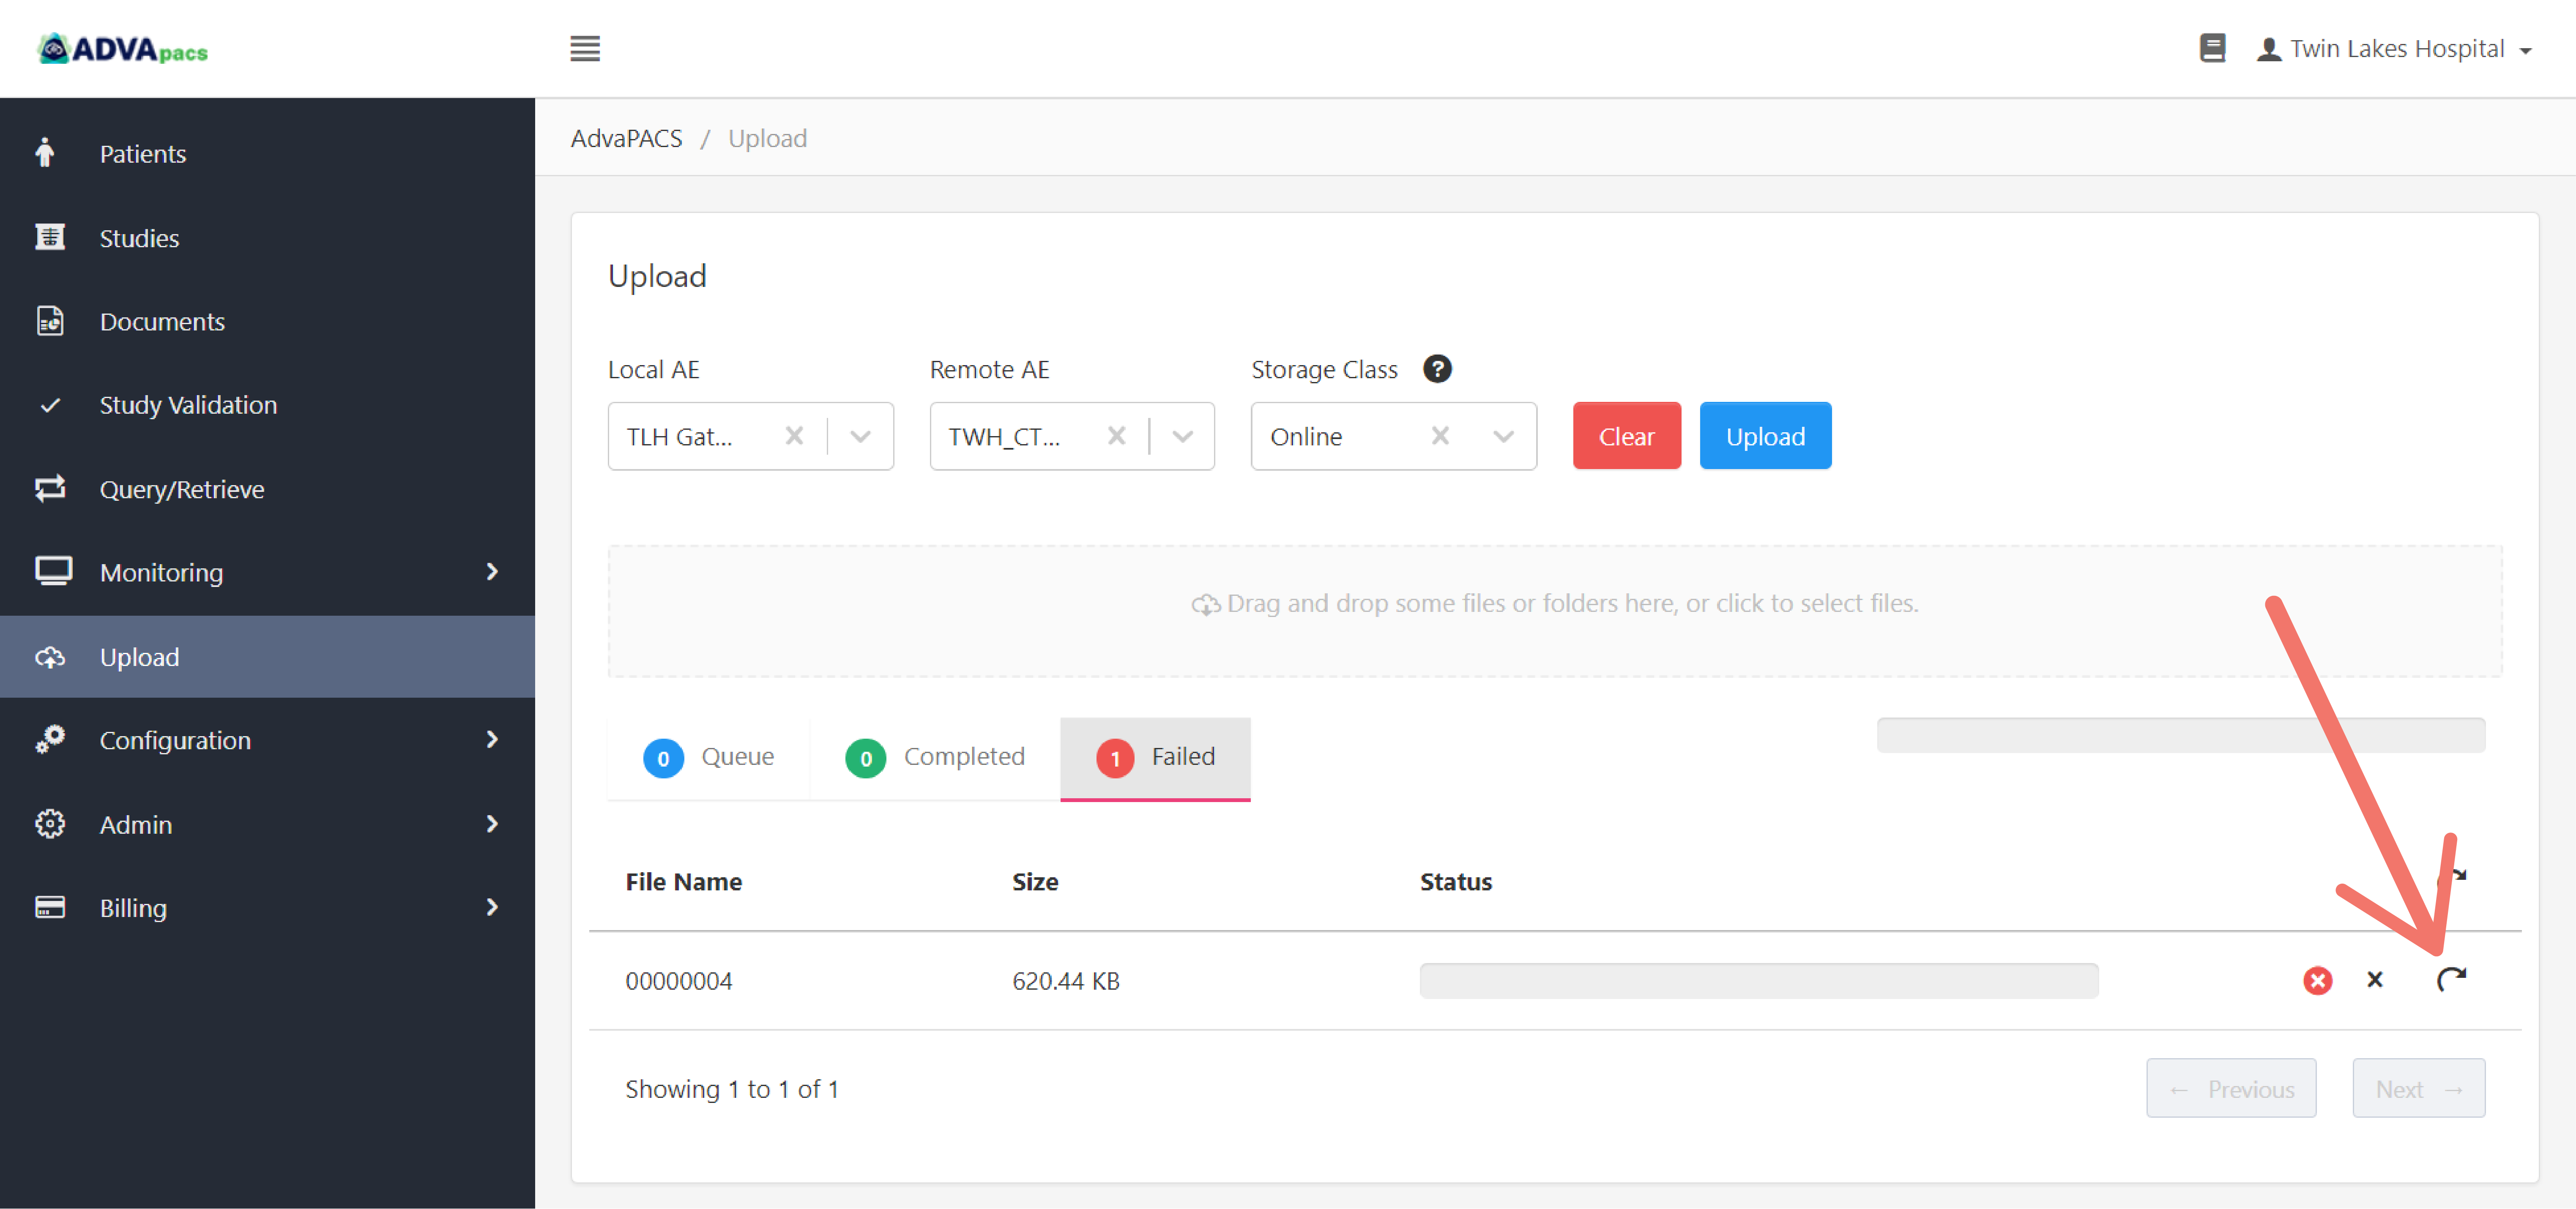
And the file will be placed back into the Queue.

-
Then, click Upload to reupload the file.

Upload from third-party services
To upload DICOM files from third-party services (Box, Dropbox, and Google Drive), follow the steps below. You may safely skip steps that do not apply to you (for example, if you do not have connected AEs, the Local AE and Remote AE options are unavailable).
-
Navigate to the Upload page.

-
Select a Remote AE. The studies to be uploaded will assume this Remote AE as its modality of origin.

-
Select a Local AE. The studies to be uploaded will assume this Local AE as the server that forwards the studies to AdvaPACS from the Remote AE. Make sure this Local AE is connected to the selected Remote AE.

-
To store the studies in the default Storage Class of the selected Local AE, do not select a Storage Class. If you prefer a different Storage Class, select one from the drop-down menu.

-
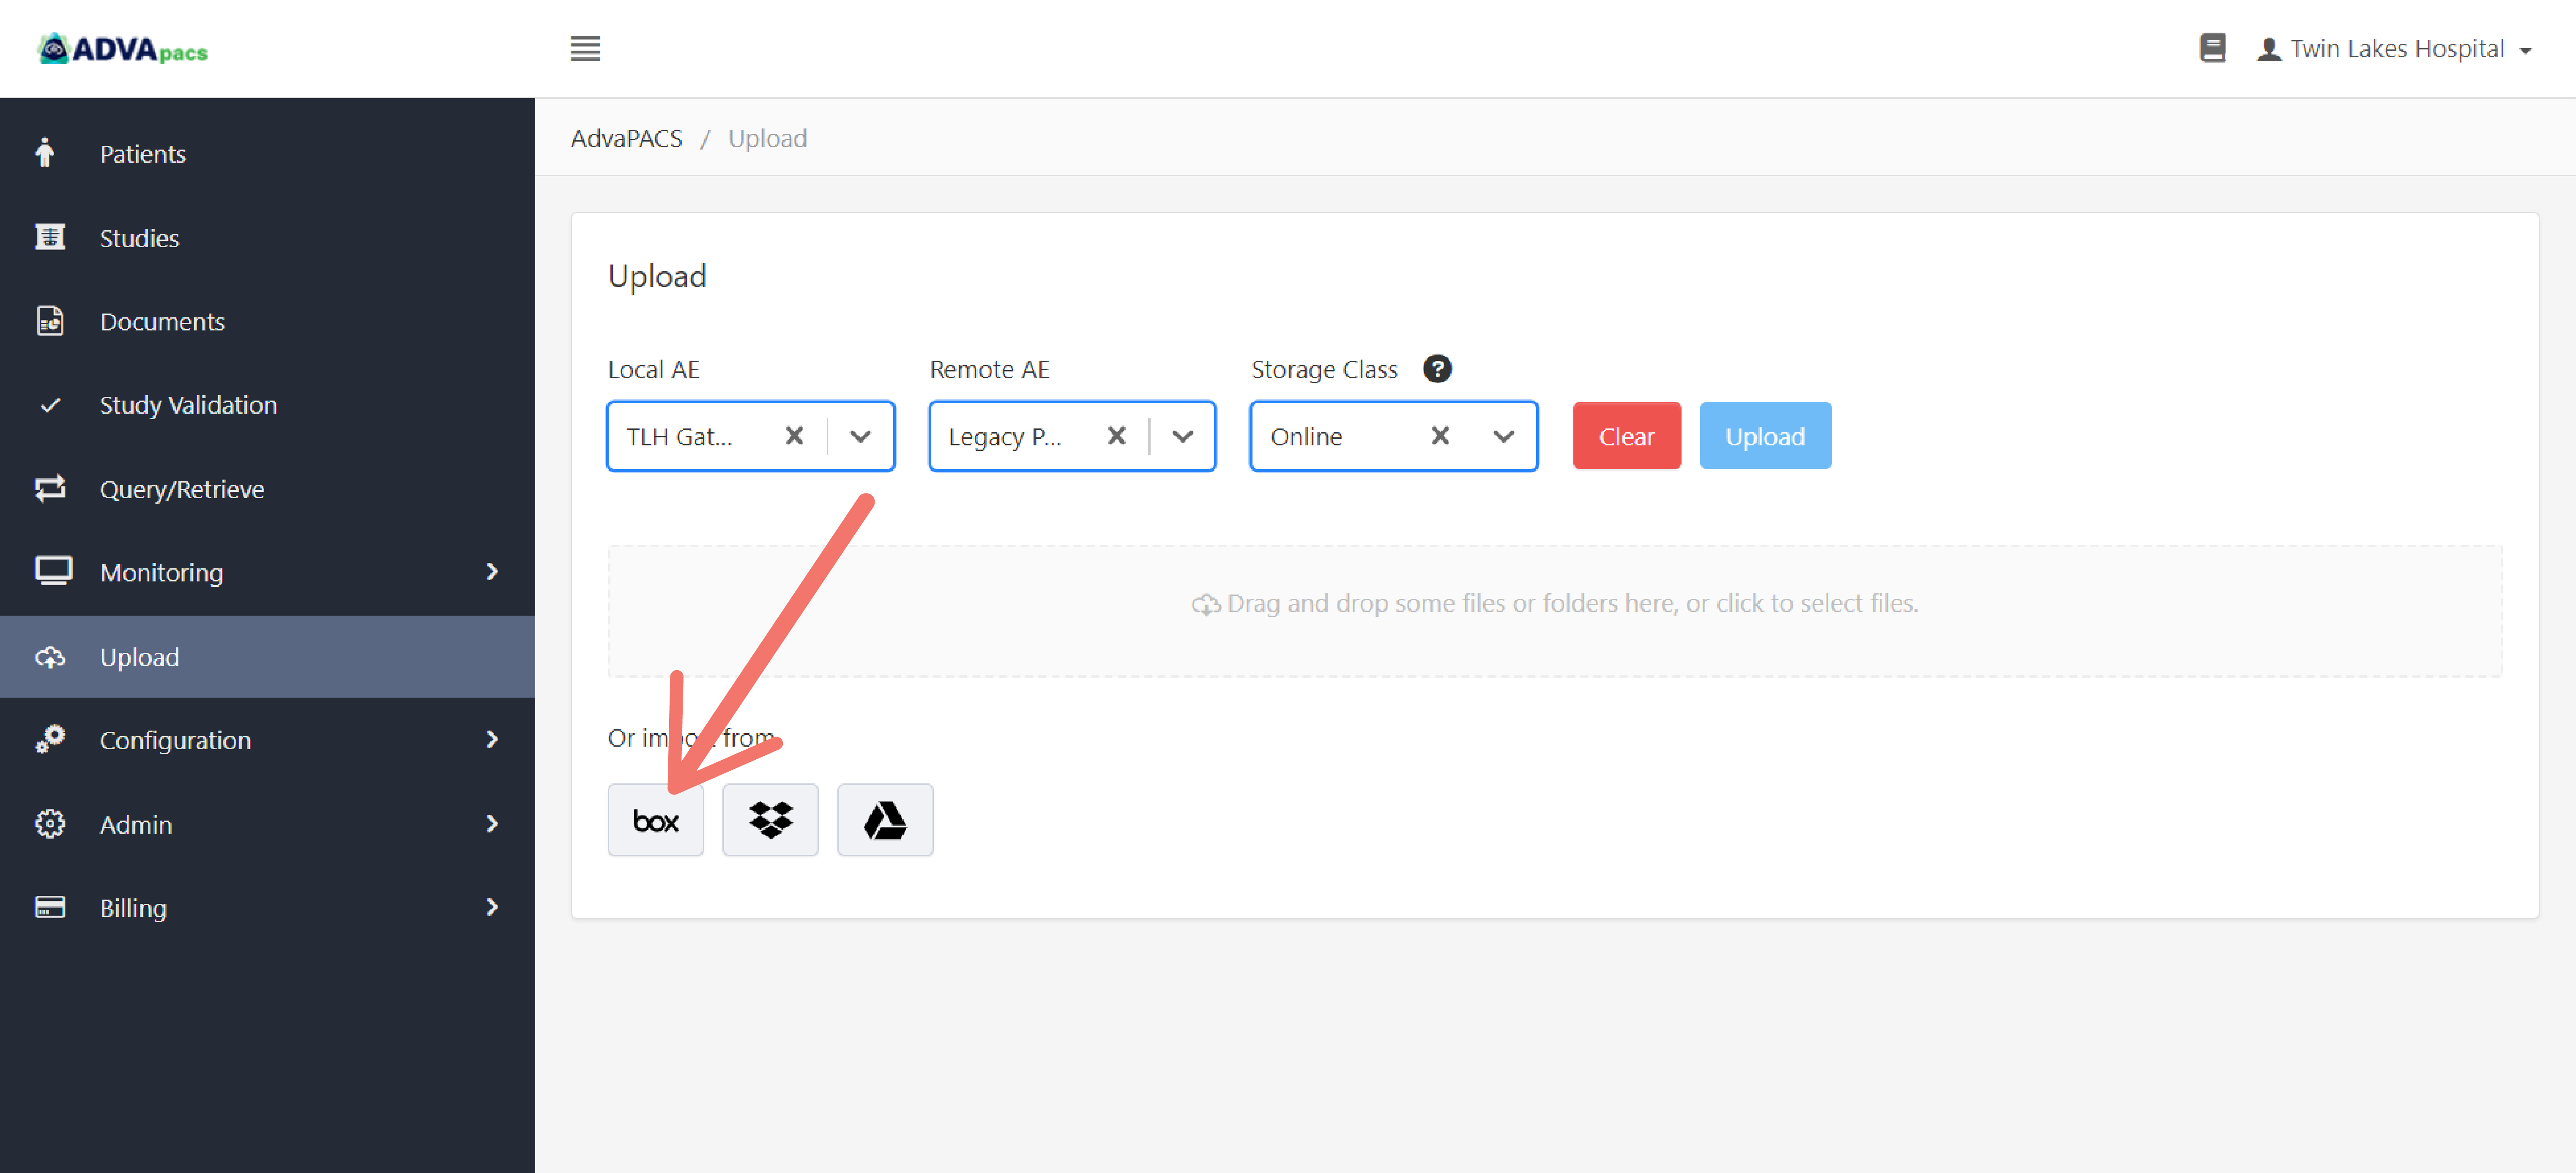
To log in to Box, Dropbox, or Google Drive. Click the button of your chosen service.
-
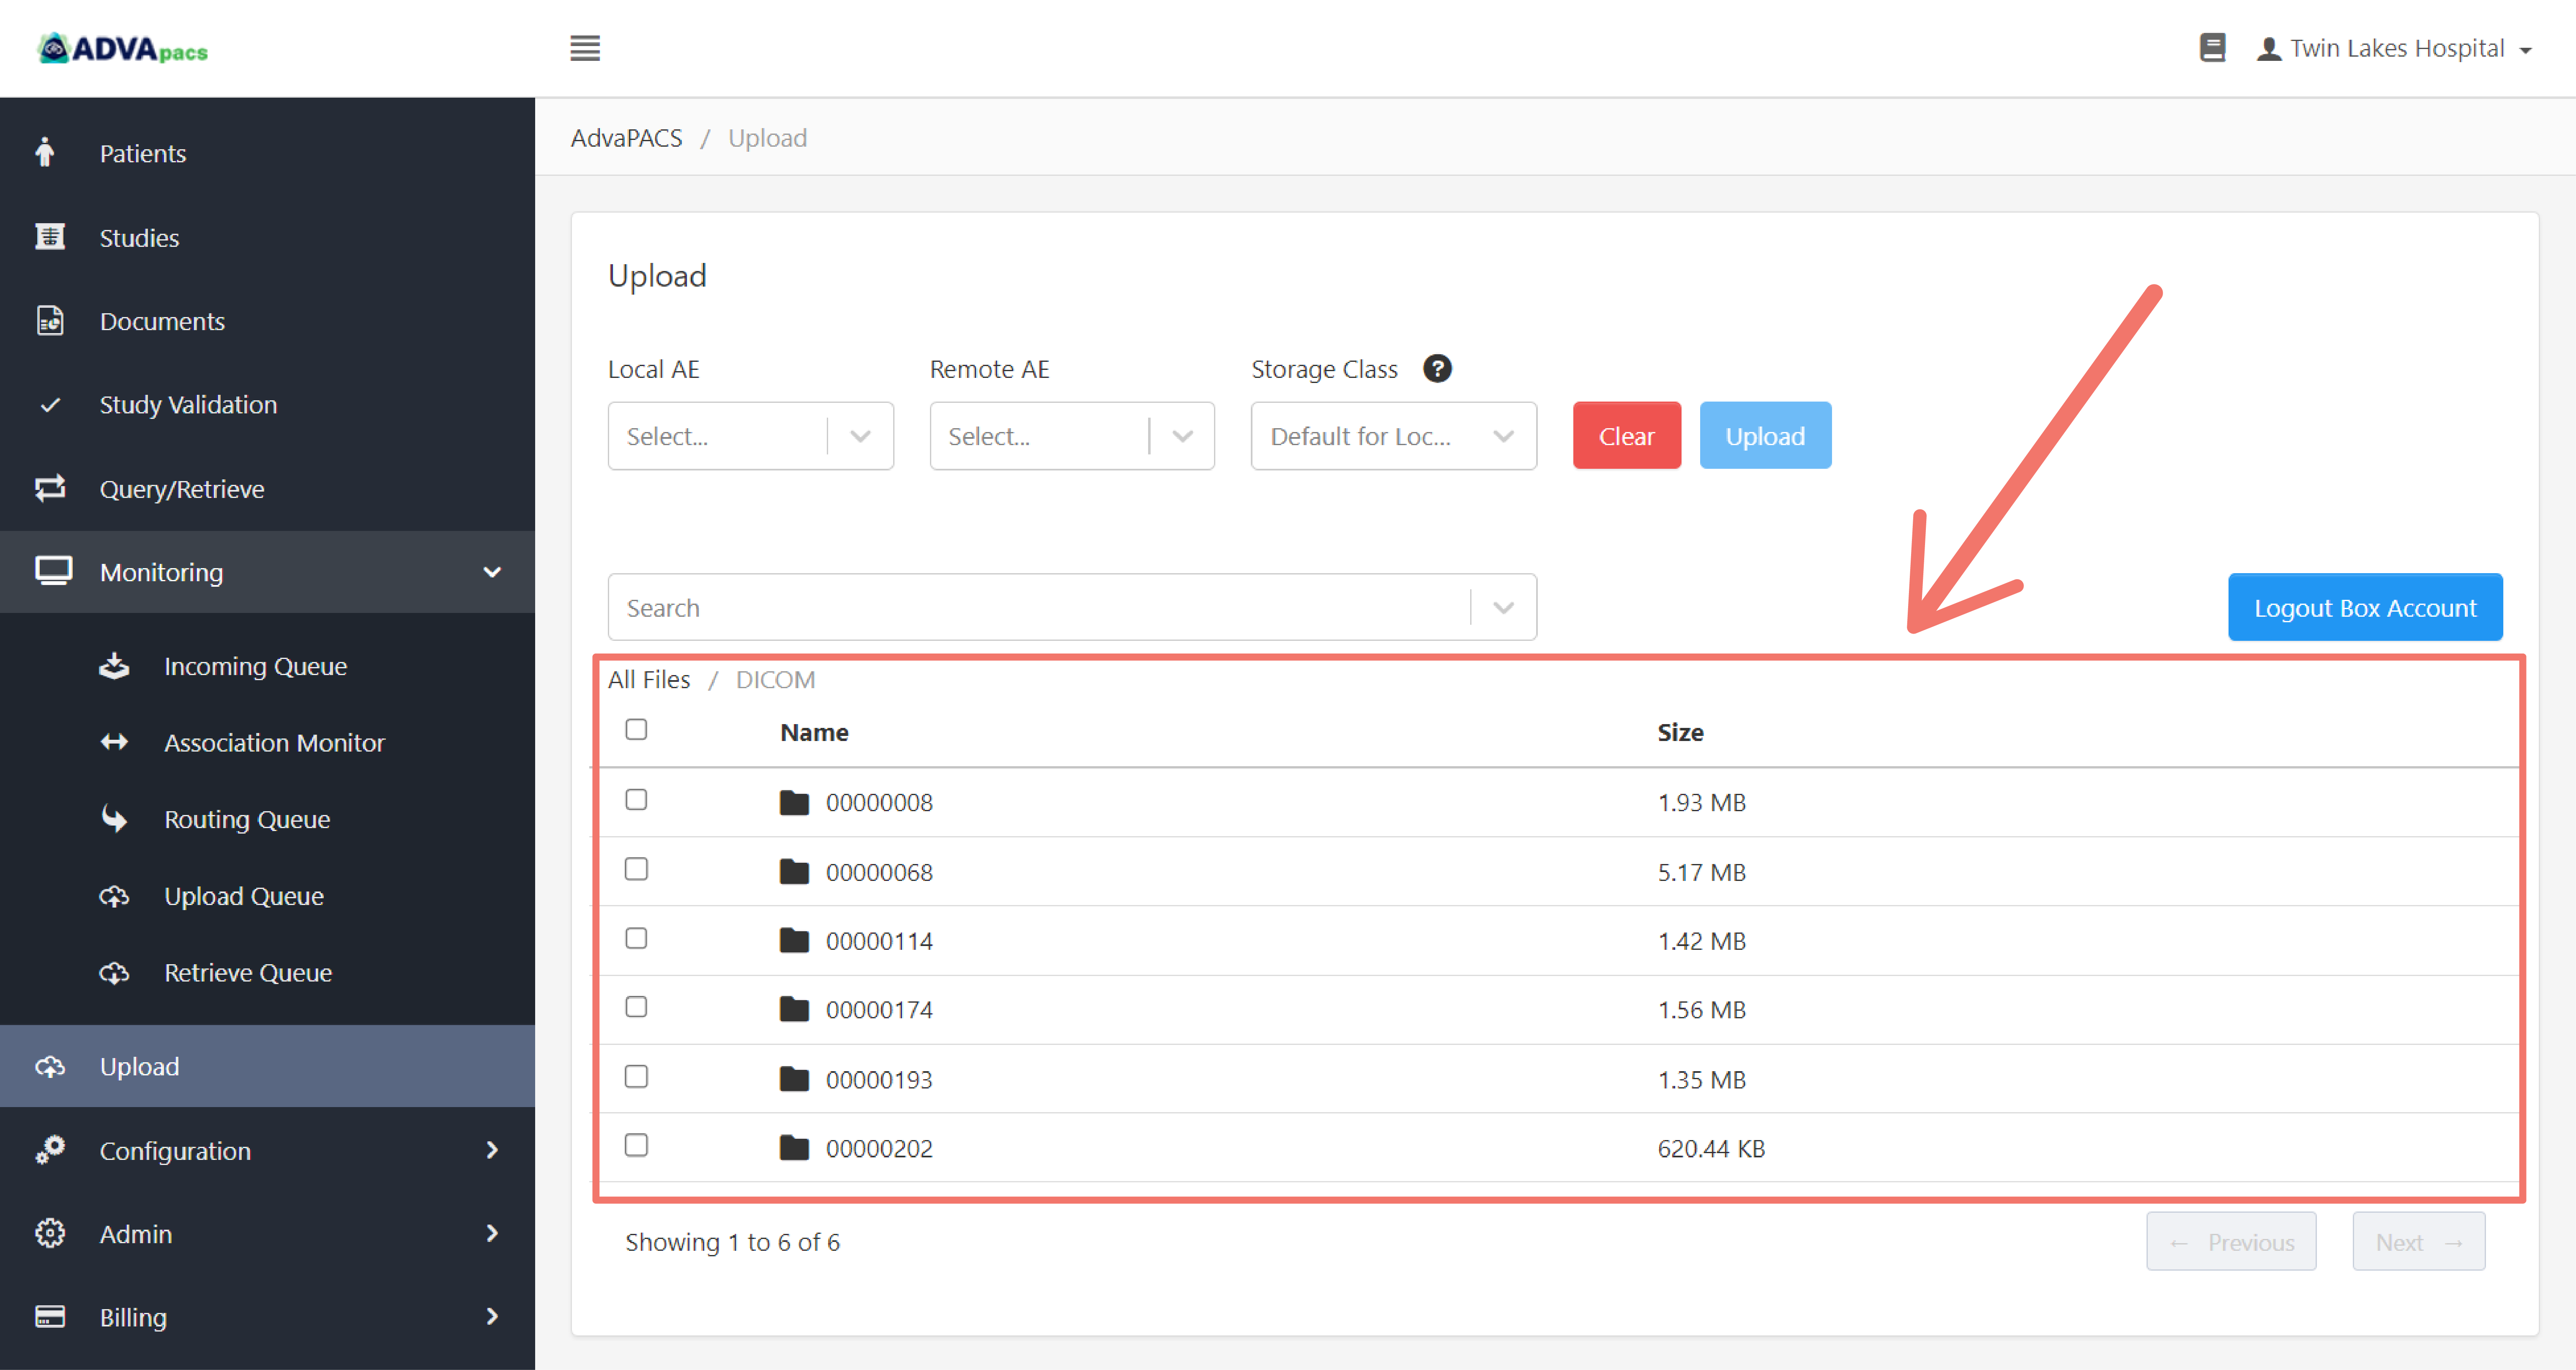
Once logged in, the files from your chosen service will appear below.
-
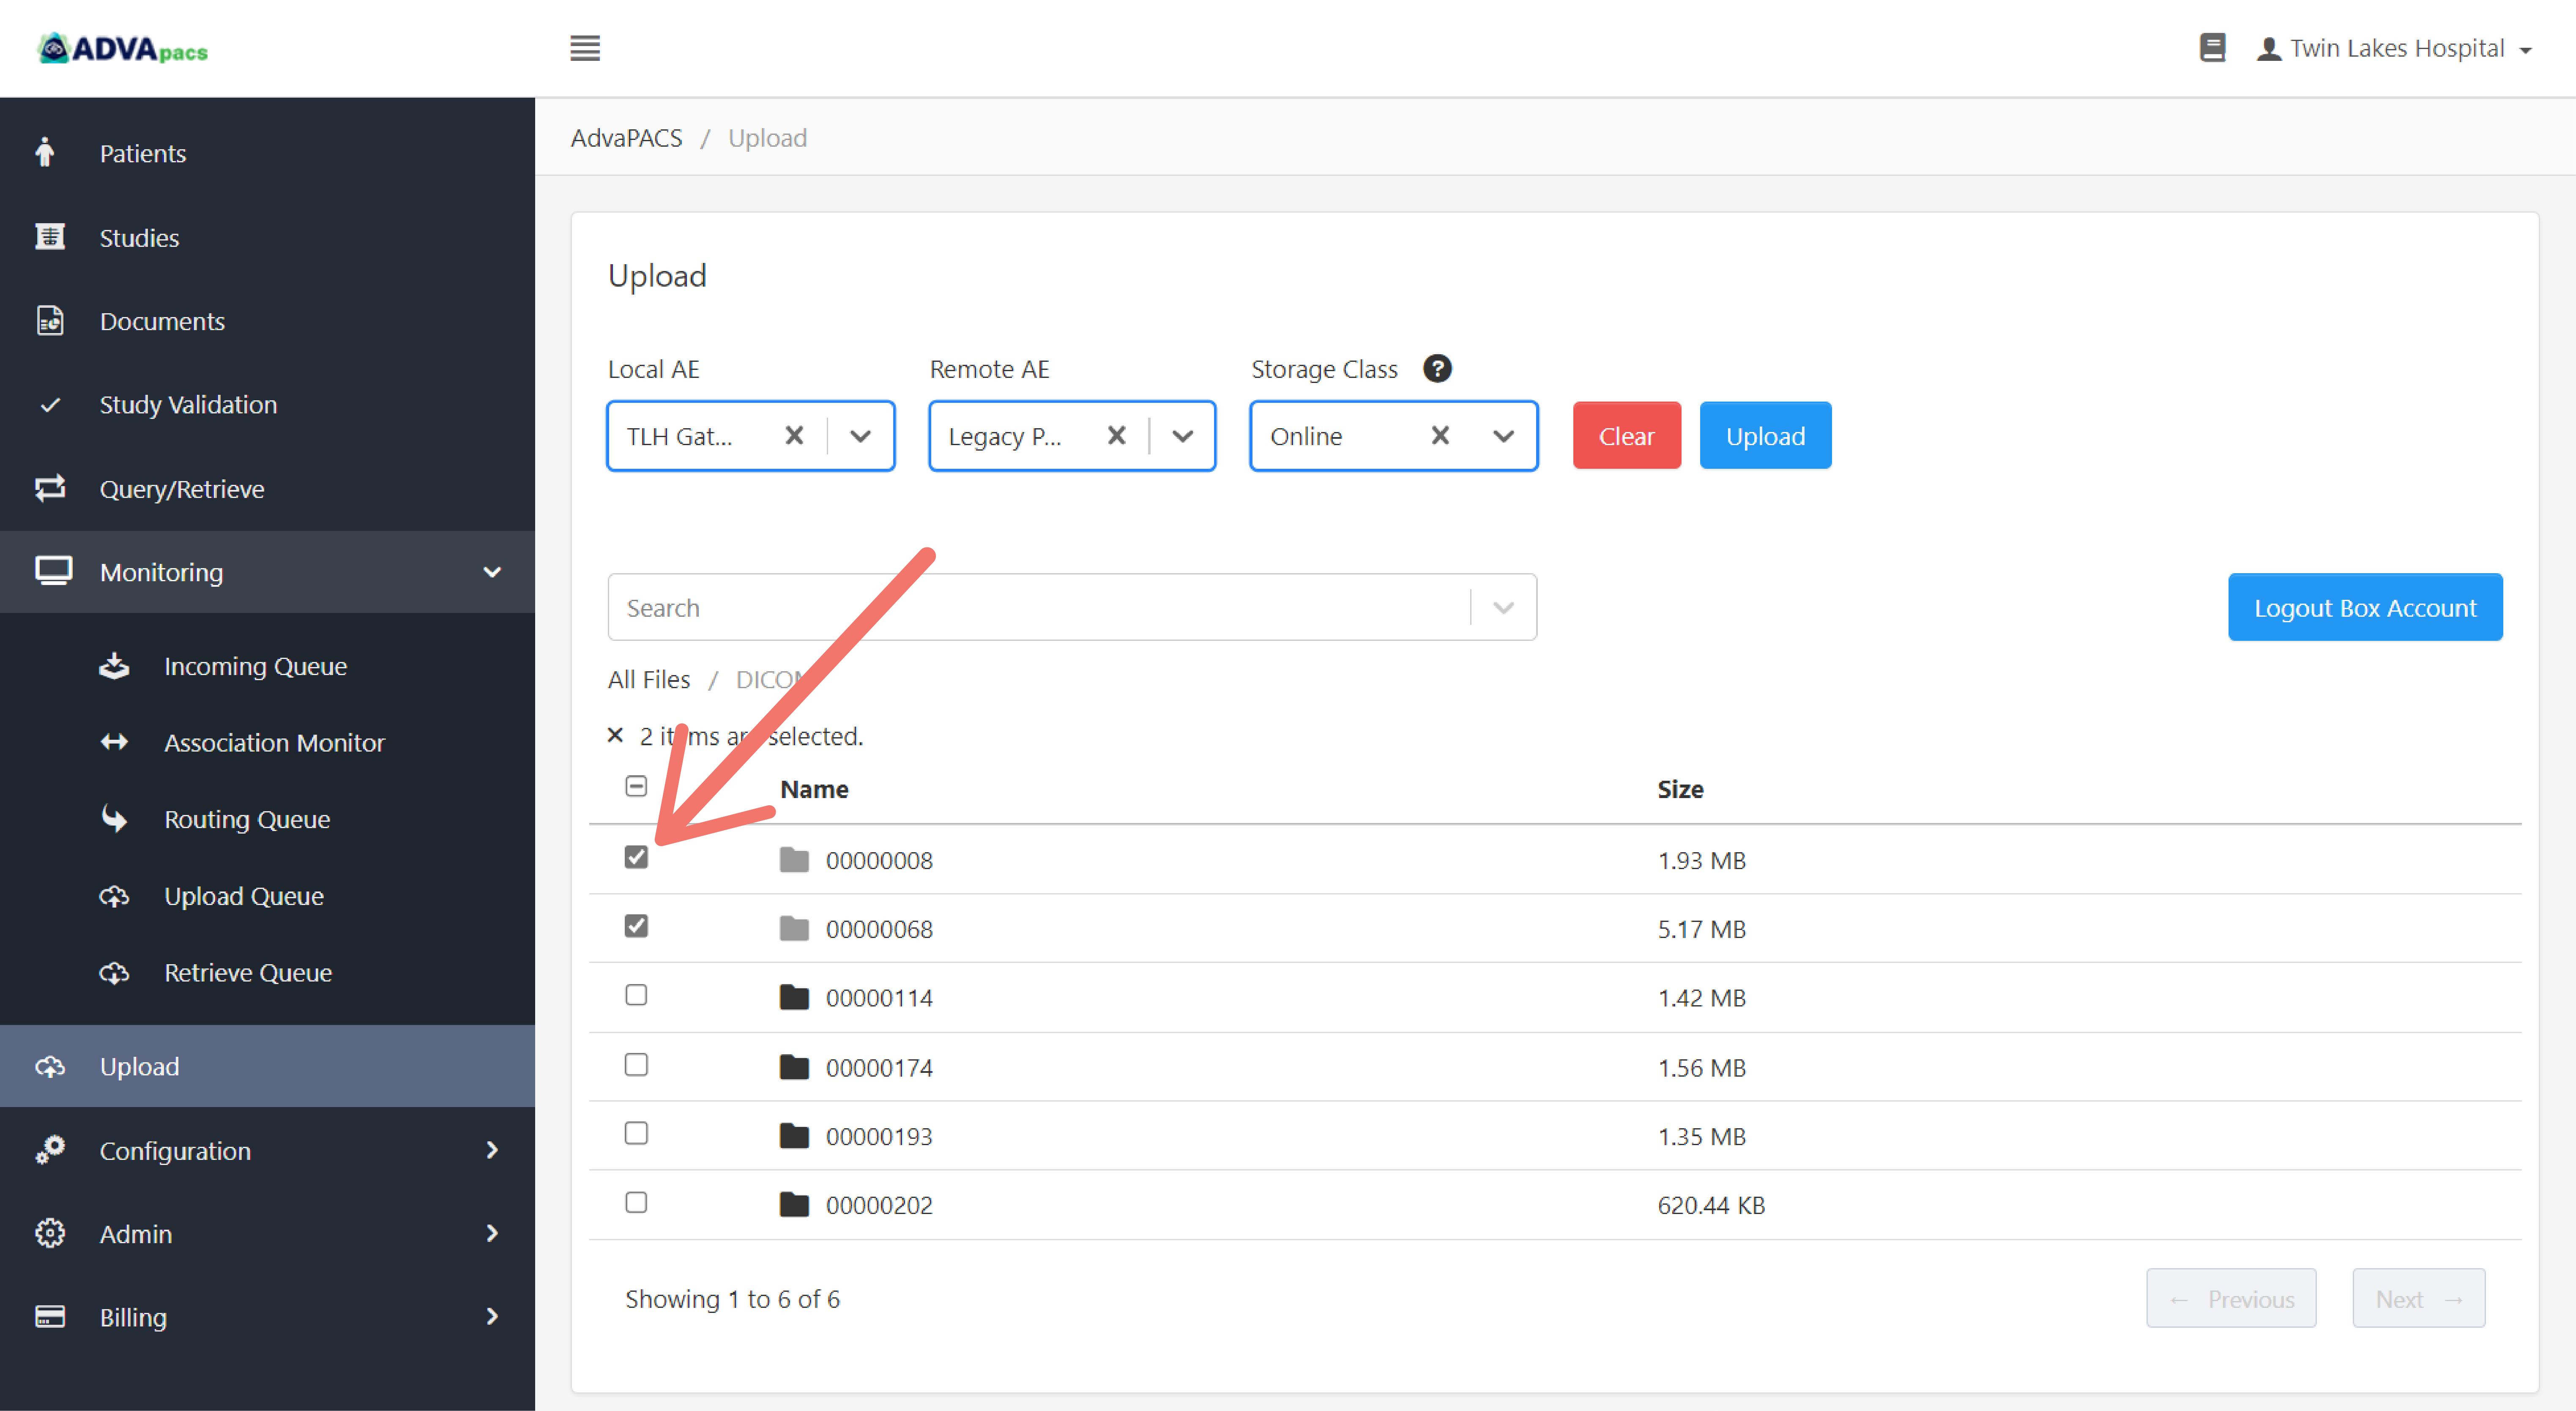
Select the files you wish to upload.
-
Click Upload.
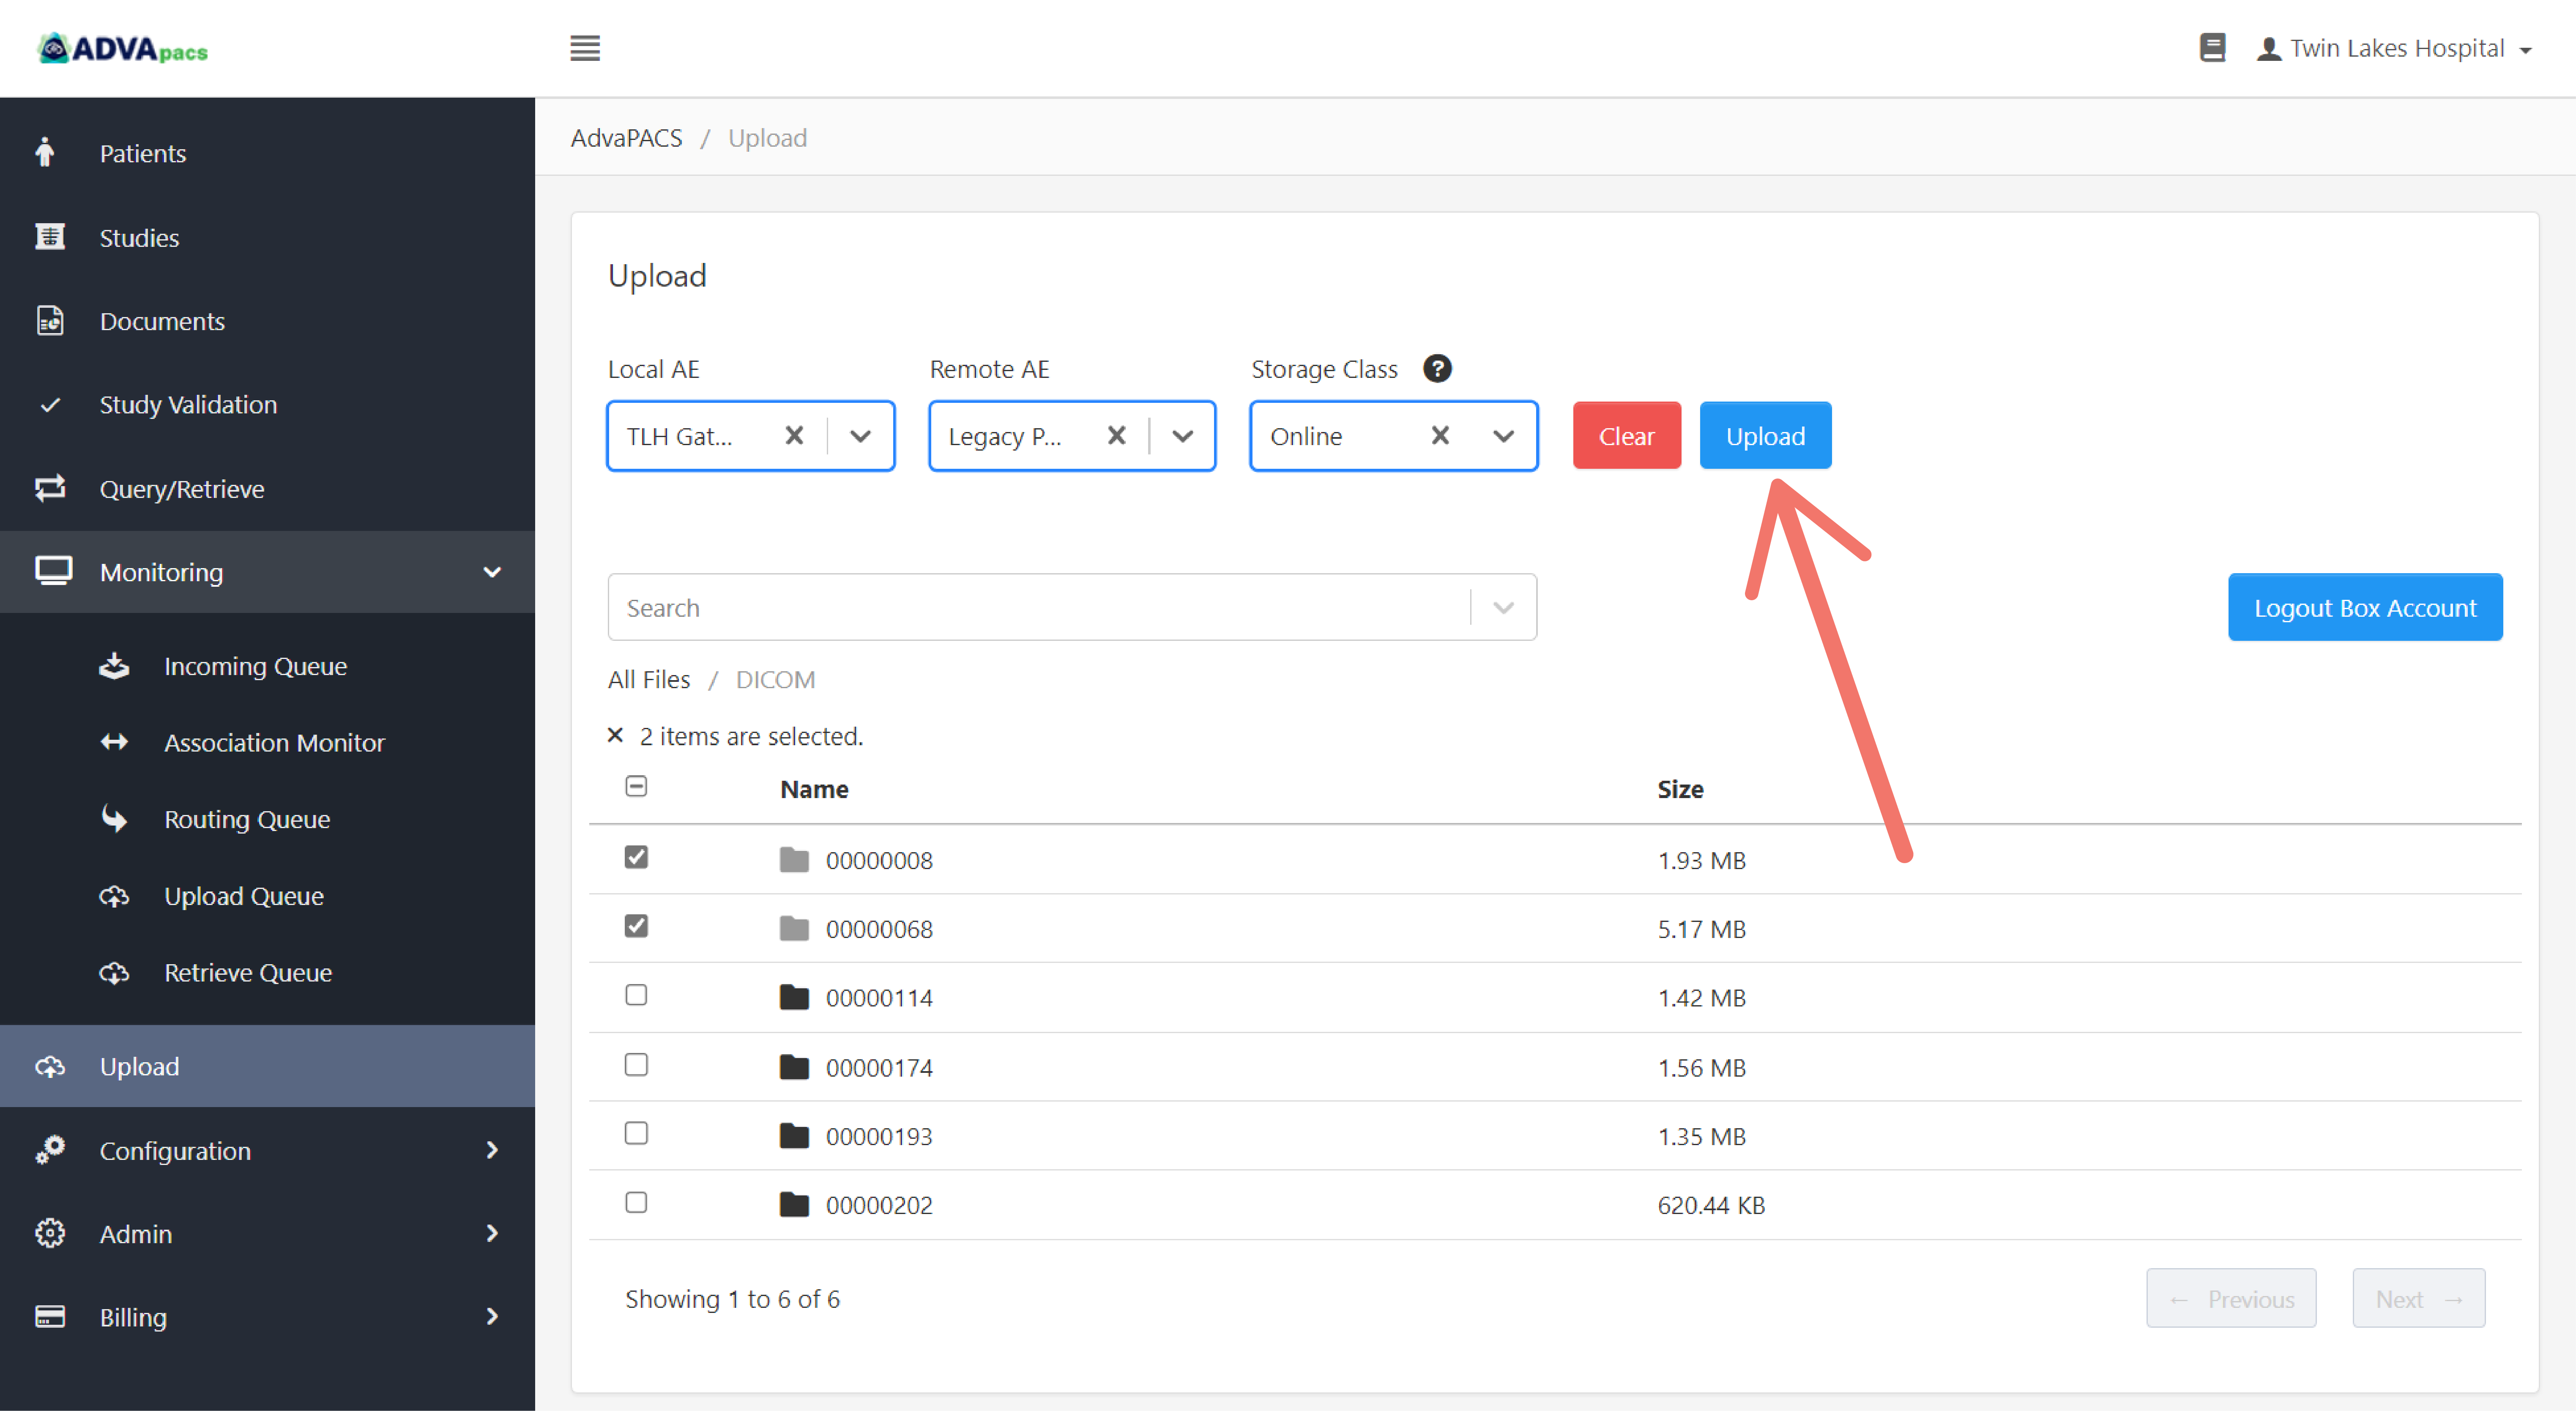
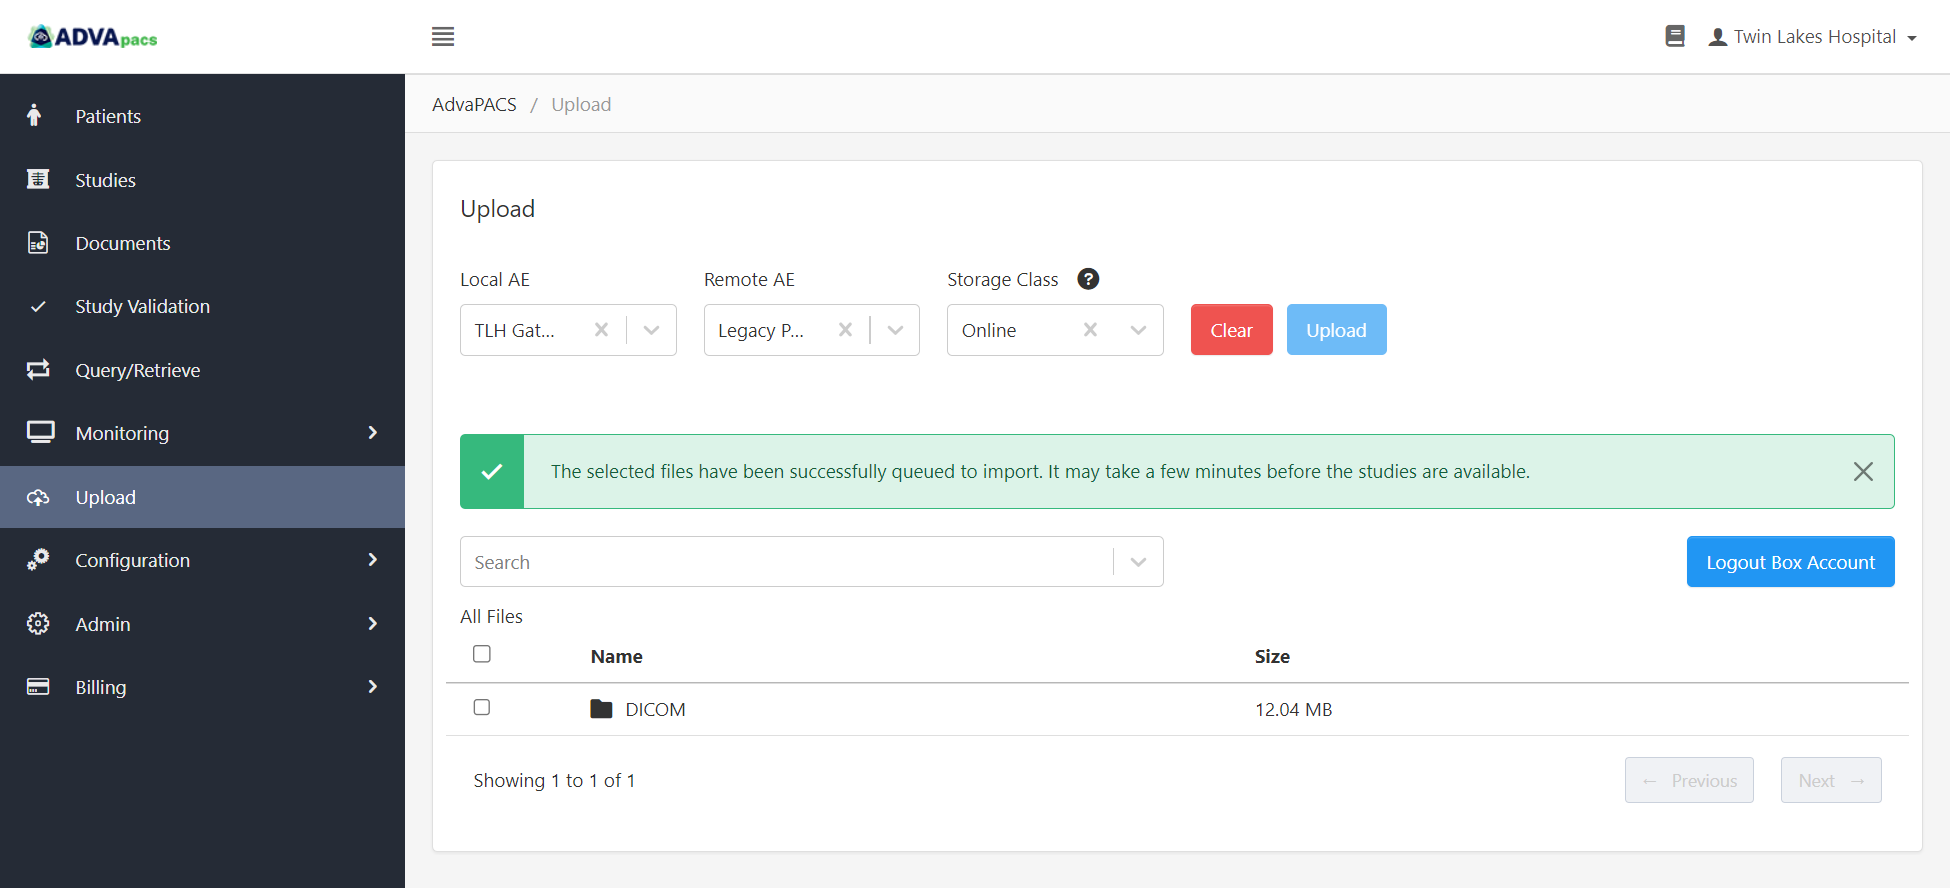
A message displays the status of the recently uploaded files.

Go to Studies to check studies that have been successfully uploaded.
Upload a new set of files
If you want to upload a new set of files, click Clear to clear the tables and start from the beginning.
