Boards and Transition Buttons
The AdvaPACS Worklist Board is a dynamic and customizable feature that allows users to define their workflow. Boards help users organize and manage worklist orders, while Transition Buttons enable seamless status updates within the workflow.
This document explains how to configure Boards and Transition Buttons in AdvaPACS Worklist.
Boards
Screen Types in Boards
AdvaPACS provides different screen types to match various workflows:
- Dictation: Enables voice recording for medical dictation.
- Typing: Provides a structured text editor for composing reports.
- Transcription: Supports audio playback for transcribing recorded dictations.
User must have the "Manage Boards" in Role Permission permission to access this module.
Setting Up a Worklist Board
To use the worklist, you must first set up boards for users to access orders. Follow these steps to create a board:
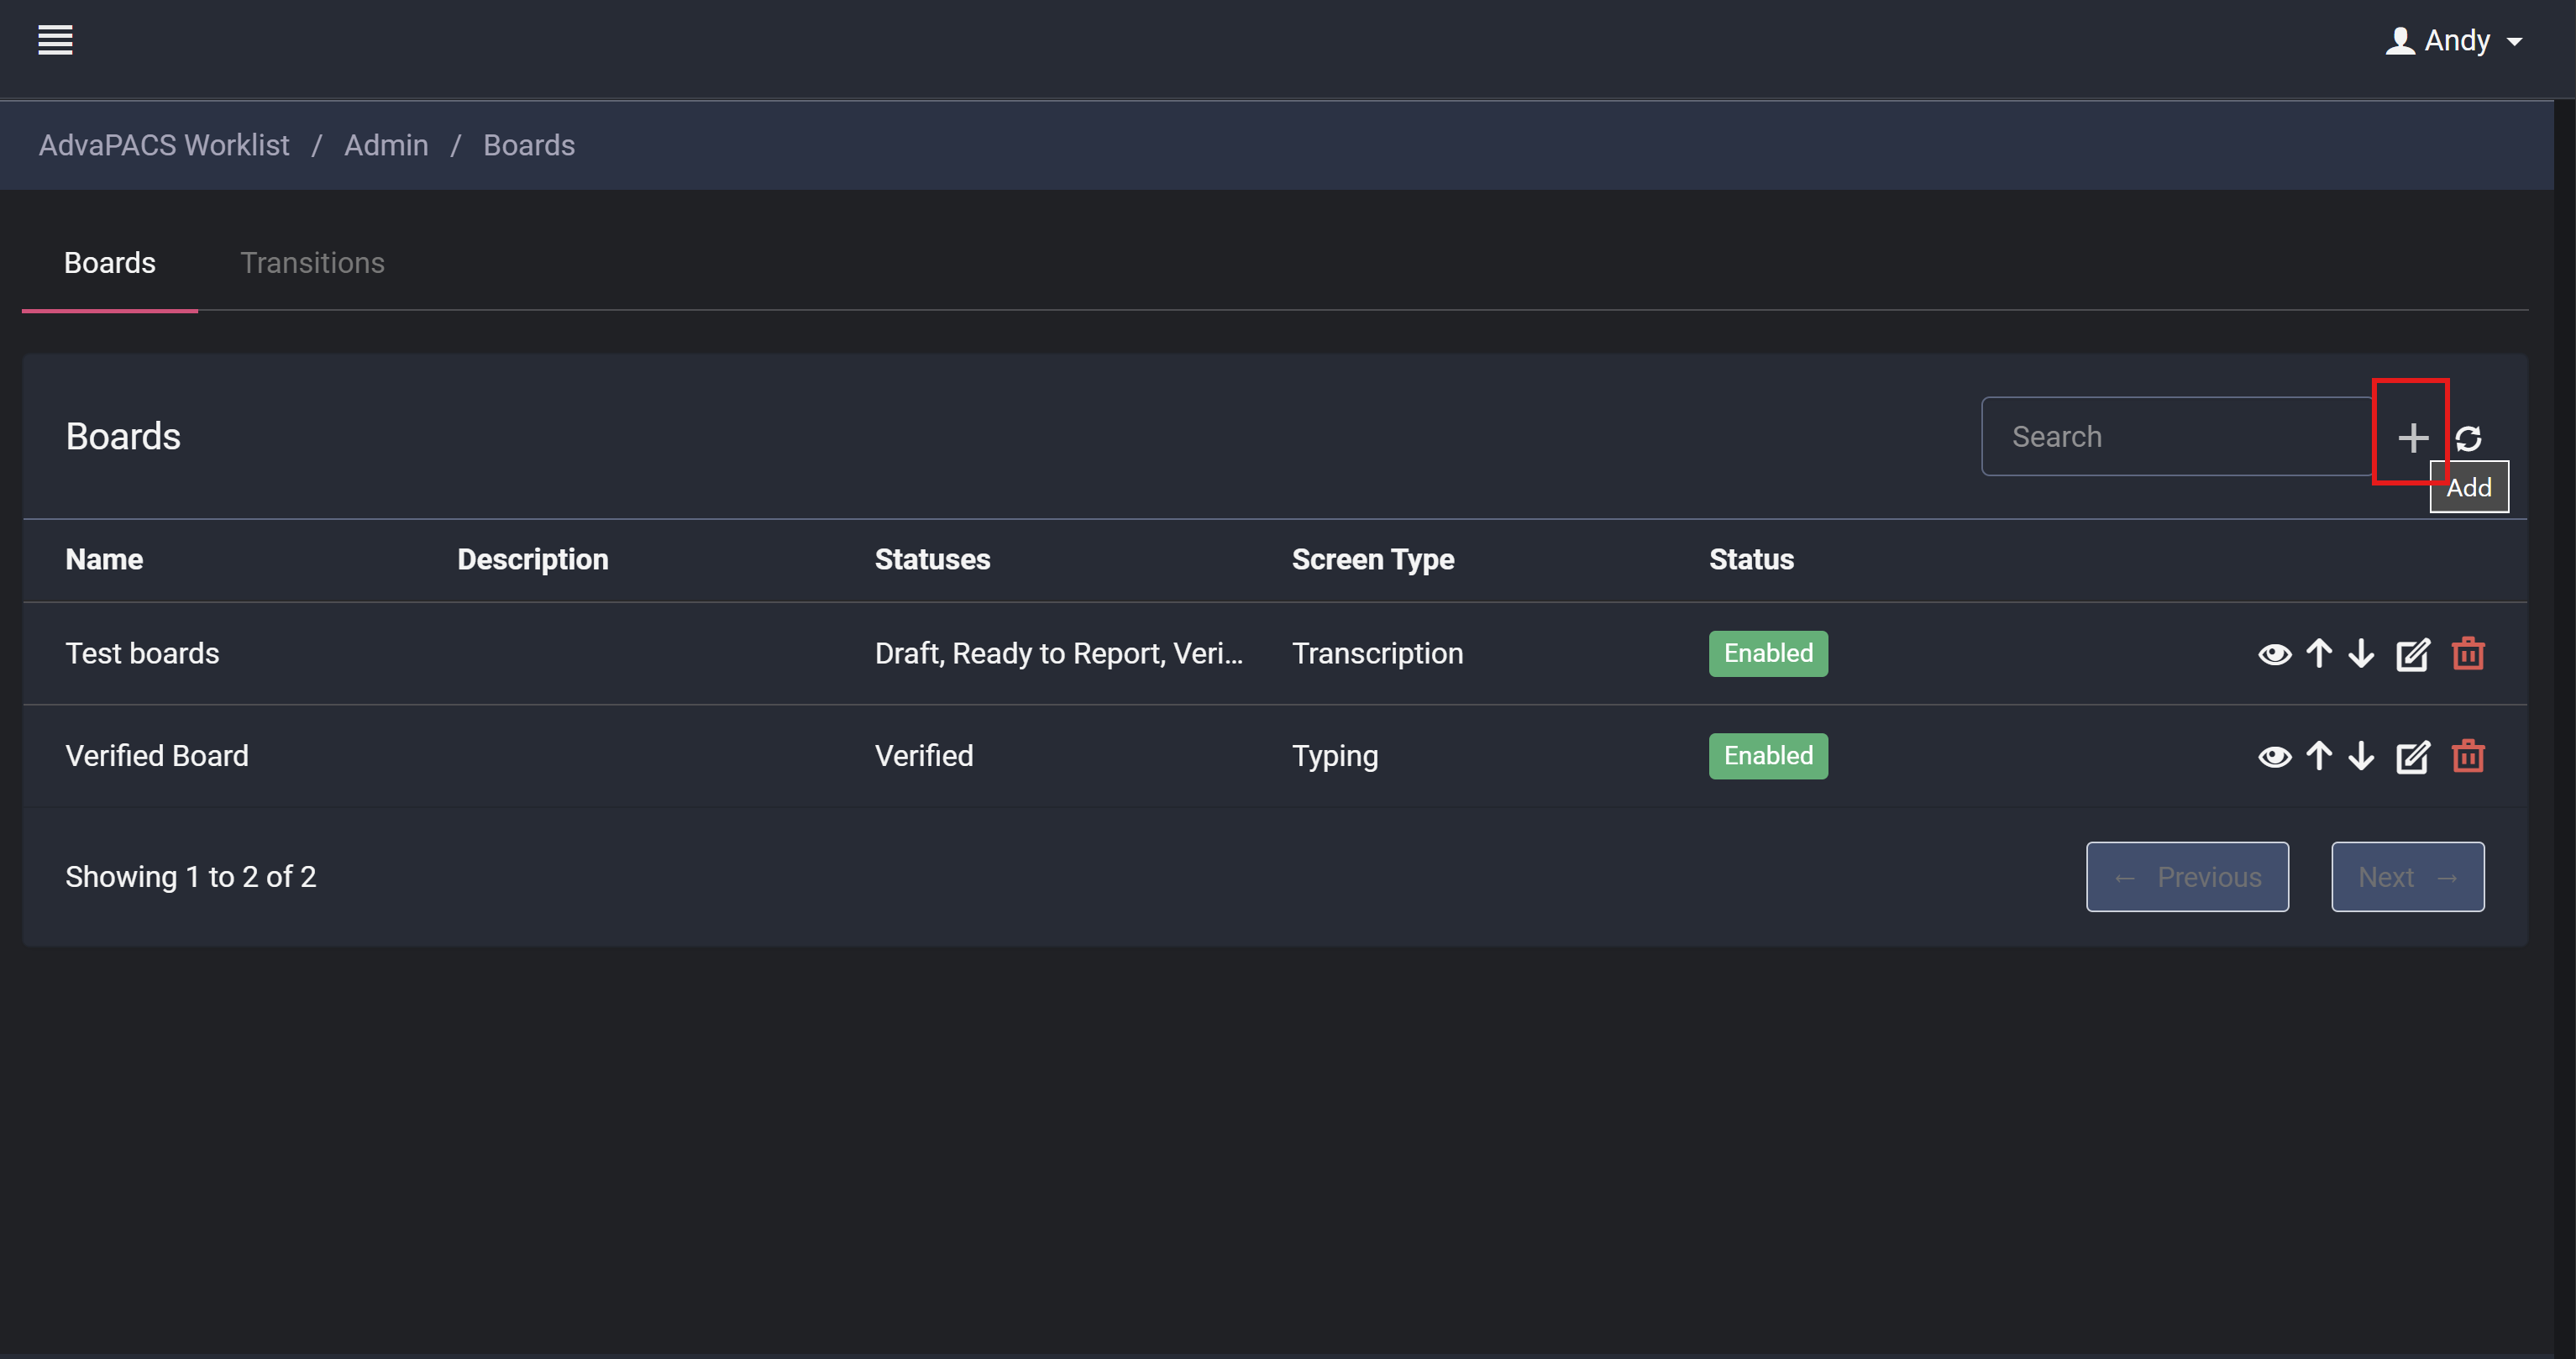
- Navigate to Admin > Boards.
- Click on the Add icon.
- You will be redirected to the Create Board screen, where you can configure the board.
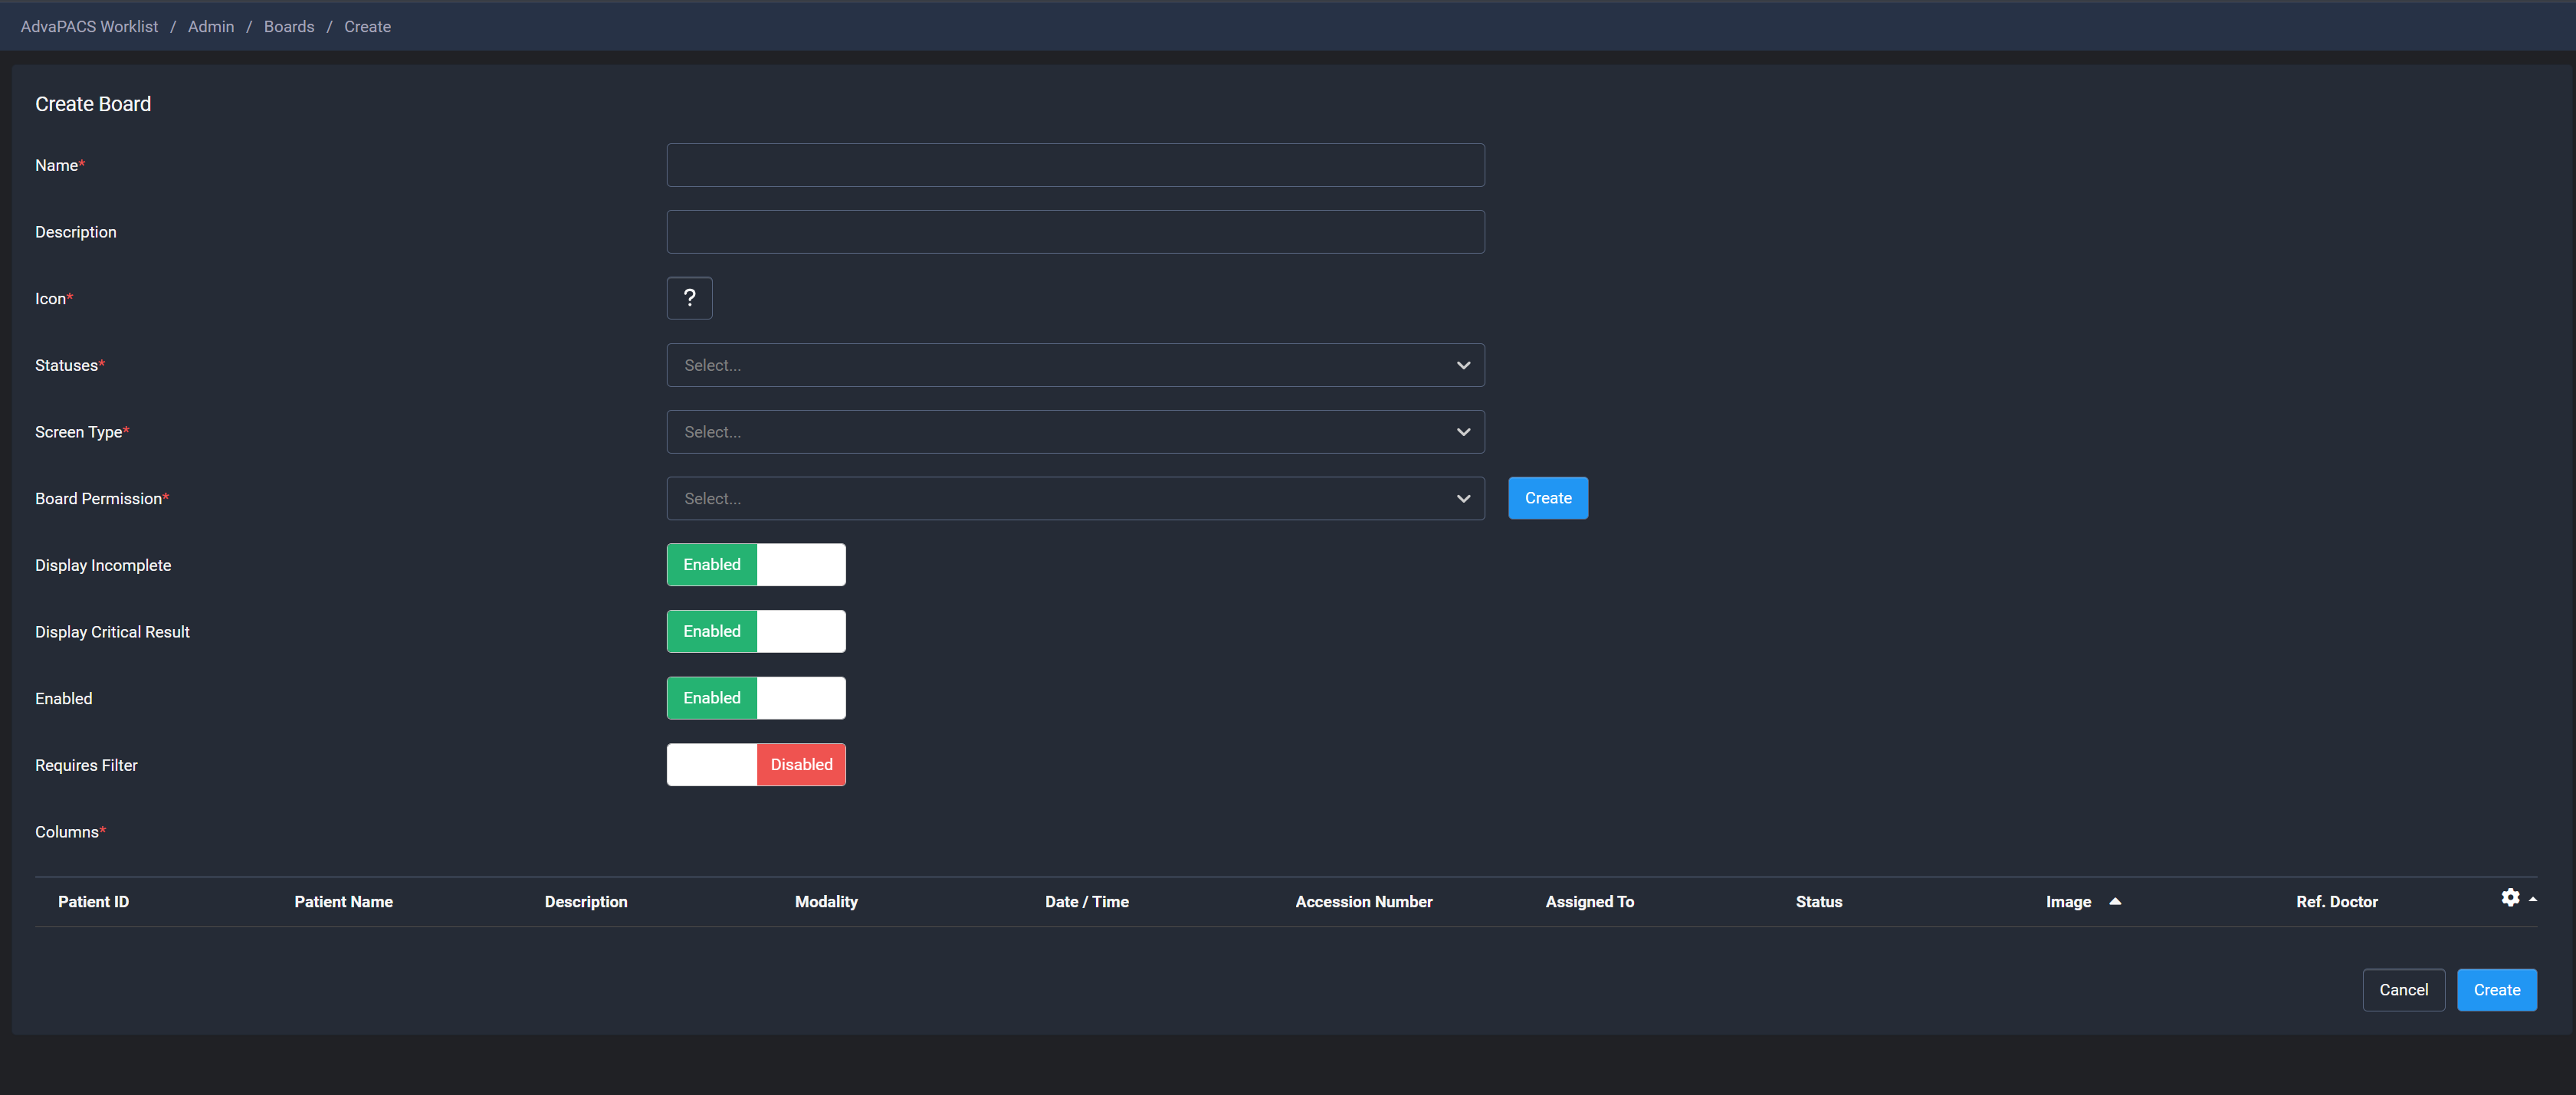
Board Configuration Options
- Name: Enter the board name.
- Description: Provide a description for the board.
- Icon: Select an icon for board identification.
- Statuses: Choose the order statuses that should be visible on the board (multiple selections allowed).
- Screen Type: Select a screen type (Dictation, Typing, or Transcription).
- Board Permission: Specify the required permission to access the board.
- Display Incomplete: Enable the Incomplete button on the board.
- Display Critical Result: Enable the Critical Result button on the board.
- Enabled: Toggle to activate or deactivate the board.
- Required Filter: Define whether a filter is mandatory for the board.
- Columns: Customize the default column listing. You can show/hide columns by clicking the Settings icon and reorder them using drag-and-drop.
Managing Boards
Once a board is created:
- It will appear in the Board Listing screen.
- It will be displayed in the left menu for users with the appropriate permission.
Assigning Permissions
If you create a new permission for the board, ensure that users have access to it:
- Navigate to Admin > Users > Roles.
- Select the relevant role.
- Navigate to Boards and assign the newly created permission.
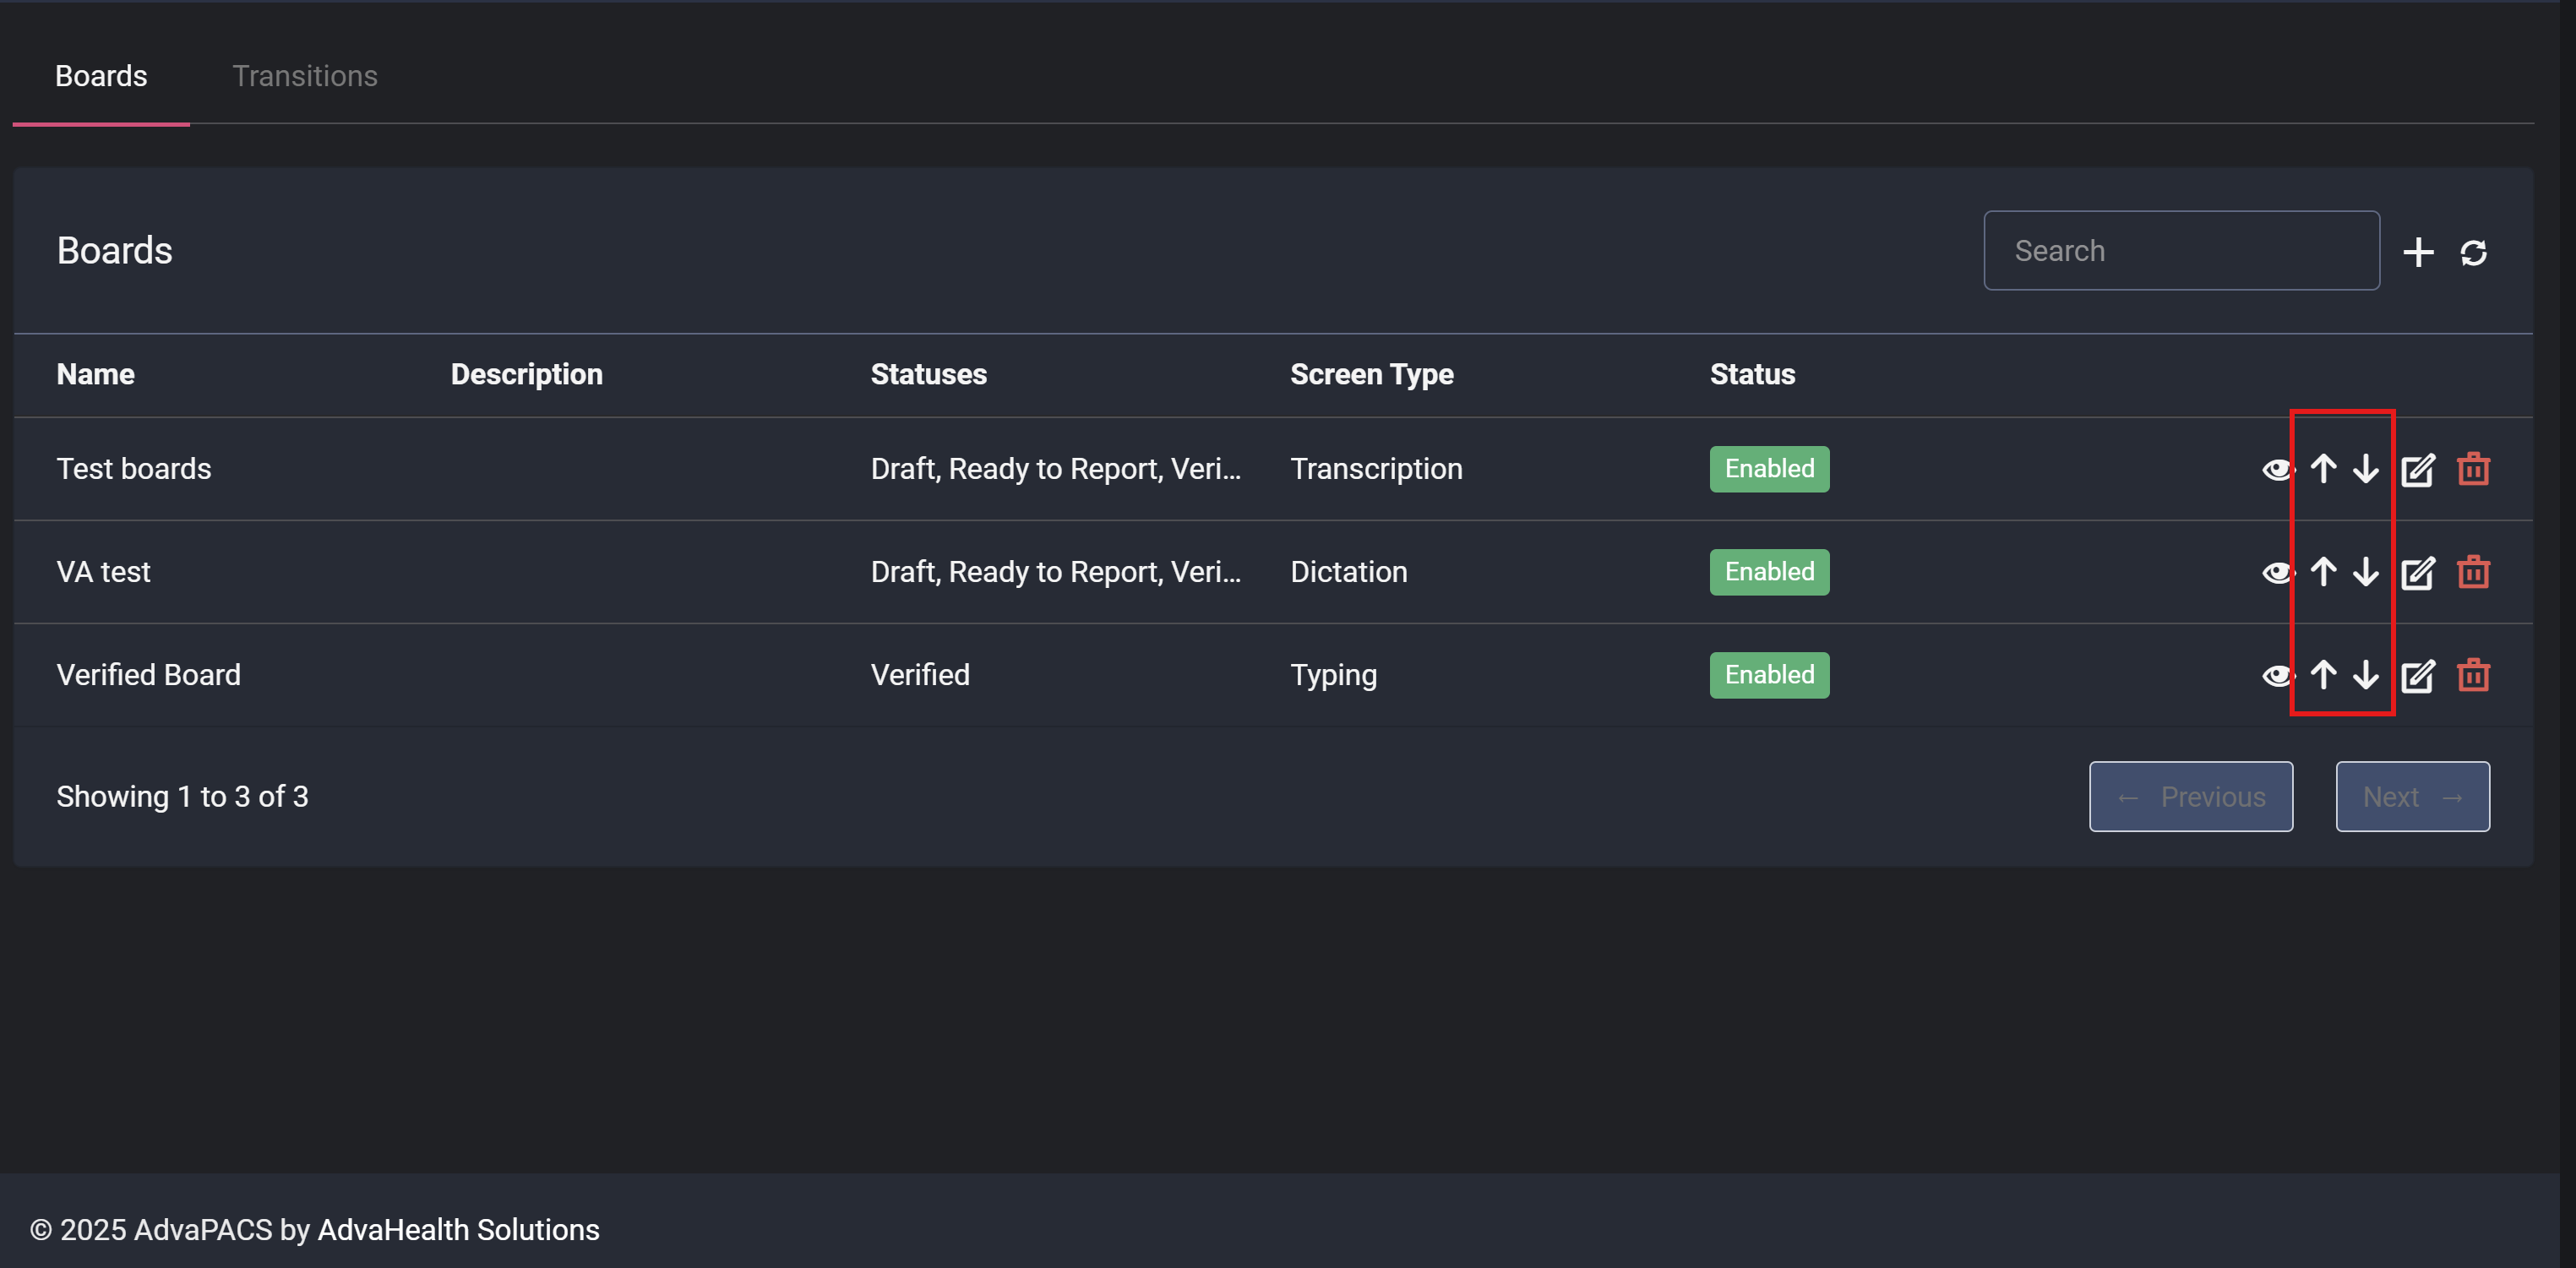
Reordering Boards
You can change the order of boards in the left menu by adjusting their position in the Board Listing.
Transition Buttons
Each board allows you to define Transition Buttons to update the status of worklist orders and reports.
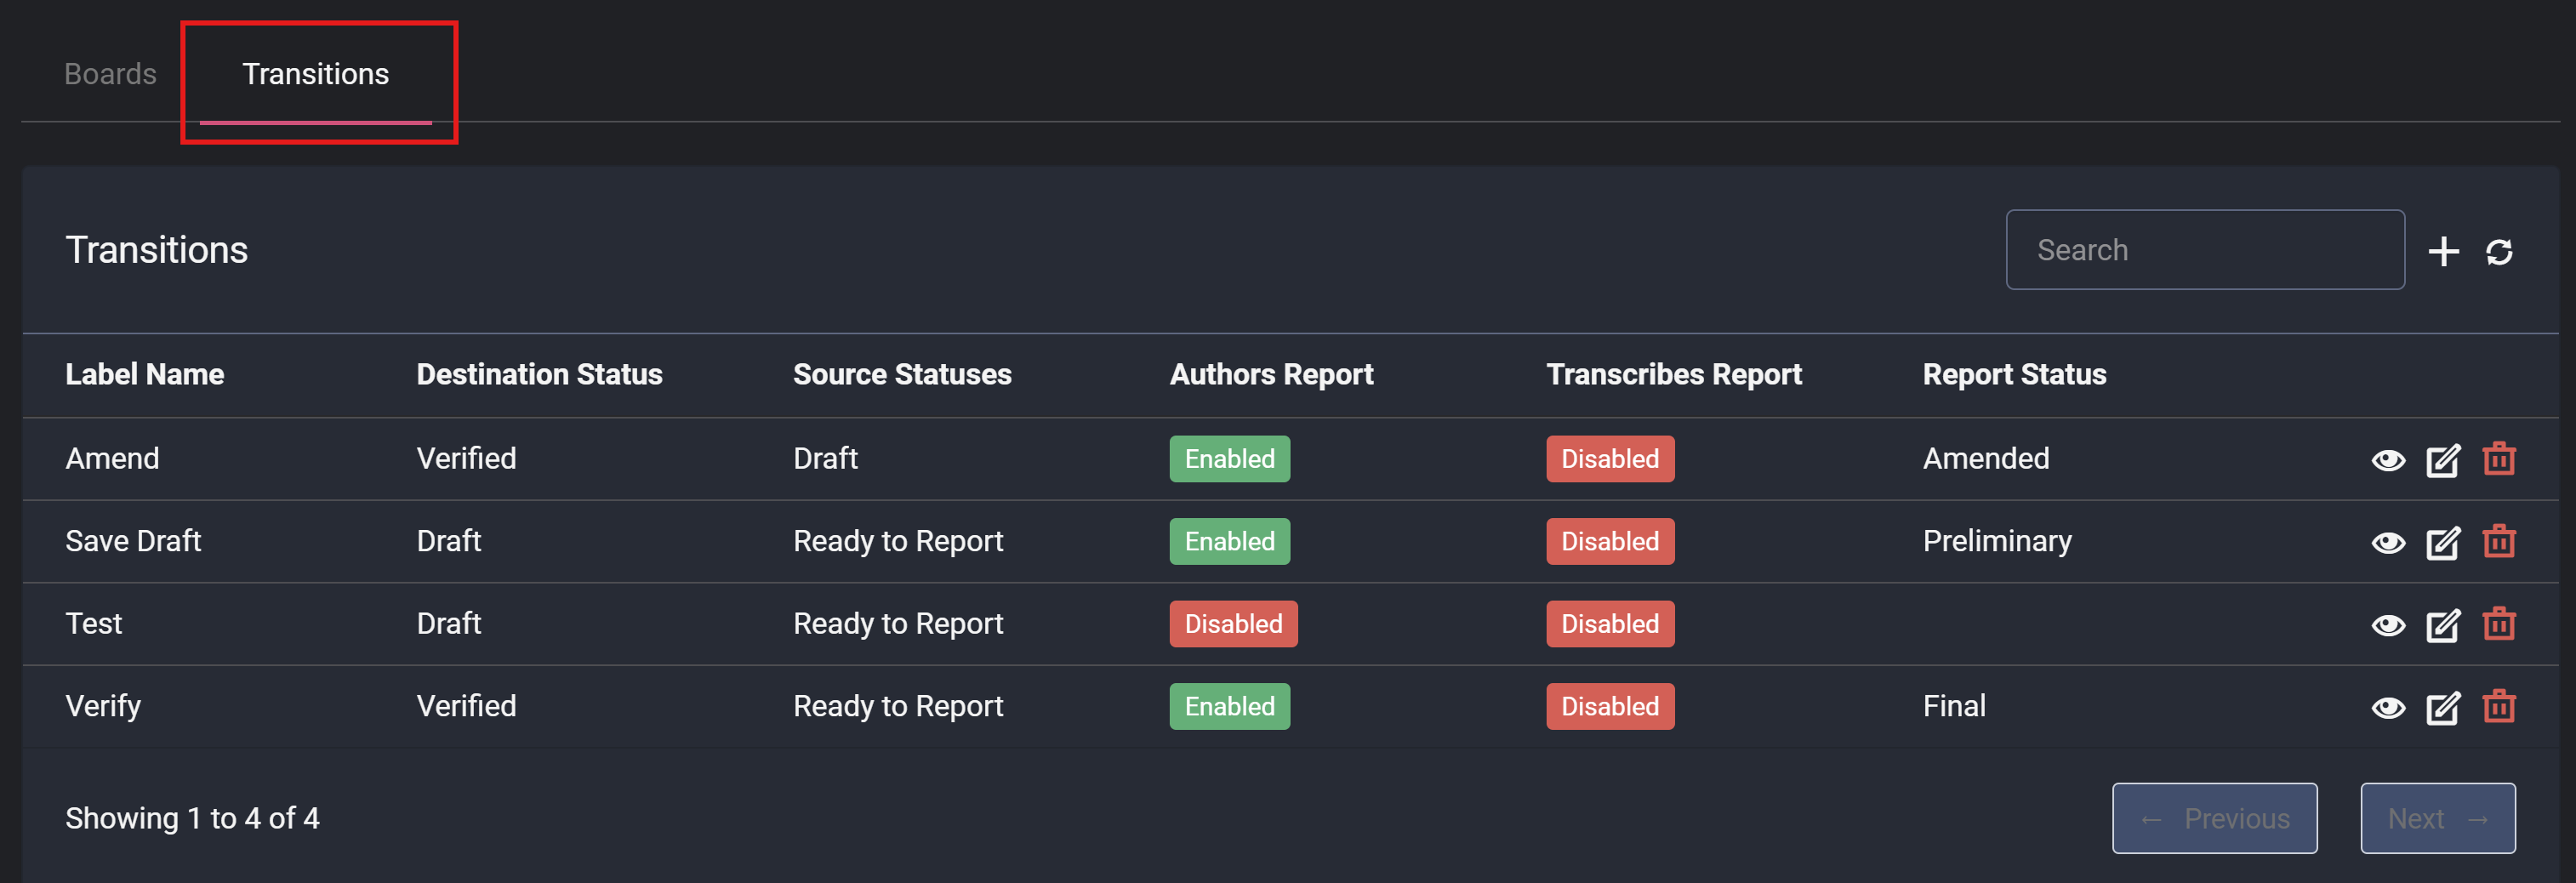
Creating a Transition Button
- Navigate to the Transitions tab.
- Click the Add icon.
Configuring a Transition Button
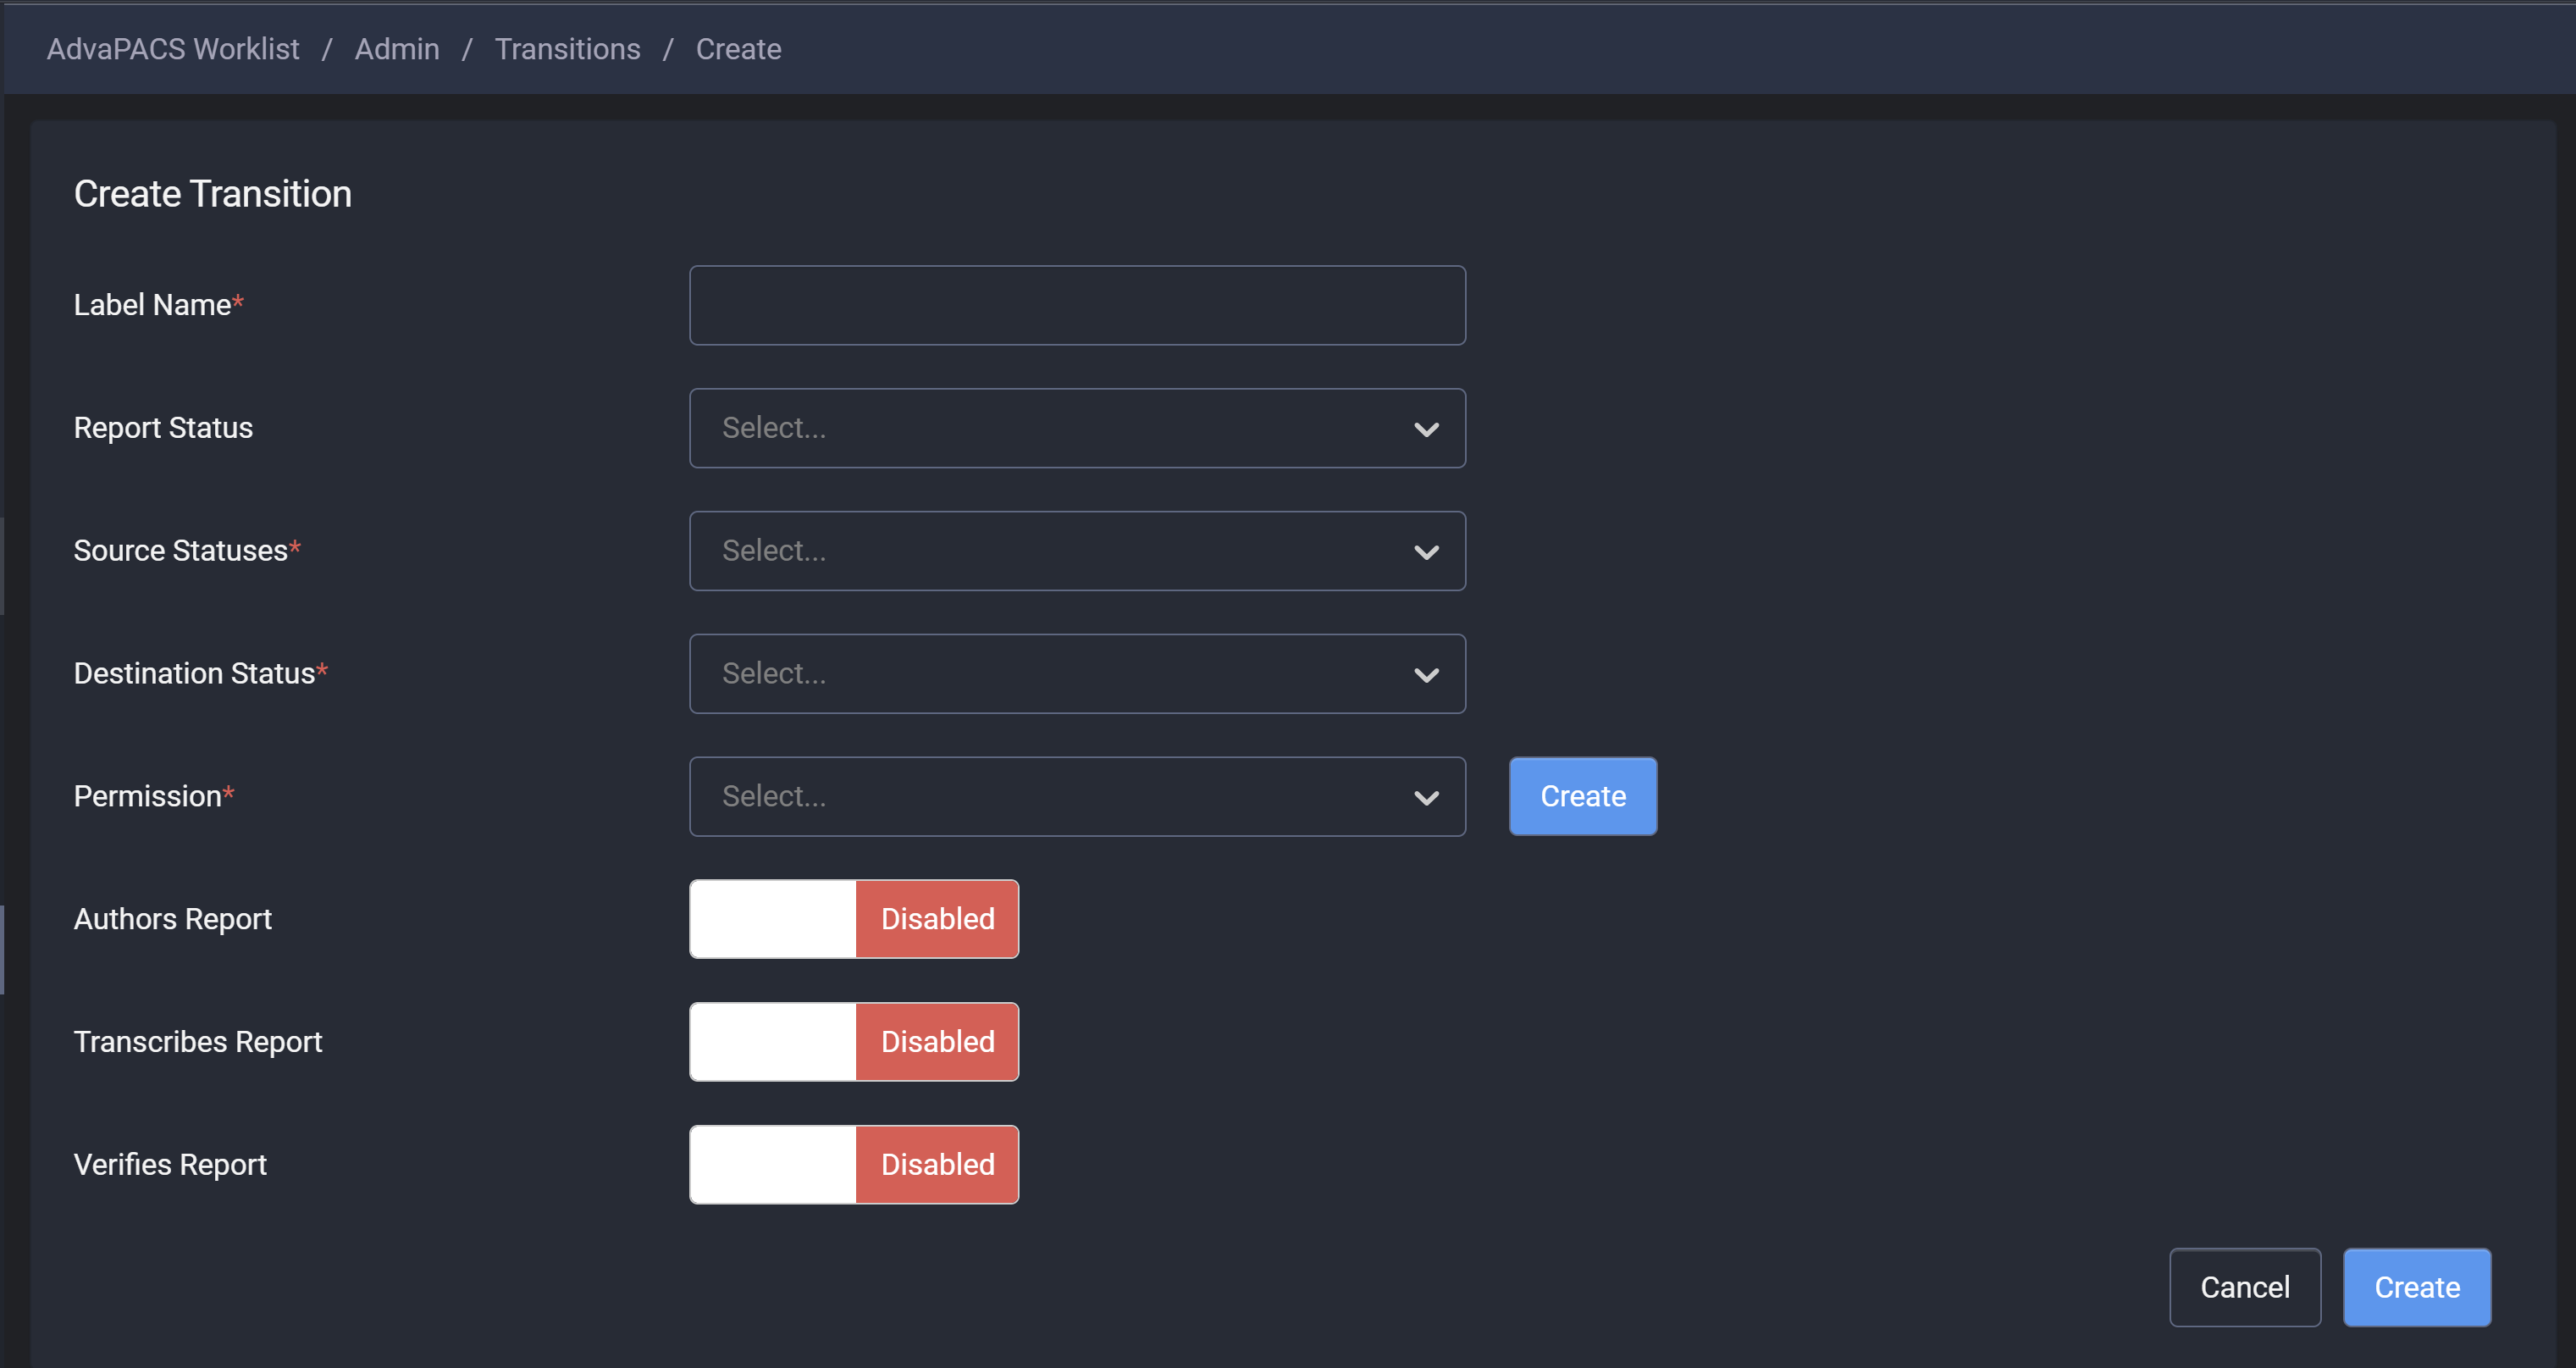
On the Create Transition screen, define the following details:
- Label Name: The name of the button.
- Report Status: The status of the generated report after clicking the button.
- Source Statuses: The initial status of the order. The button is visible only for orders with these statuses.
- Destination Statuses: The updated status of the order after selecting the button.
- Permission: Specify the required permission to access the button.
- Author Report: The user name is auto assigned as "Reported By" in the report when using this button.
- Transcribes Report: The user name is auto assigned as "Transcribed By" in the report when using this button.
- Verifies Report: The user name is auto assigned as "Verified By" in the report when using this button.
Once created, the button will appear in the Transition Listing screen.
Assigning Permissions
If you create a new permission for a transition button, ensure users have the necessary access:
- Navigate to Admin > Users > Roles.
- Select the relevant role.
- Navigate to Workflow and assign the newly created permission.
To ensure a smooth workflow, every board must have at least one transition button. Without it, user actions will not be saved.