How to Create Routing Rules
This article guides you through the process of creating Routing Rules. Before you begin, we recommend that you have a basic understanding of it.
Steps
-
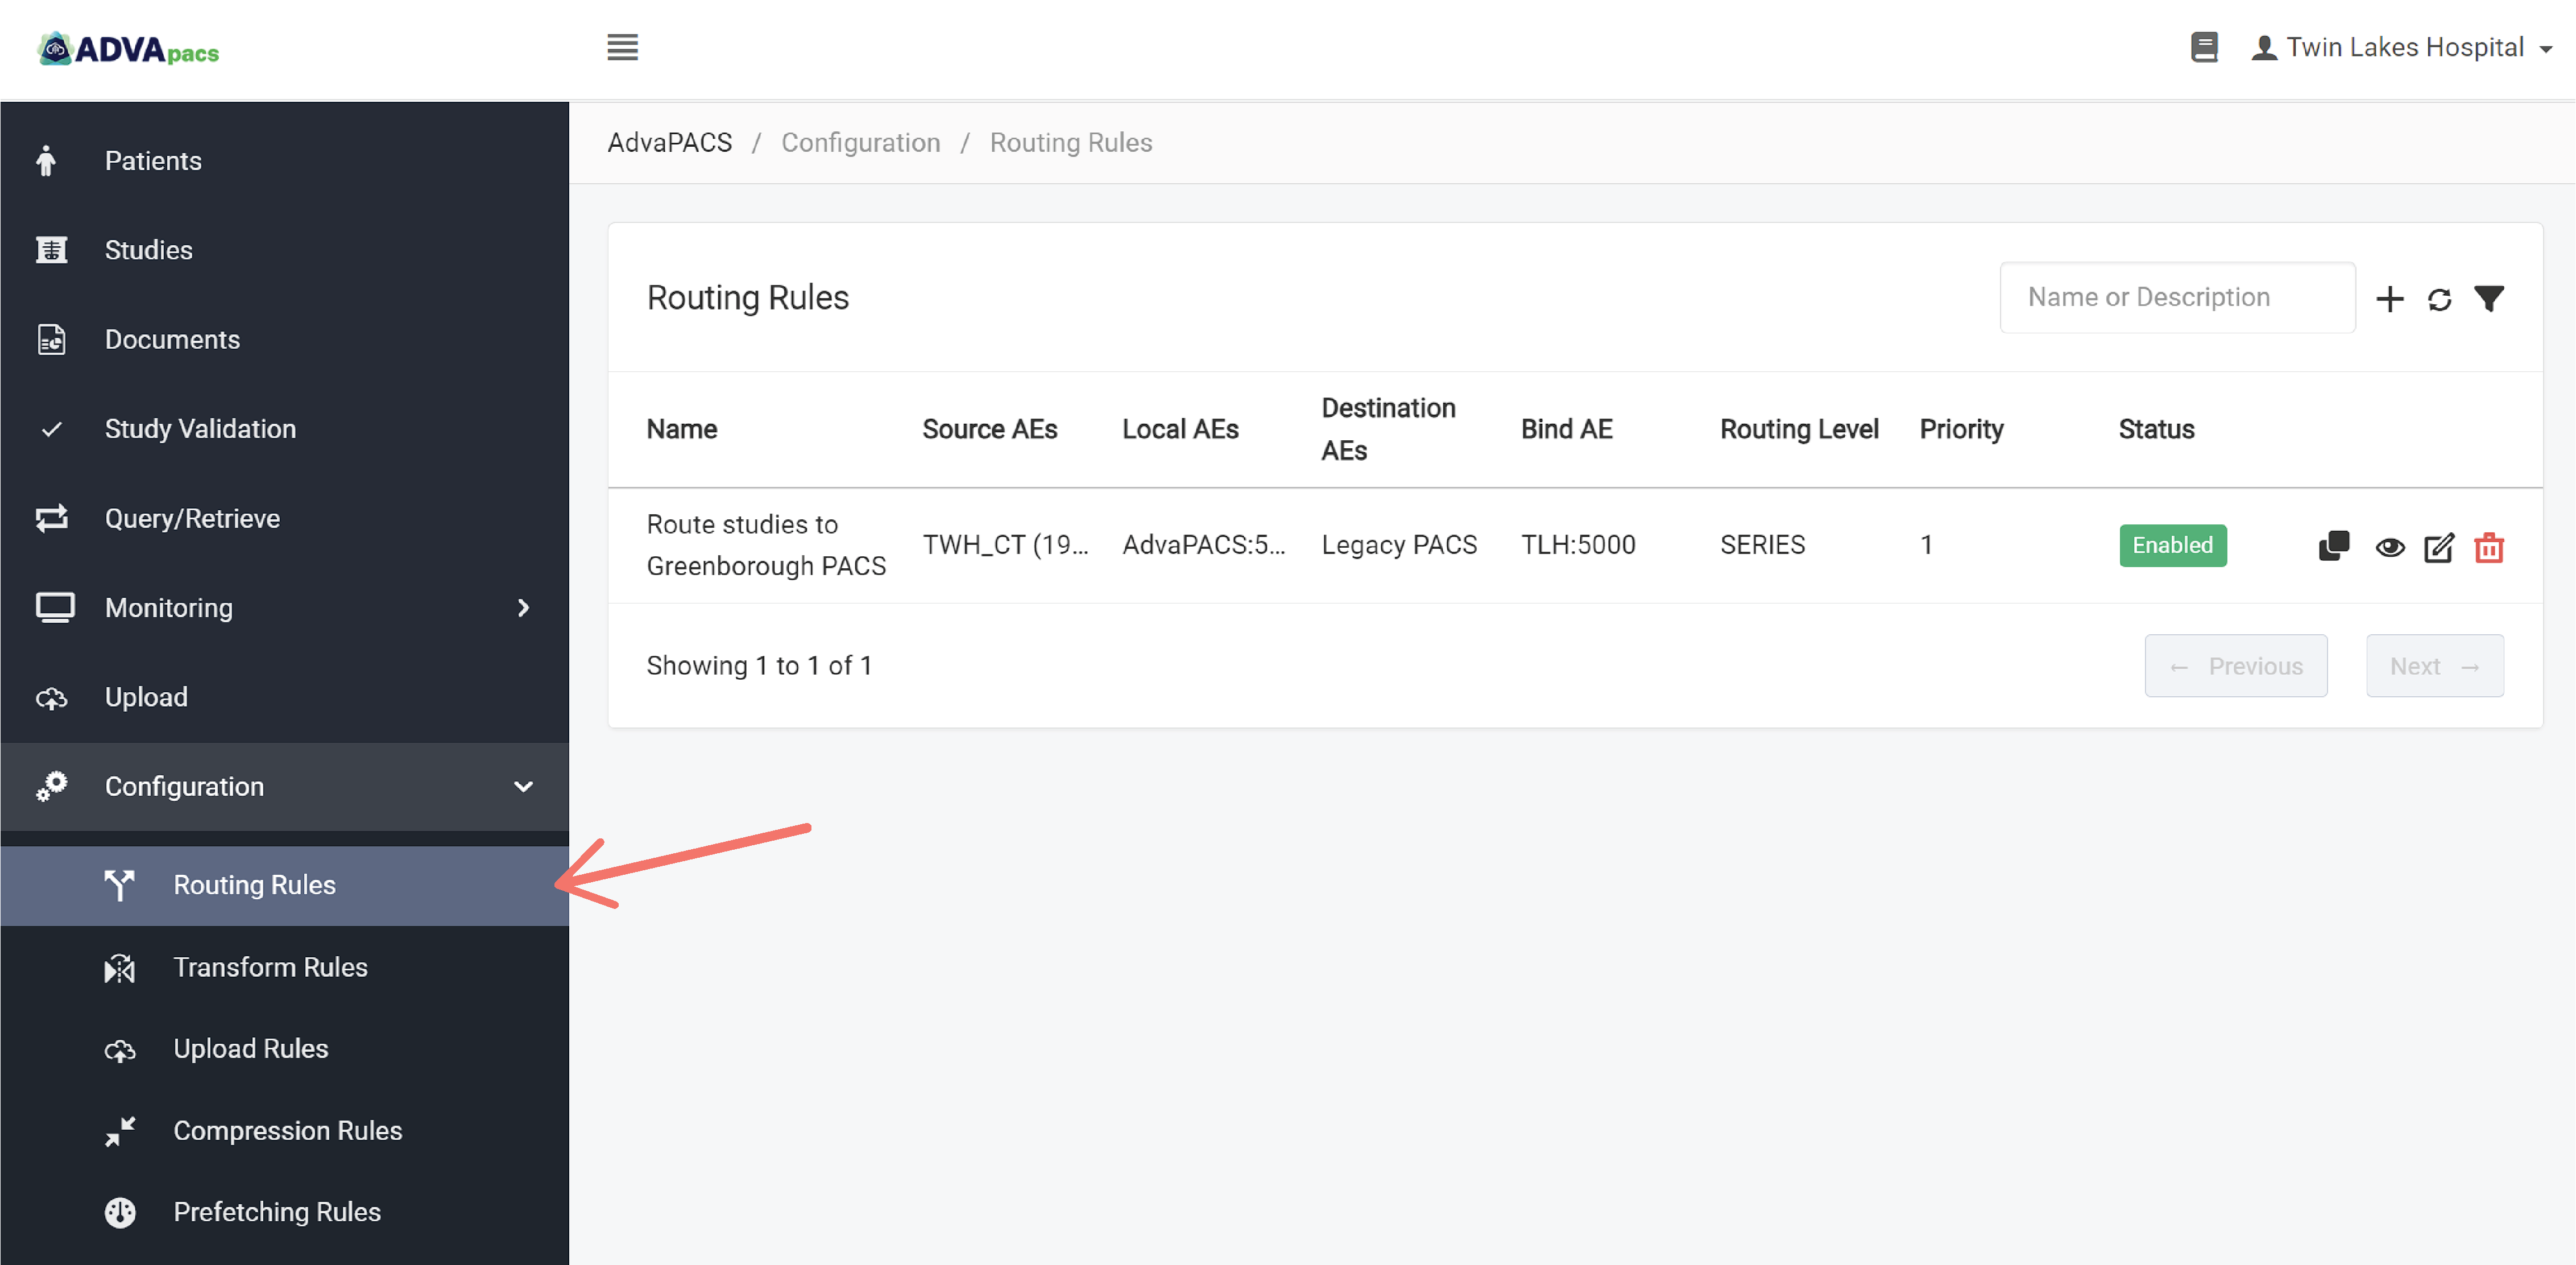
Navigate to the Routing Rules page. Click Configuration on the left sidebar, and click Routing Rules.
-
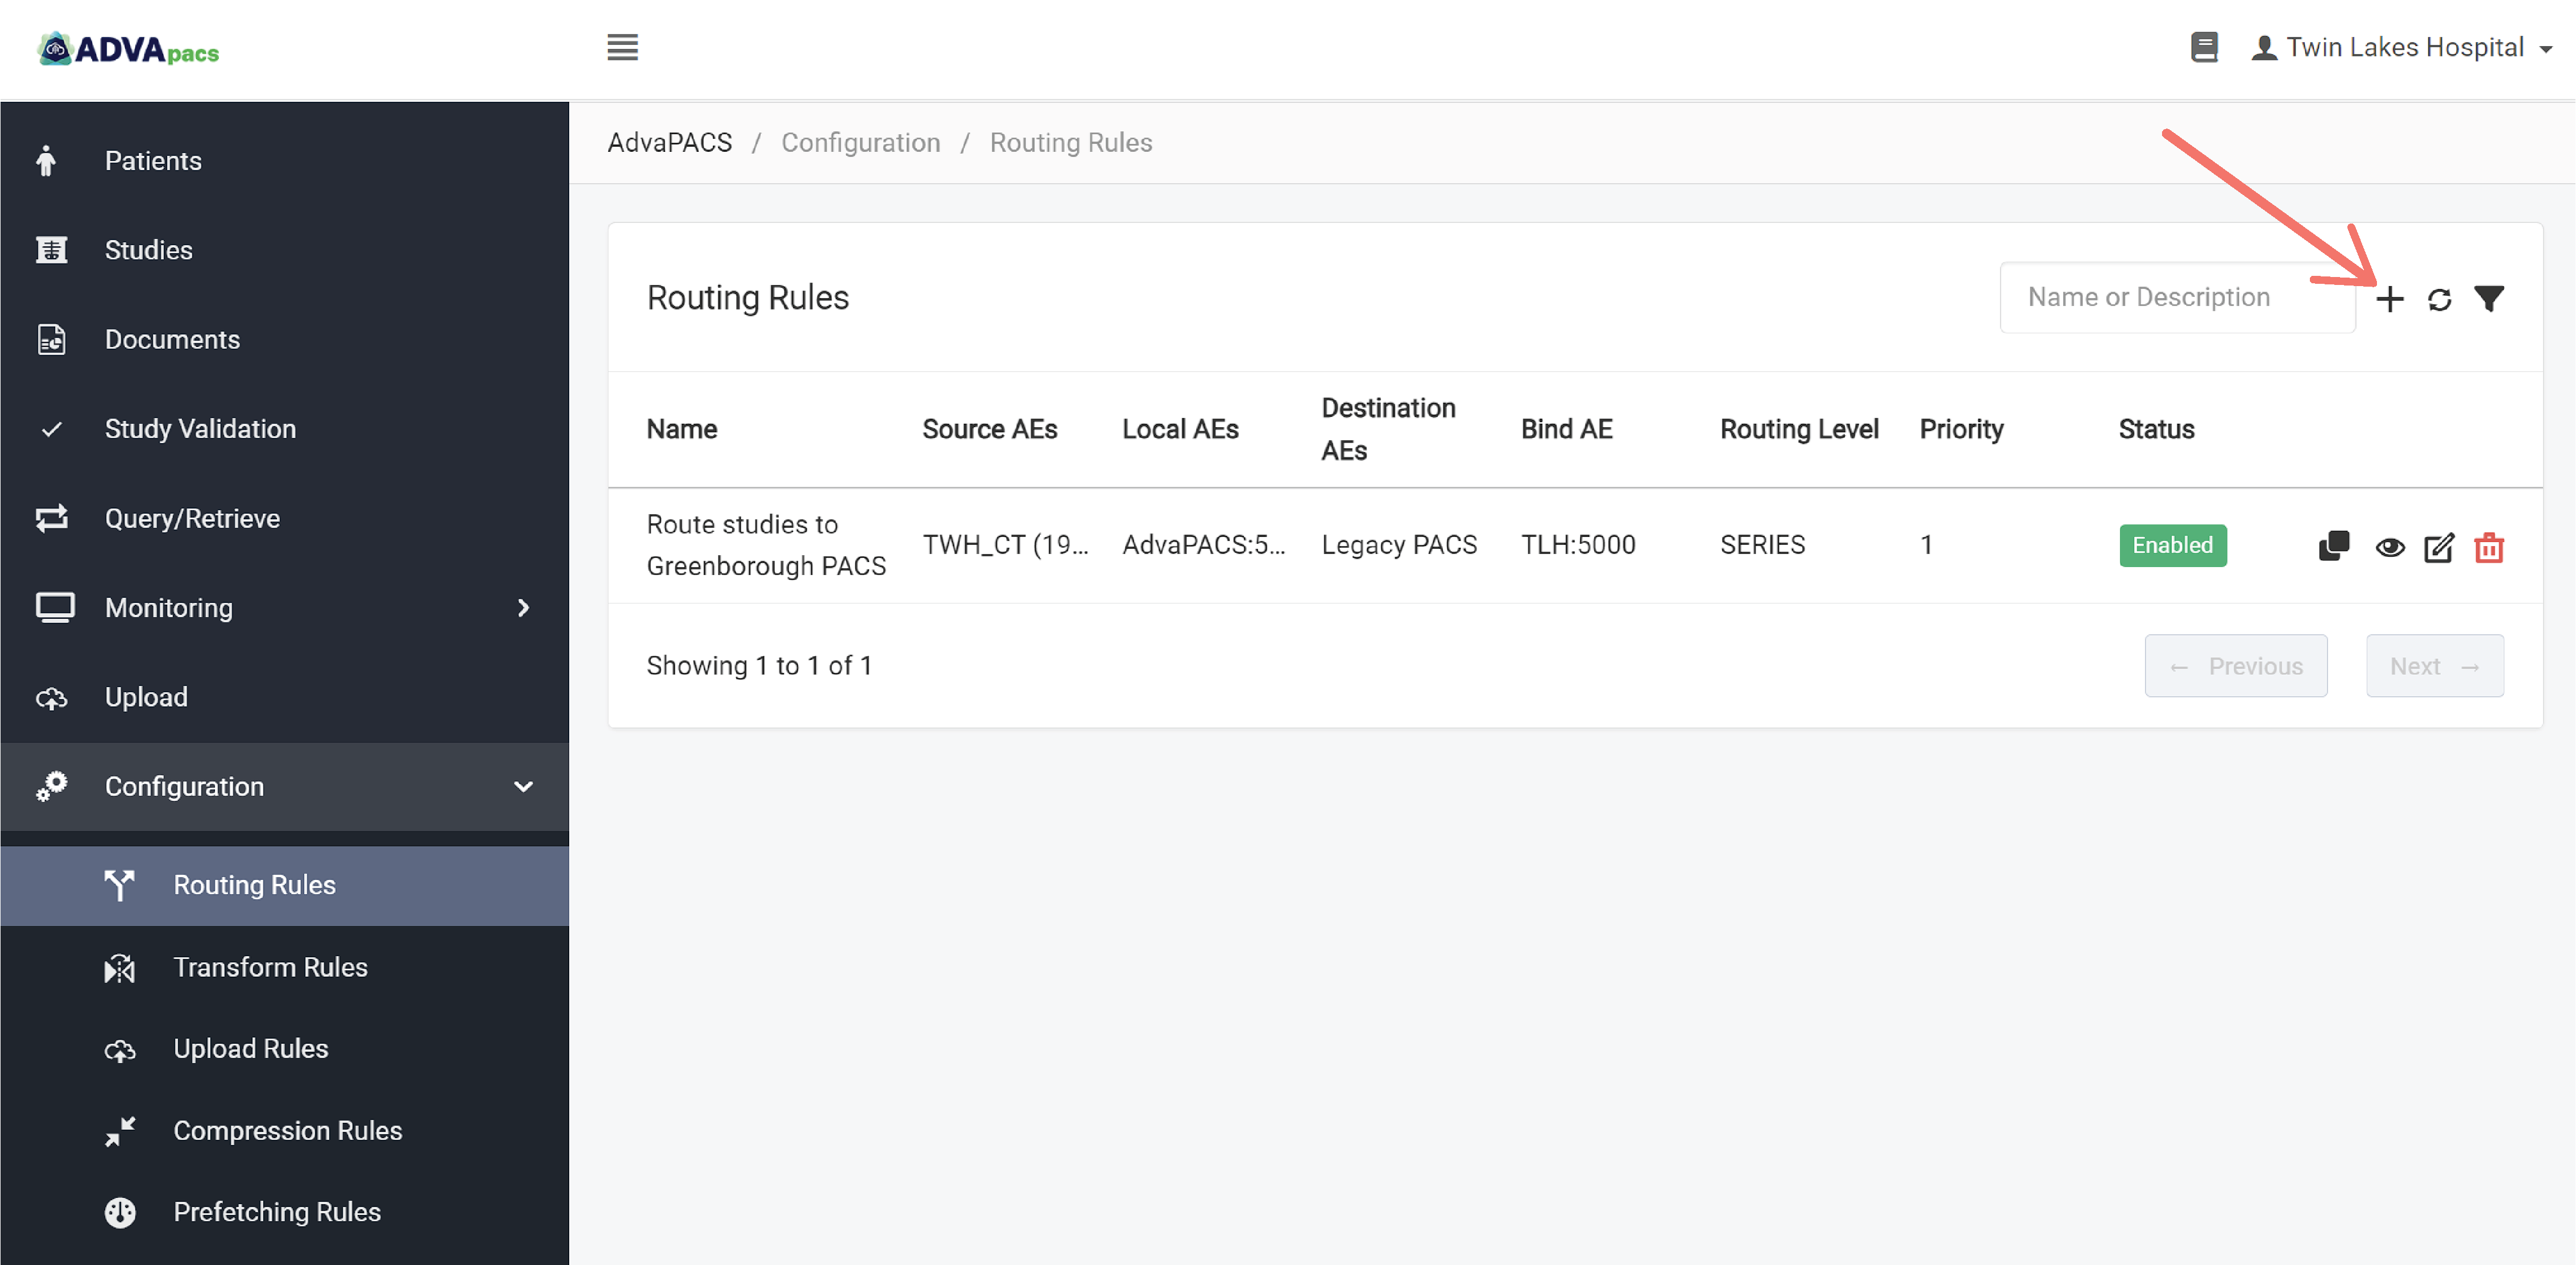
Click on the "+" icon to create a new rule.
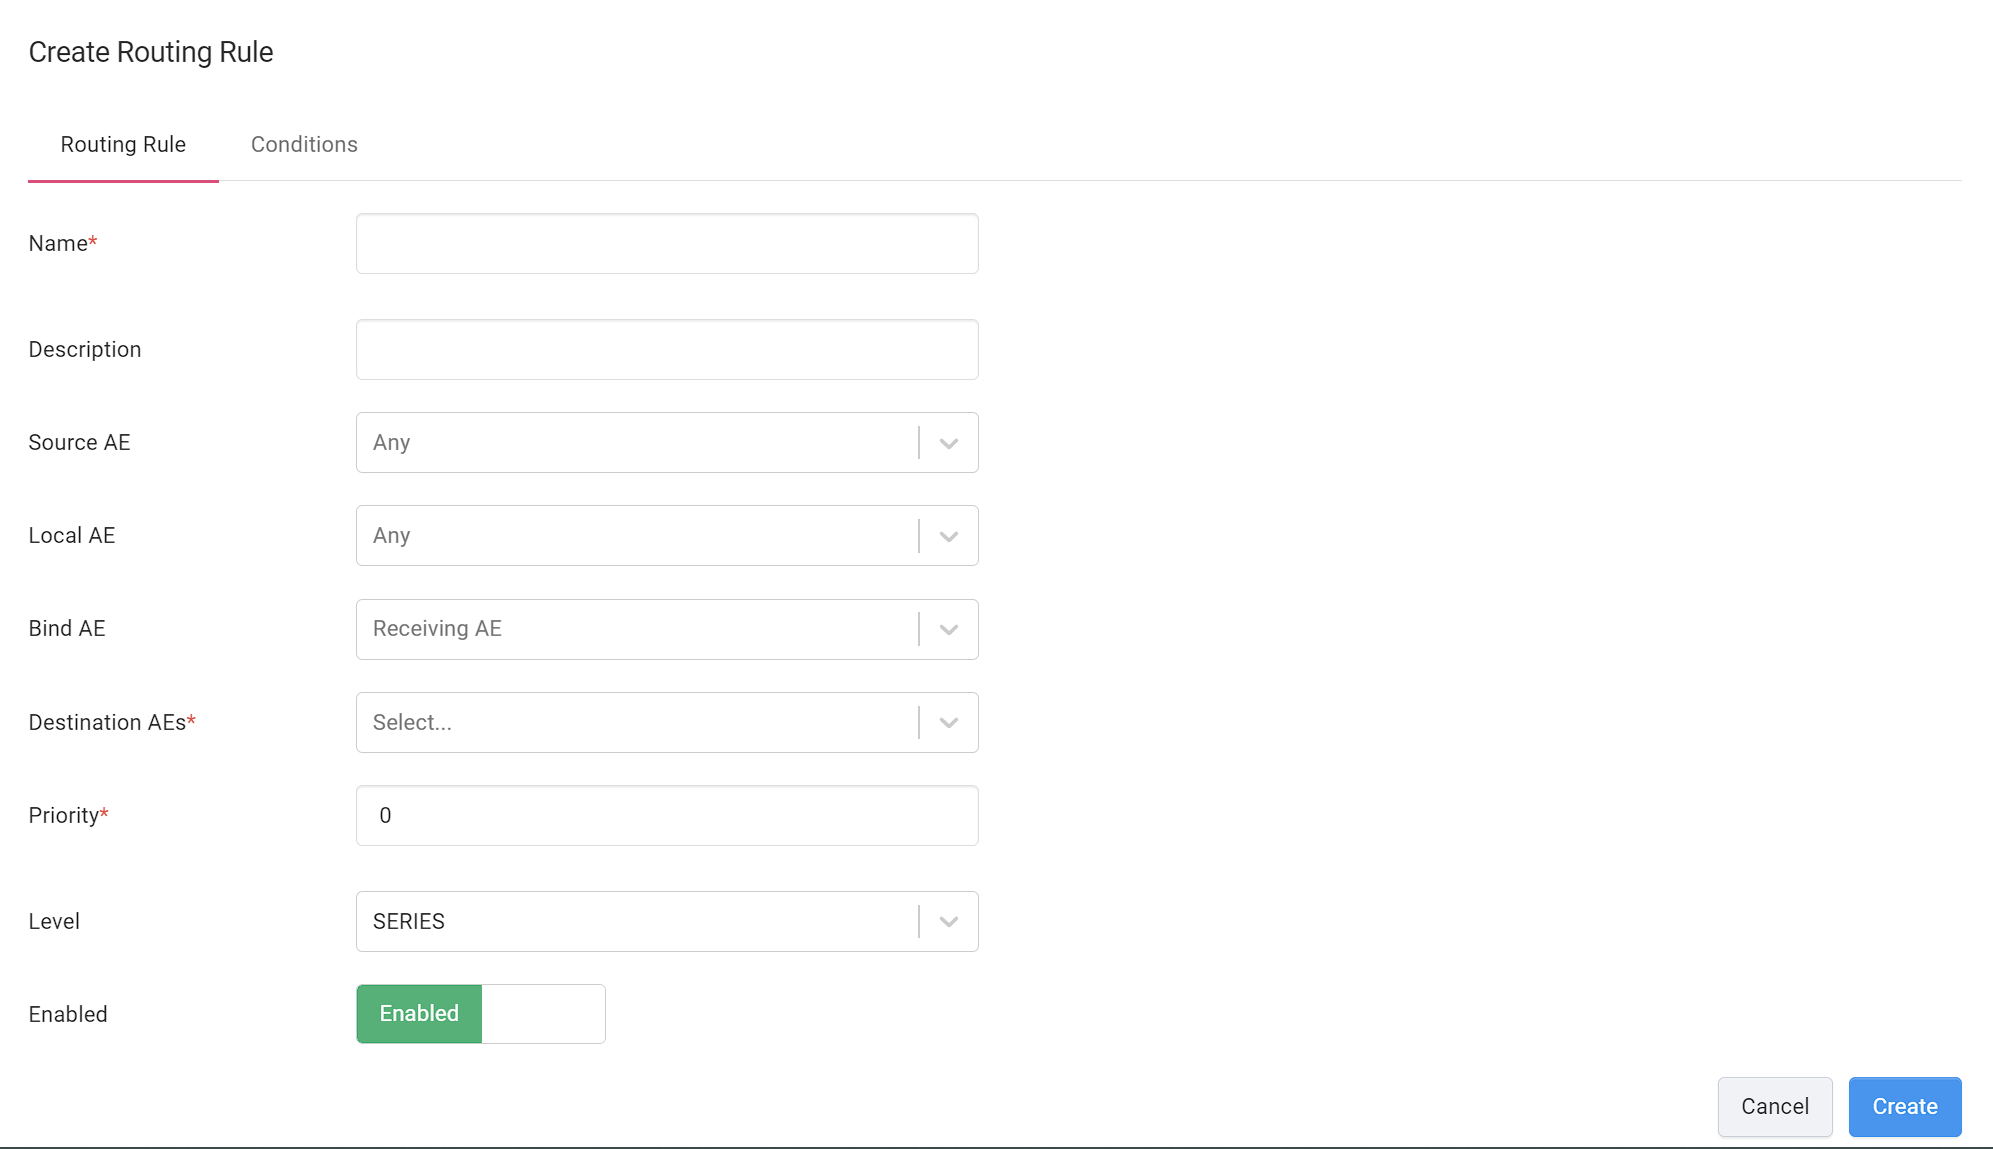
A Routing Rule is composed of two configurations separated into different sections.
This tutorial is divided into these sections and contains prompts to help you systematically create a routing rule.
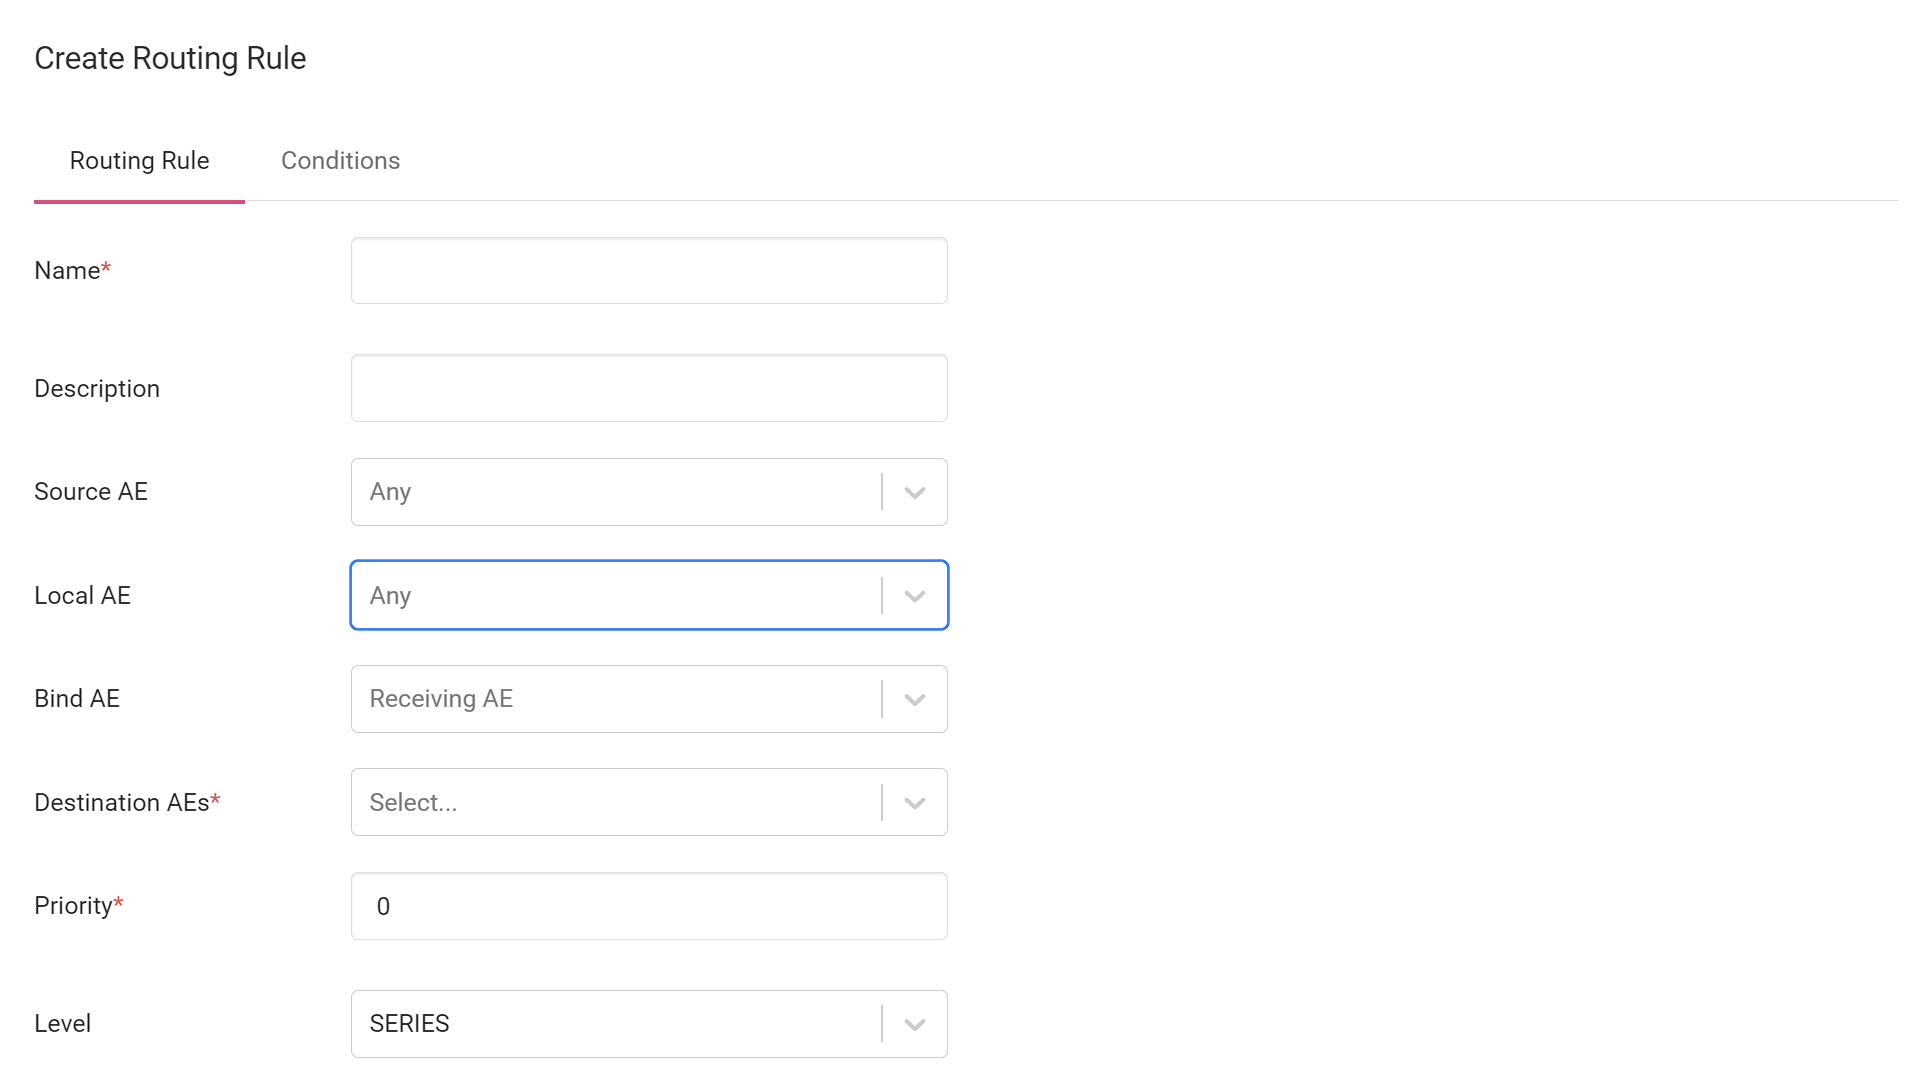
Routing Rule
-
Enter your rule's Name and Description.
-
What is the Remote AE of origin of the DICOM instances you want to route?
Your answer determines the appropriate Source AE to specify in the rule.
Click on the Source AE dropdown menu and select one or more Source AEs.
-
What is the Local AE that the instances pass through as they are uploaded from the Source AE to AdvaPACS?
Click on the Local AE dropdown menu and select one or more Local AEs.
-
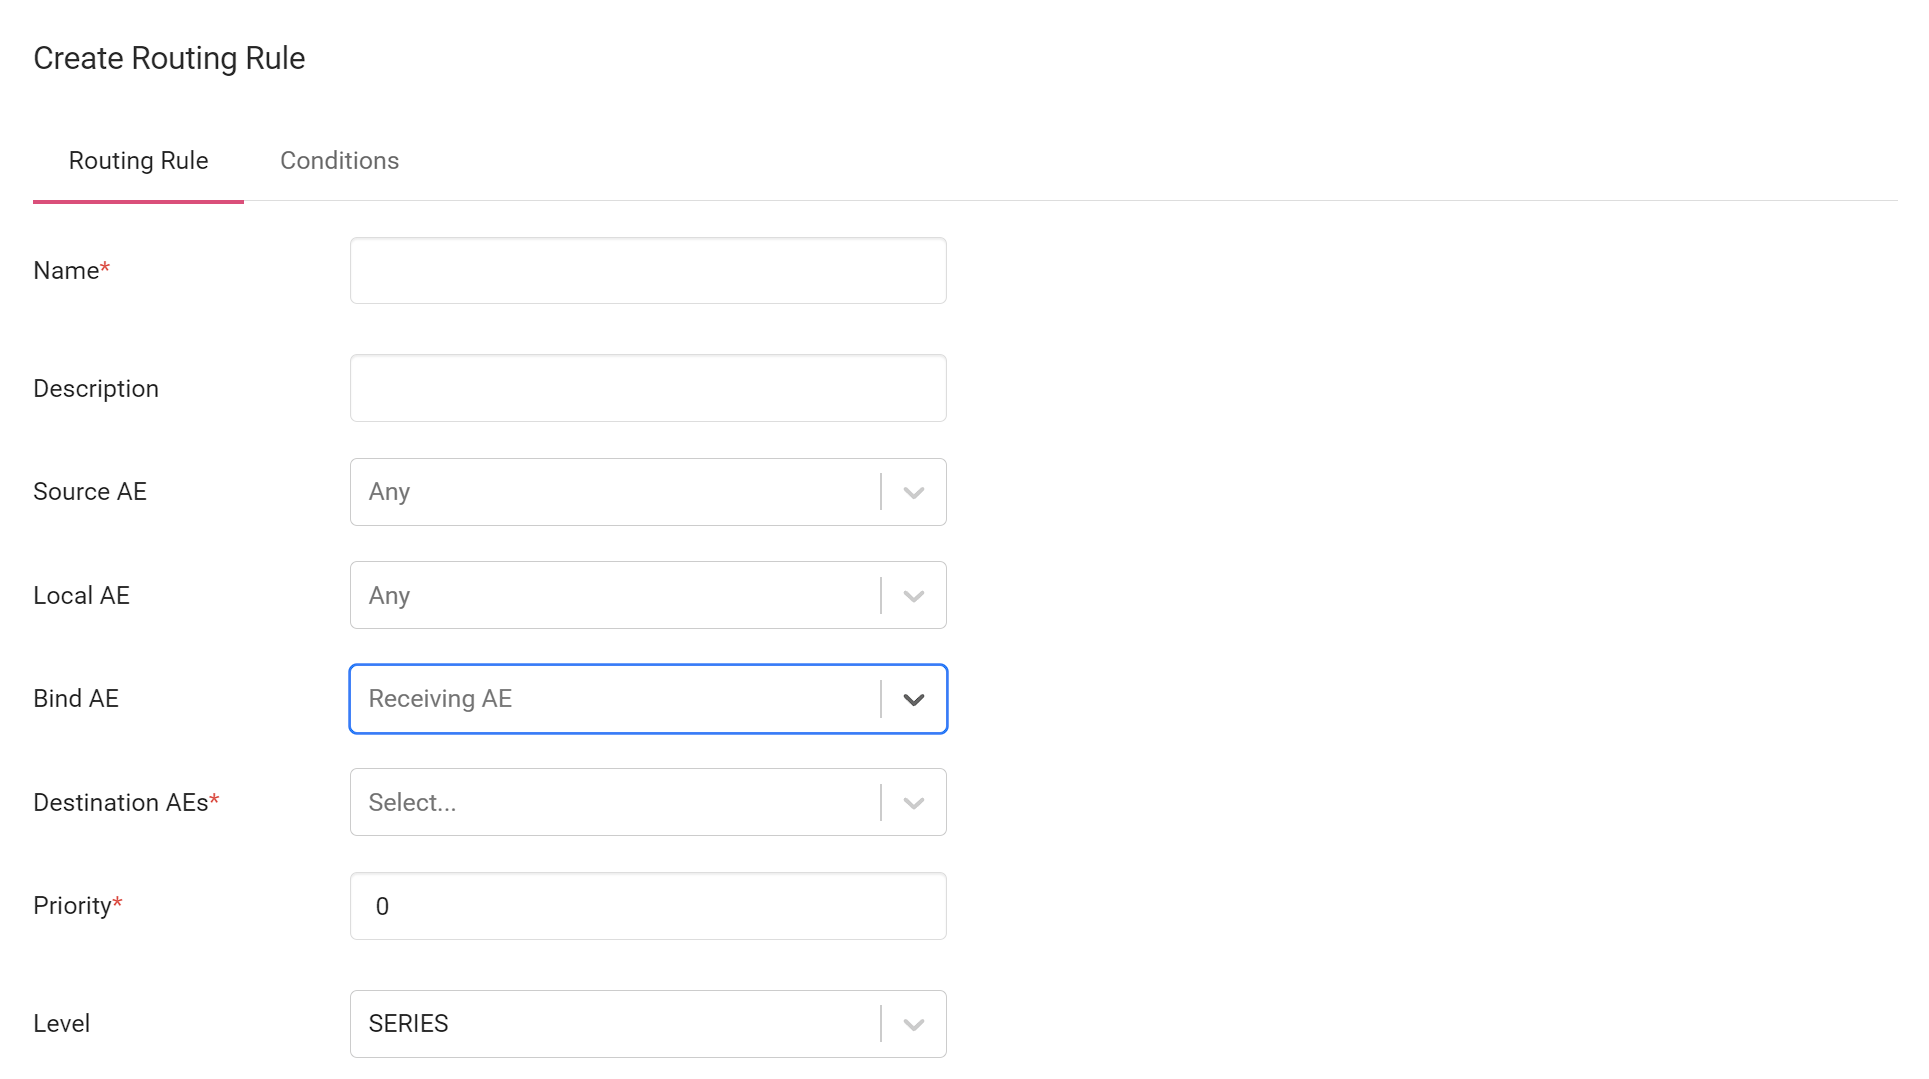
What is the Local AE that routes the instances to the Destination AE?
Your answer determines the appropriate Bind AE to specify in the rule.
Click on the Bind AE dropdown menu and select one or more Bind AEs.
-
What is the Remote AE where the filtered instances will be routed to?
Your answer determines the appropriate Destination AE to specify in the rule.
Click on the Destination AE dropdown menu and select one or more Destination AEs.

-
Set the rule's priority. Select a number from 1 to 100, with 100 being the highest and 1 being the lowest priority.
Enter a number on the Priority input.

-
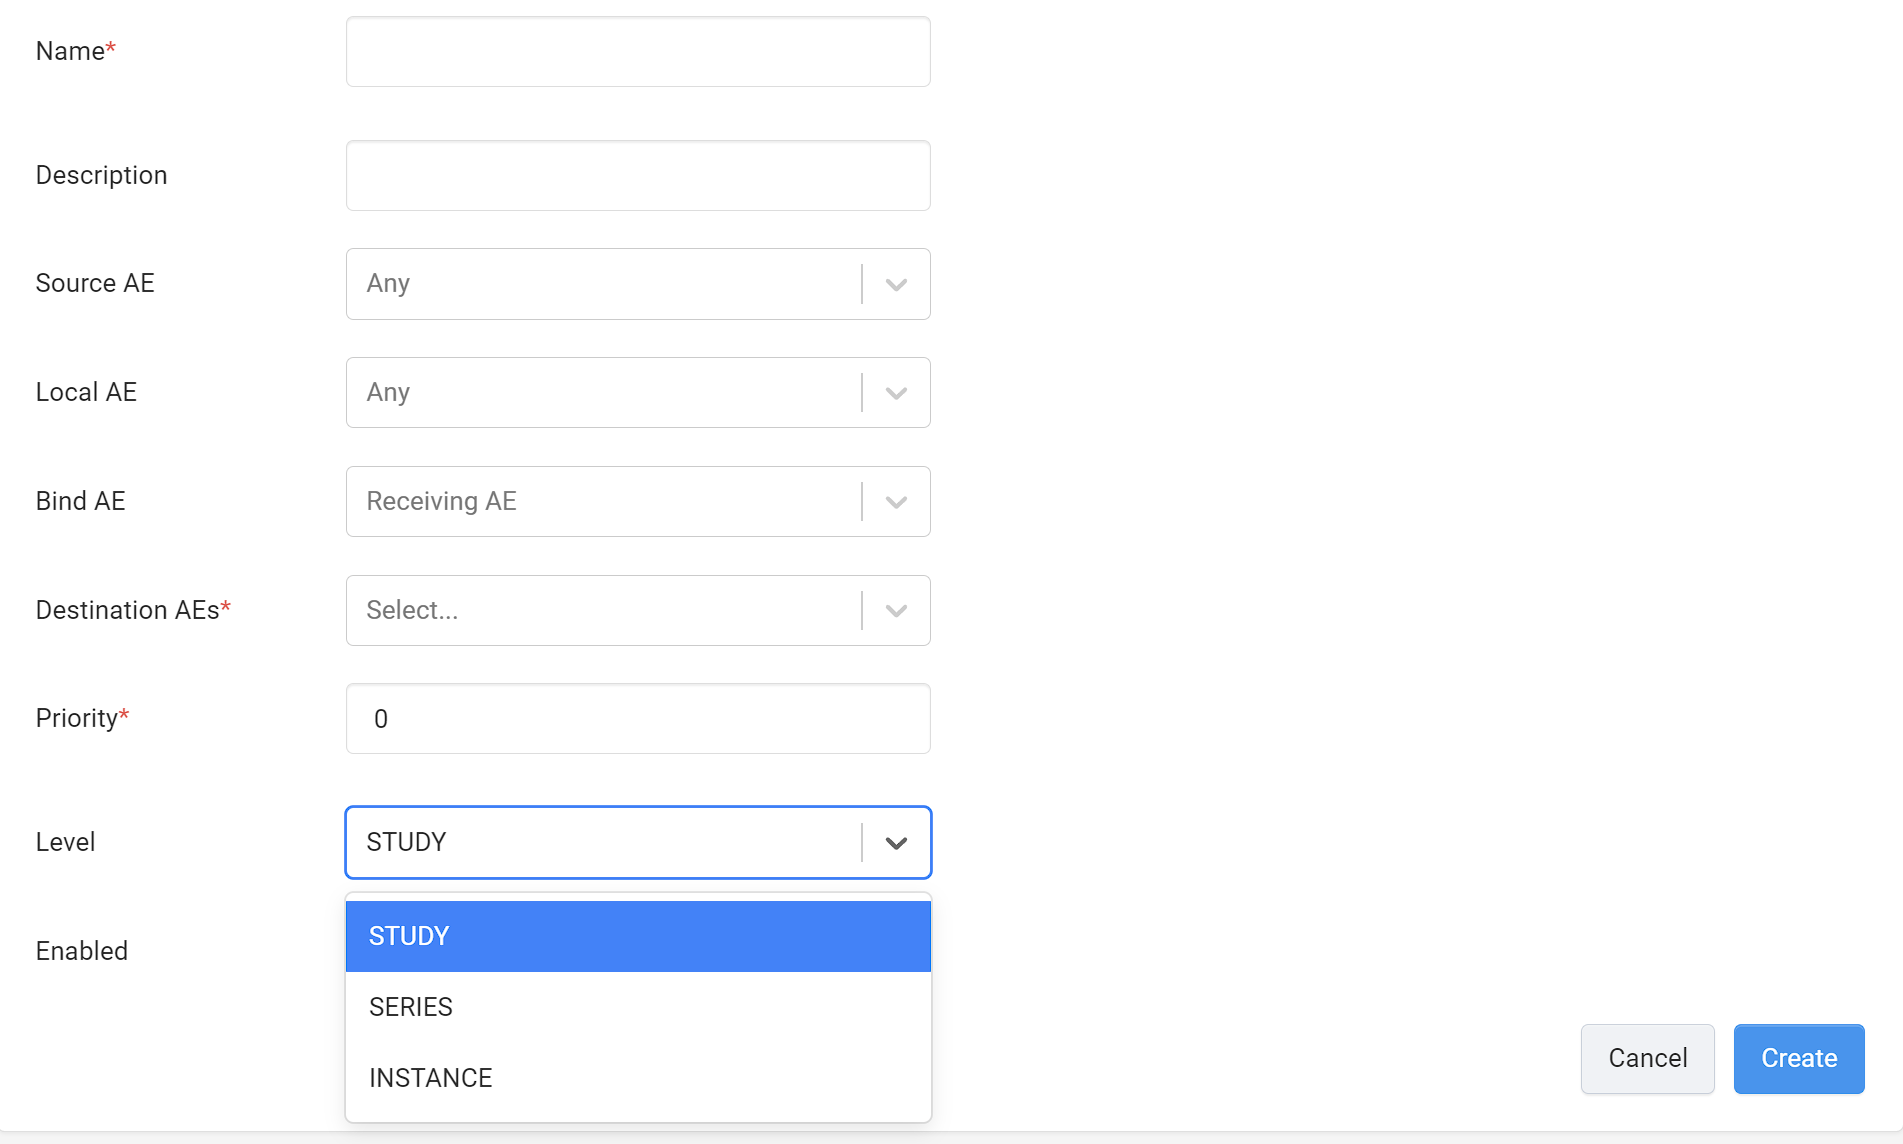
What set of instances do you want to route? Is it entire studies, series, or specific instances?
Your answer determines the appropriate Level to specify in the rule.
Conditions
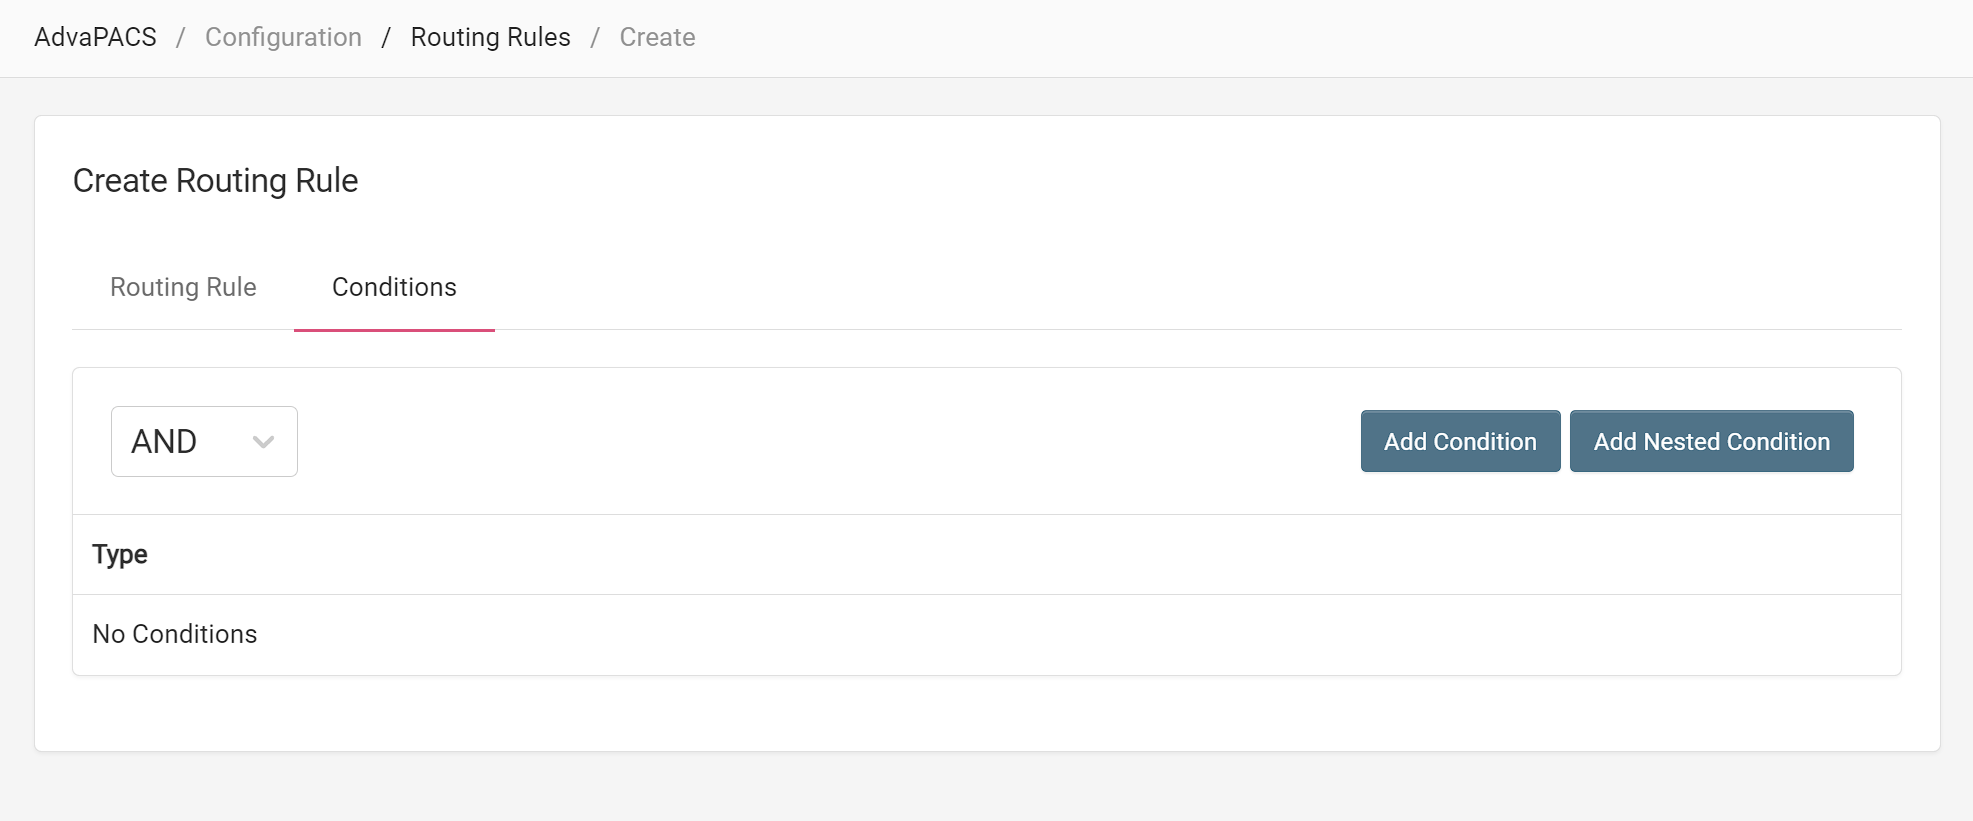
Conditions are created and applied in the same manner across different rules. To create a condition, follow the steps outlined in Creating Conditions.