How to Create a Remote AE (AdvaPACS Cloud)
This article guides you through the process of creating a Remote AE with type AdvaPACS Cloud.
This type of Remote AE allows modalities to connect directly to AdvaPACS through a TCP connection.
Steps
-
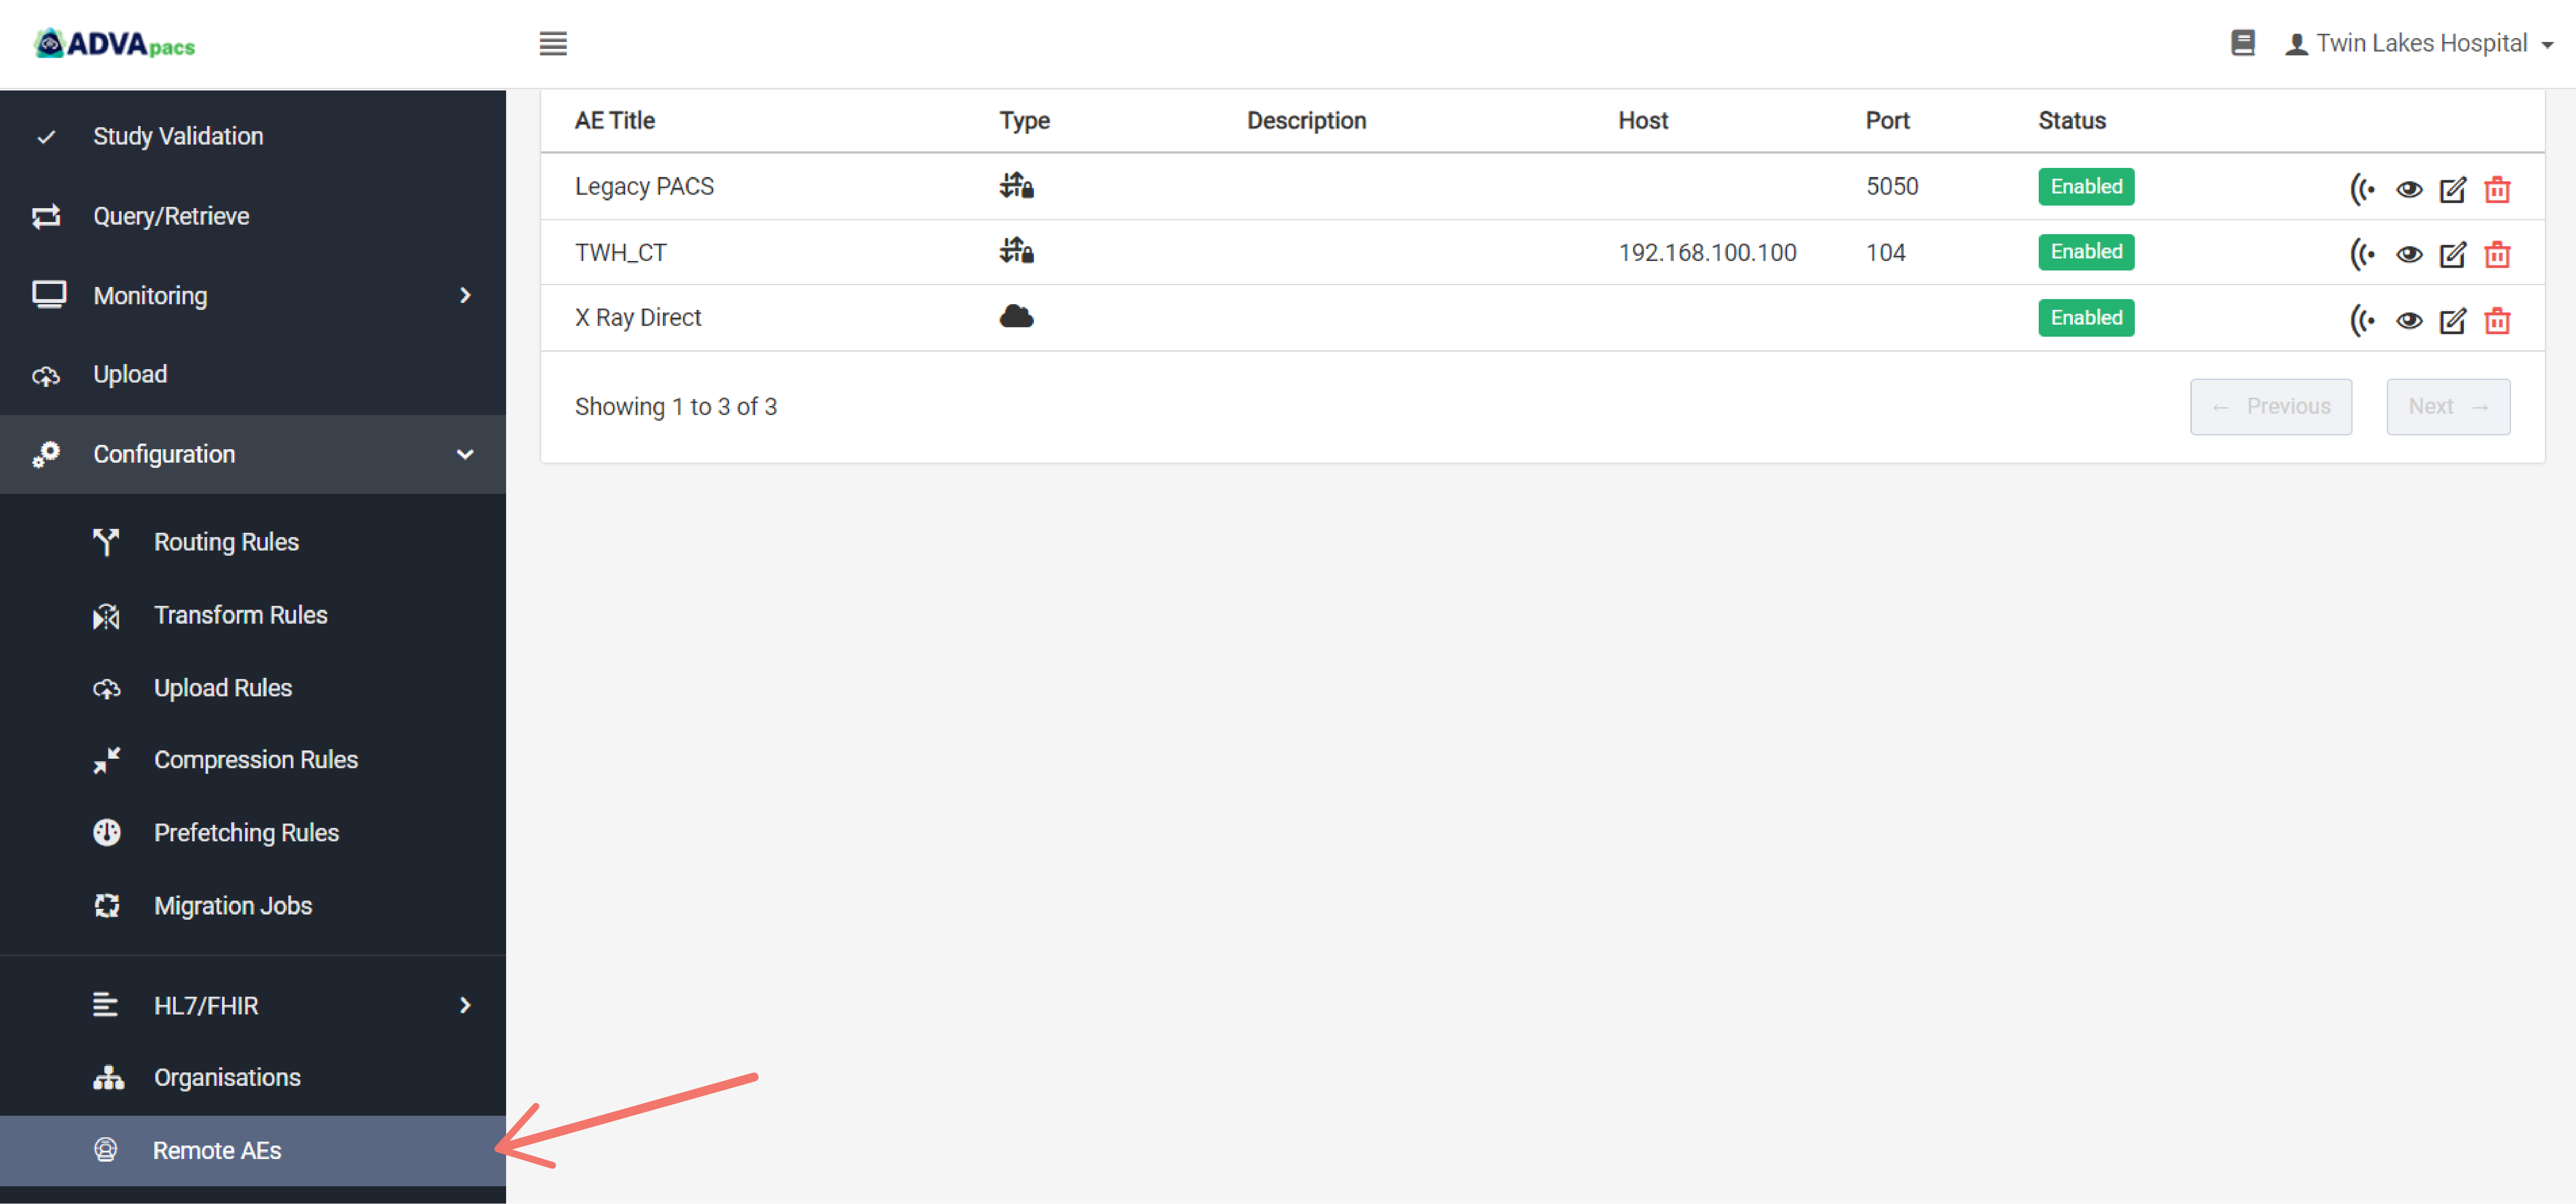
Navigate to the Remote AEs page. Click Configuration on the left sidebar, and click Remote AEs.
-
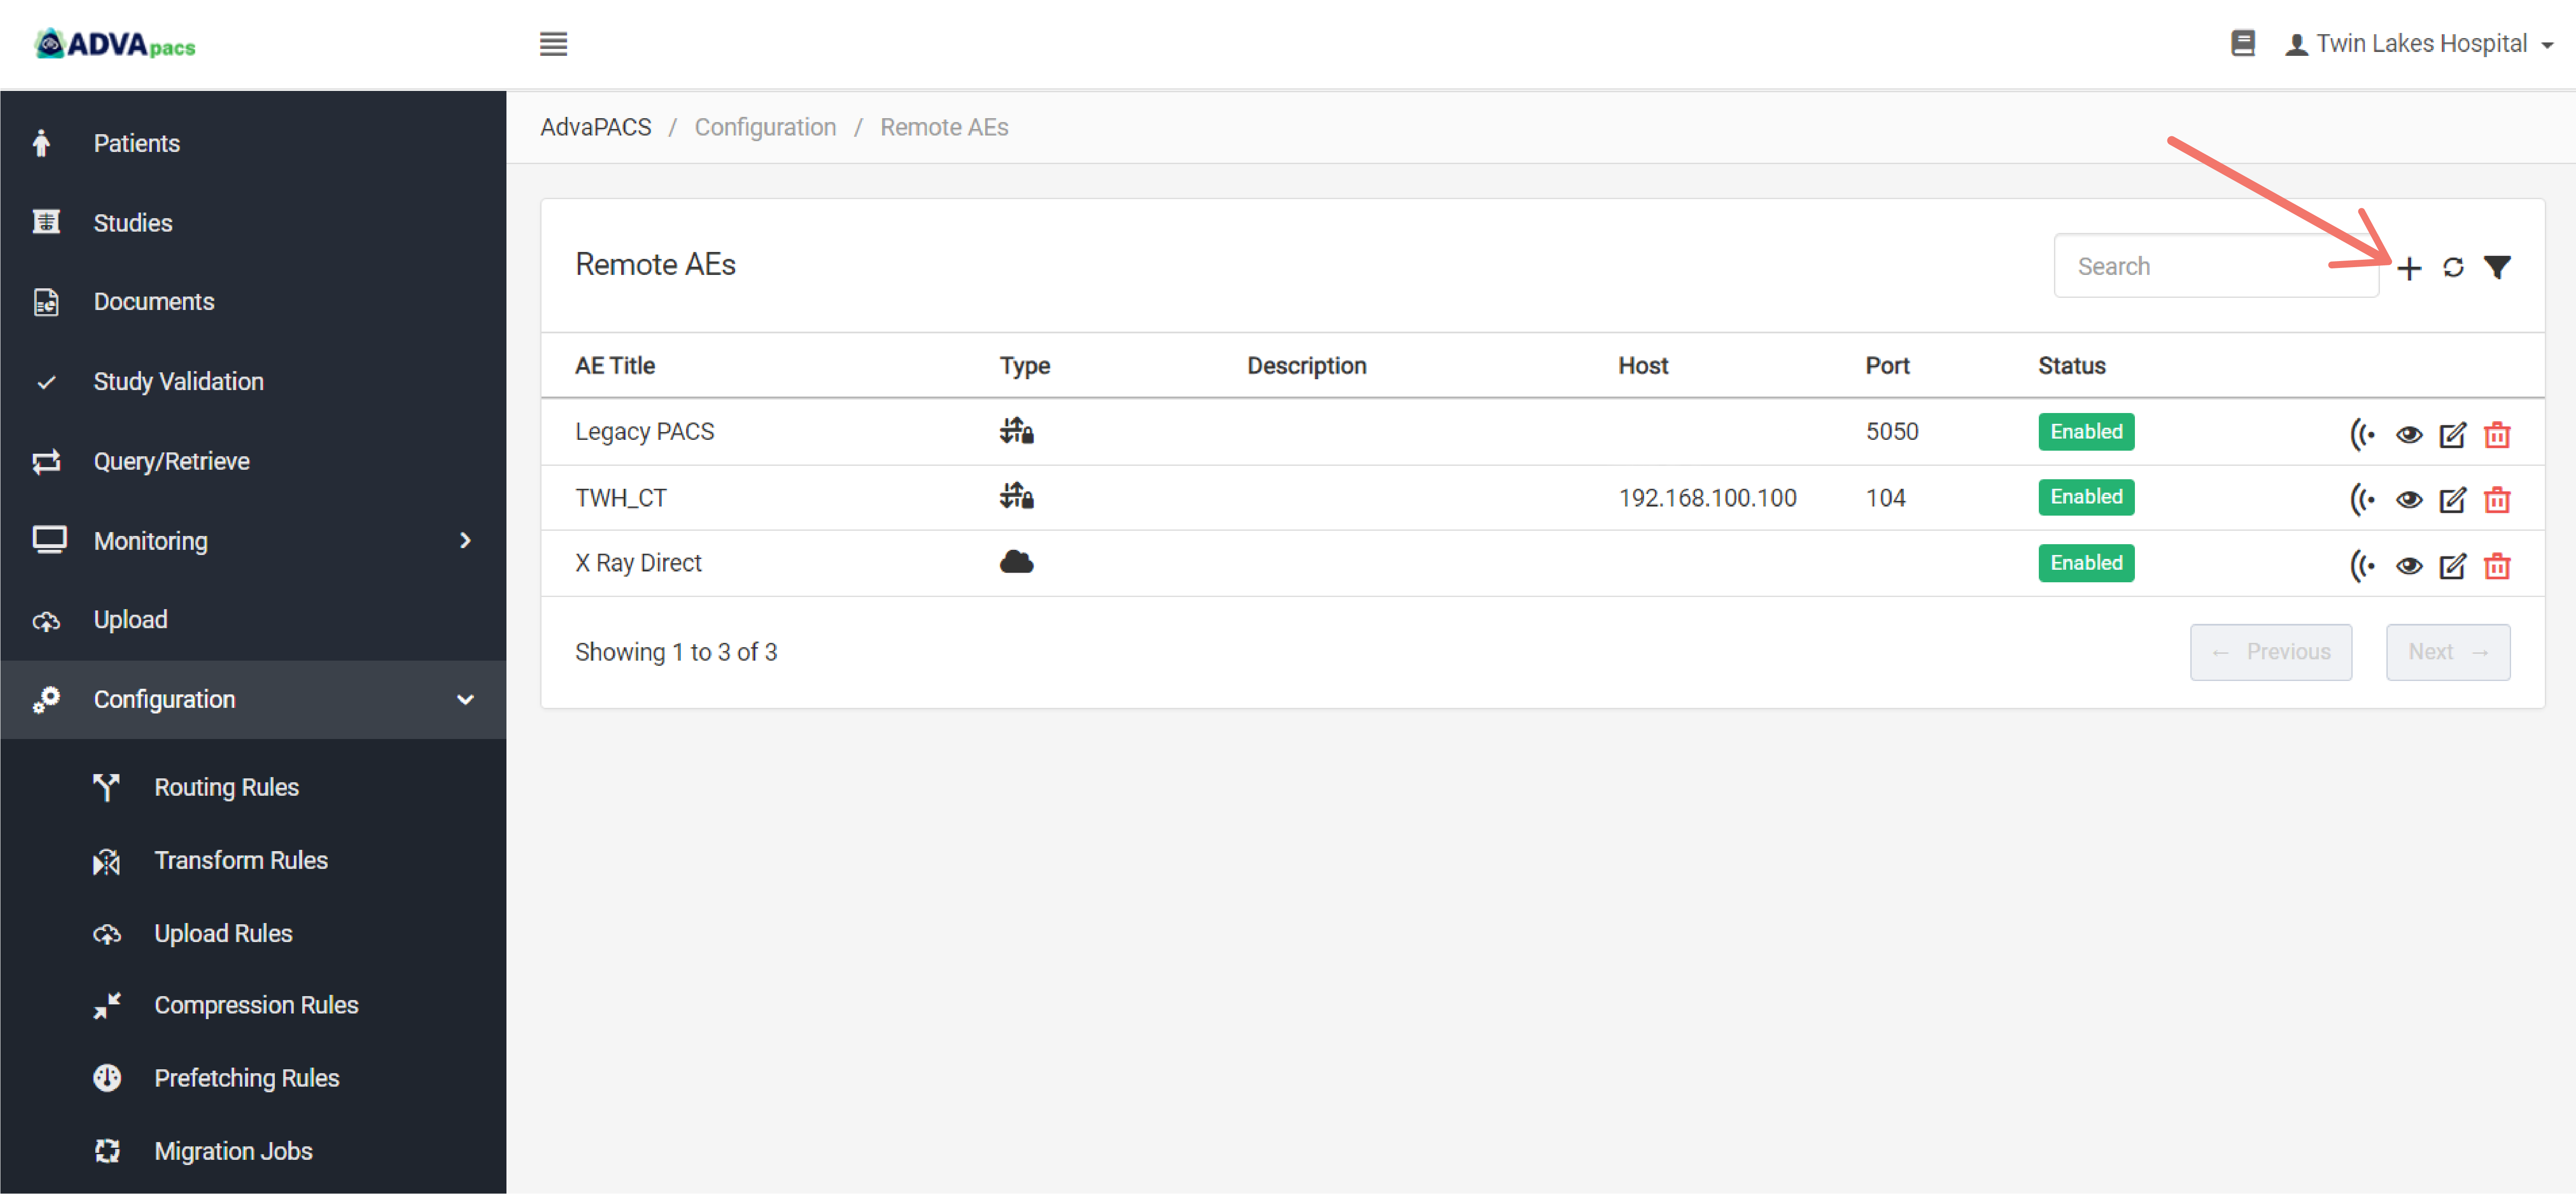
Click on the "+" icon to create a new Remote AE.
Configuring the Remote AE
Creating a Remote AE has two configurations separated into the following sections:
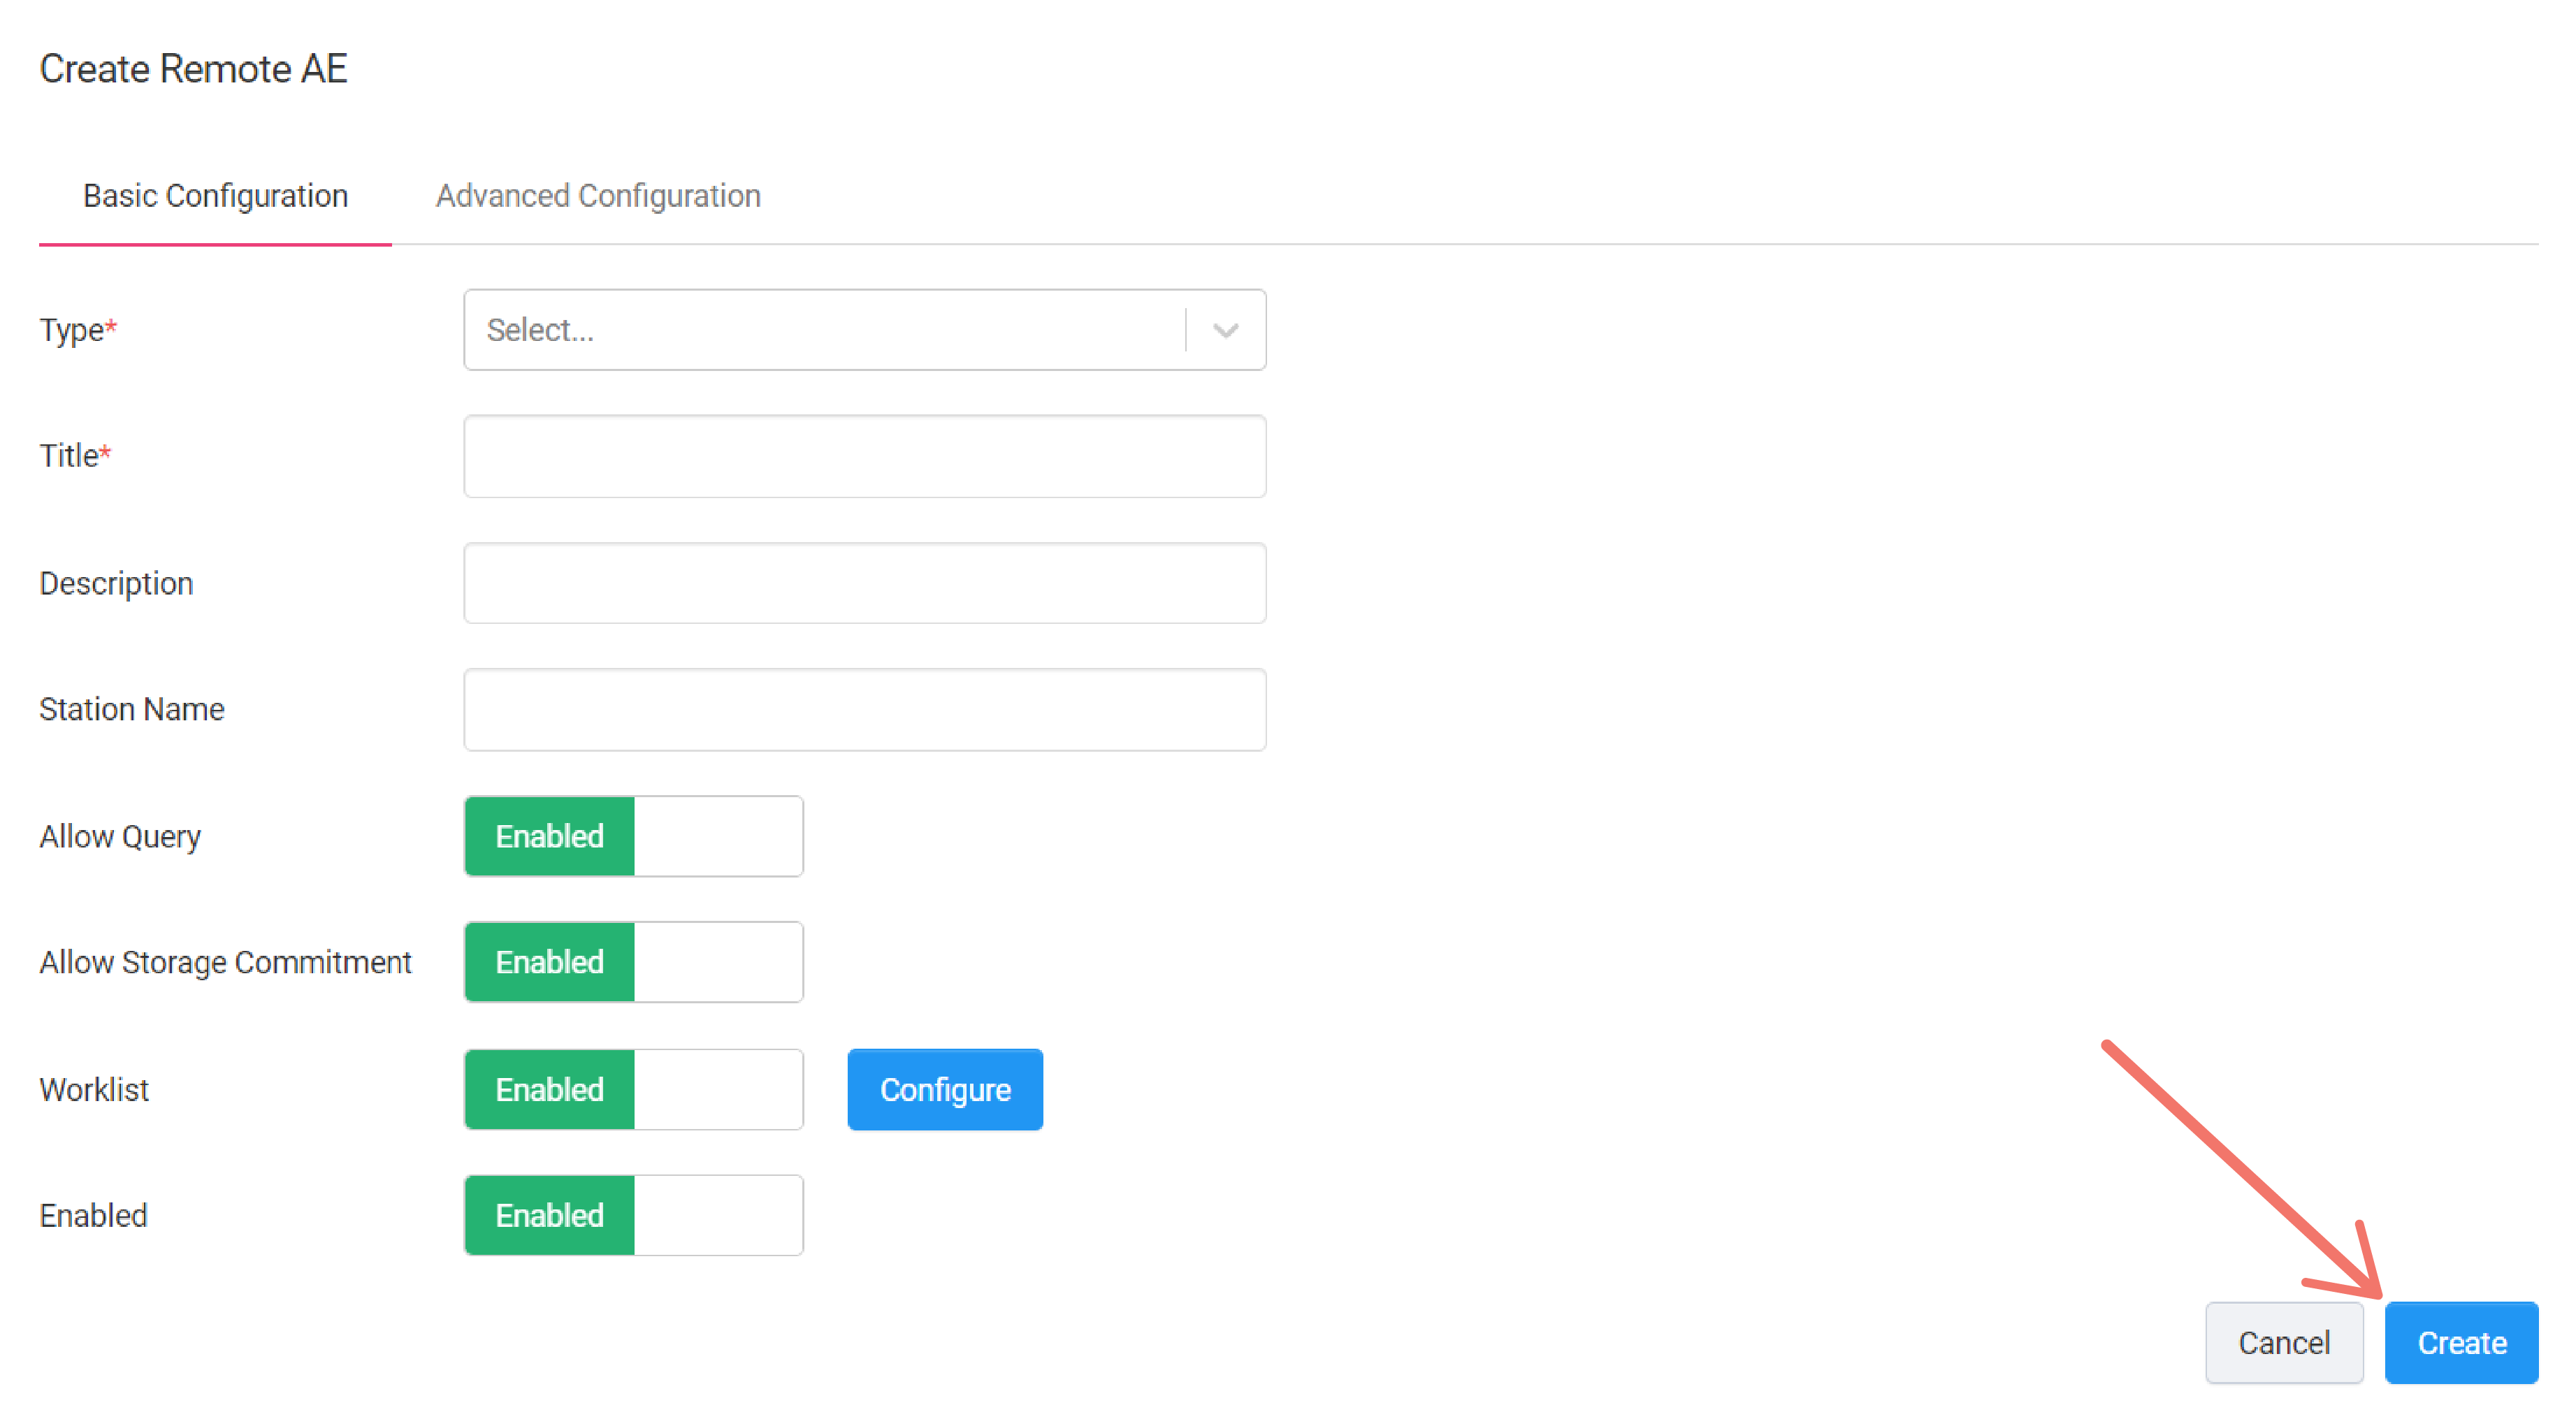
Basic Configuration
This section contains inputs for identifying the Remote AE and managing it.
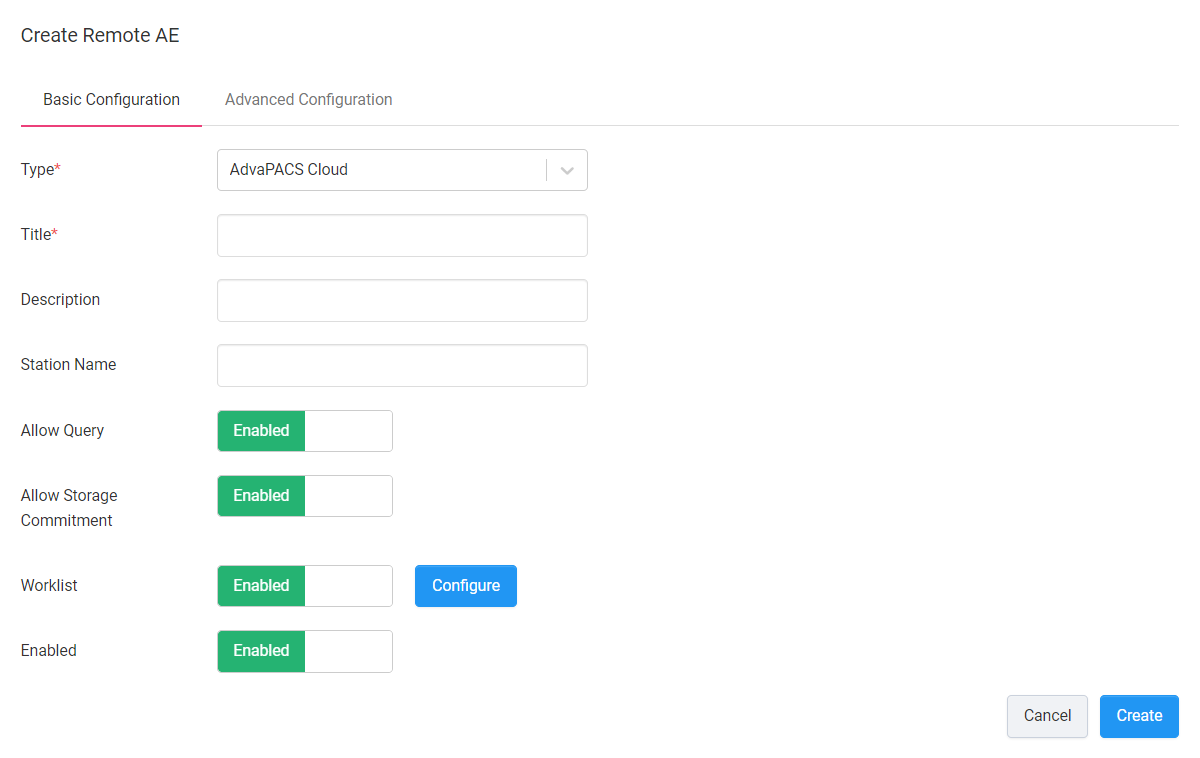
Select the AdvaPACS Cloud Type and configure the following inputs and fields:
- AE Title - Add a name for the Remote AE.
- Description - Add a description for the Remote AE.
- Station Name - Add a Station Name for the Remote AE.
- Allow Query - Control whether the Remote AE can query study data from AdvaPACS.
- Allow Storage Commitment - Control whether the Remote AE can request Storage Commit after storing a study.
- Worklist - Control whether the Remote AE can query worklists from AdvaPACS.
- Configure - Modify worklist queries and responses to centralize worklist filter configuration.
- Enabled - Enables or Disables the Remote AE.
Advanced Configuration
This section contains additional options for managing how the Remote AE operates with AdvaPACS.
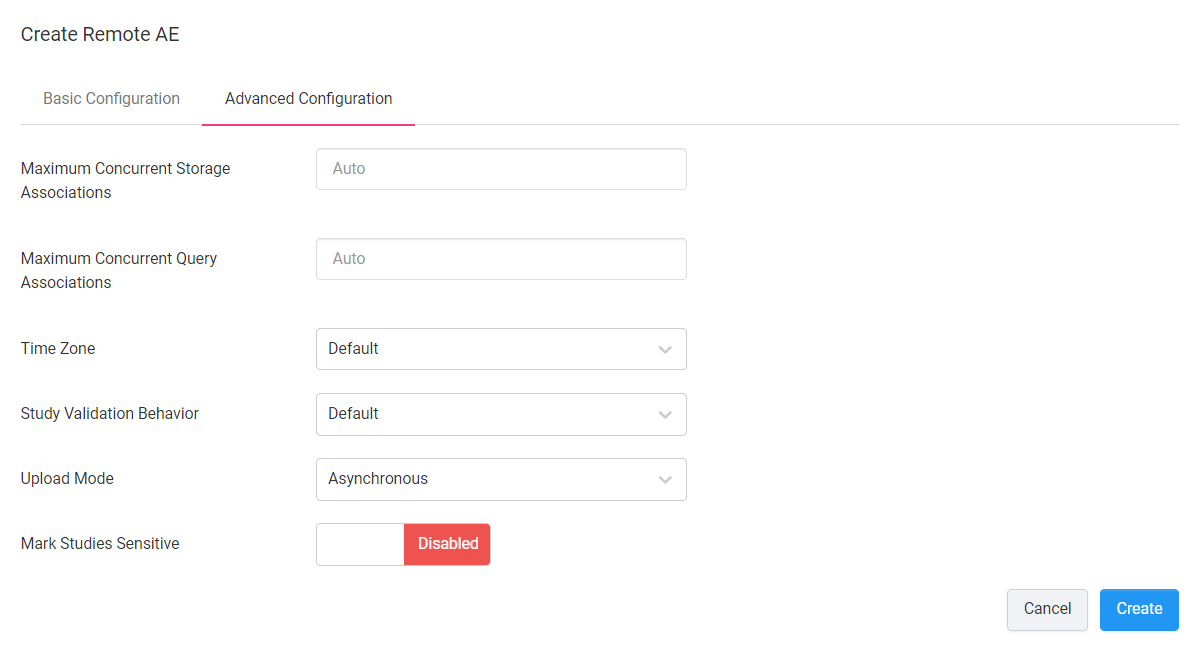
Use the following as guide to configure the inputs in Advanced Configuration
- Maximum Concurrent Storage Associations - Set the maximum number of simultaneous connections AdvaPACS can make to the Remote AE when sending data. When Auto is set, it defaults to 8 connections.
- Maximum Concurrent Query Associations - Set the maximum number of simultaneous connections AdvaPACS can make to the Remote AE when querying data. When Auto is set, it defaults to 8 connections.
- Time Zone - The time zone used when the Remote AE sends data to, or queries data from AdvaPACS and doesn't explicitly provide one. When Default is set, it inherits the time zone set in settings.
- Study Validation Behavior - Set the Study Validation mode used when sending data to AdvaPACS.
- Mark Studies Sensitive - Control whether studies sent from the Remote AE are marked as sensitive.
Creating the Remote AE
Navigate to the Basic Configuration section and click Create to create the Remote AE.
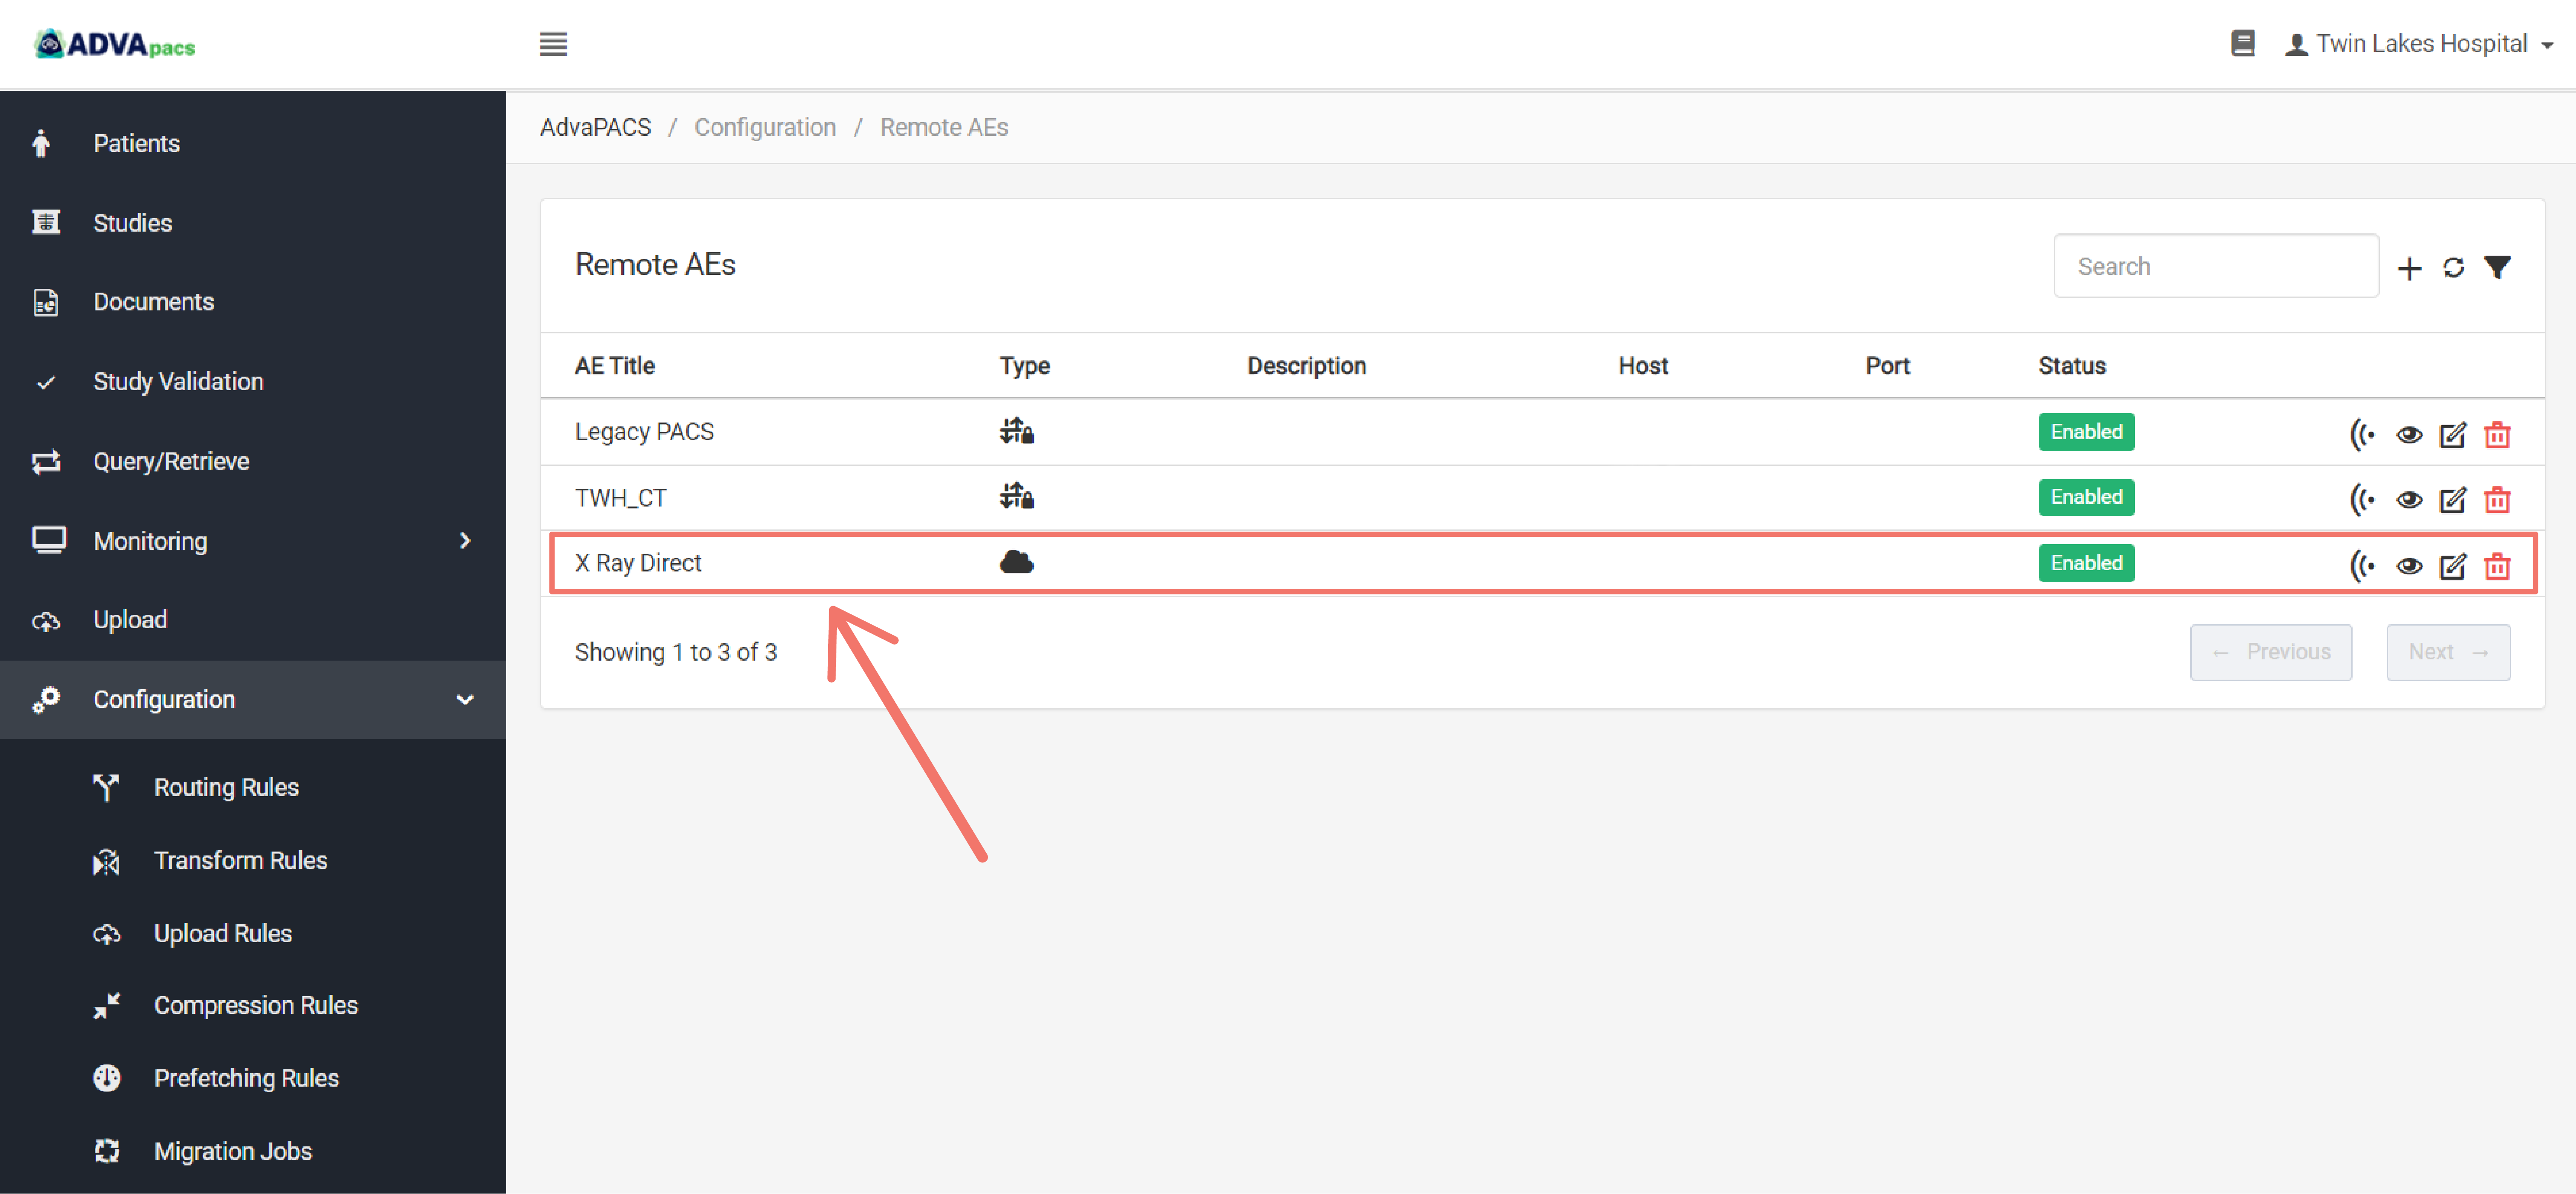
The newly created Remote AE should appear in the Remote AE listing page.
Connecting to AdvaPACS
To connect the Remote AE to AdvaPACS, you need the following:
Generate a certificate
The certificate allows the Remote AE to connect securely to AdvaPACS. Follow the steps to create one for the Remote AE.
-
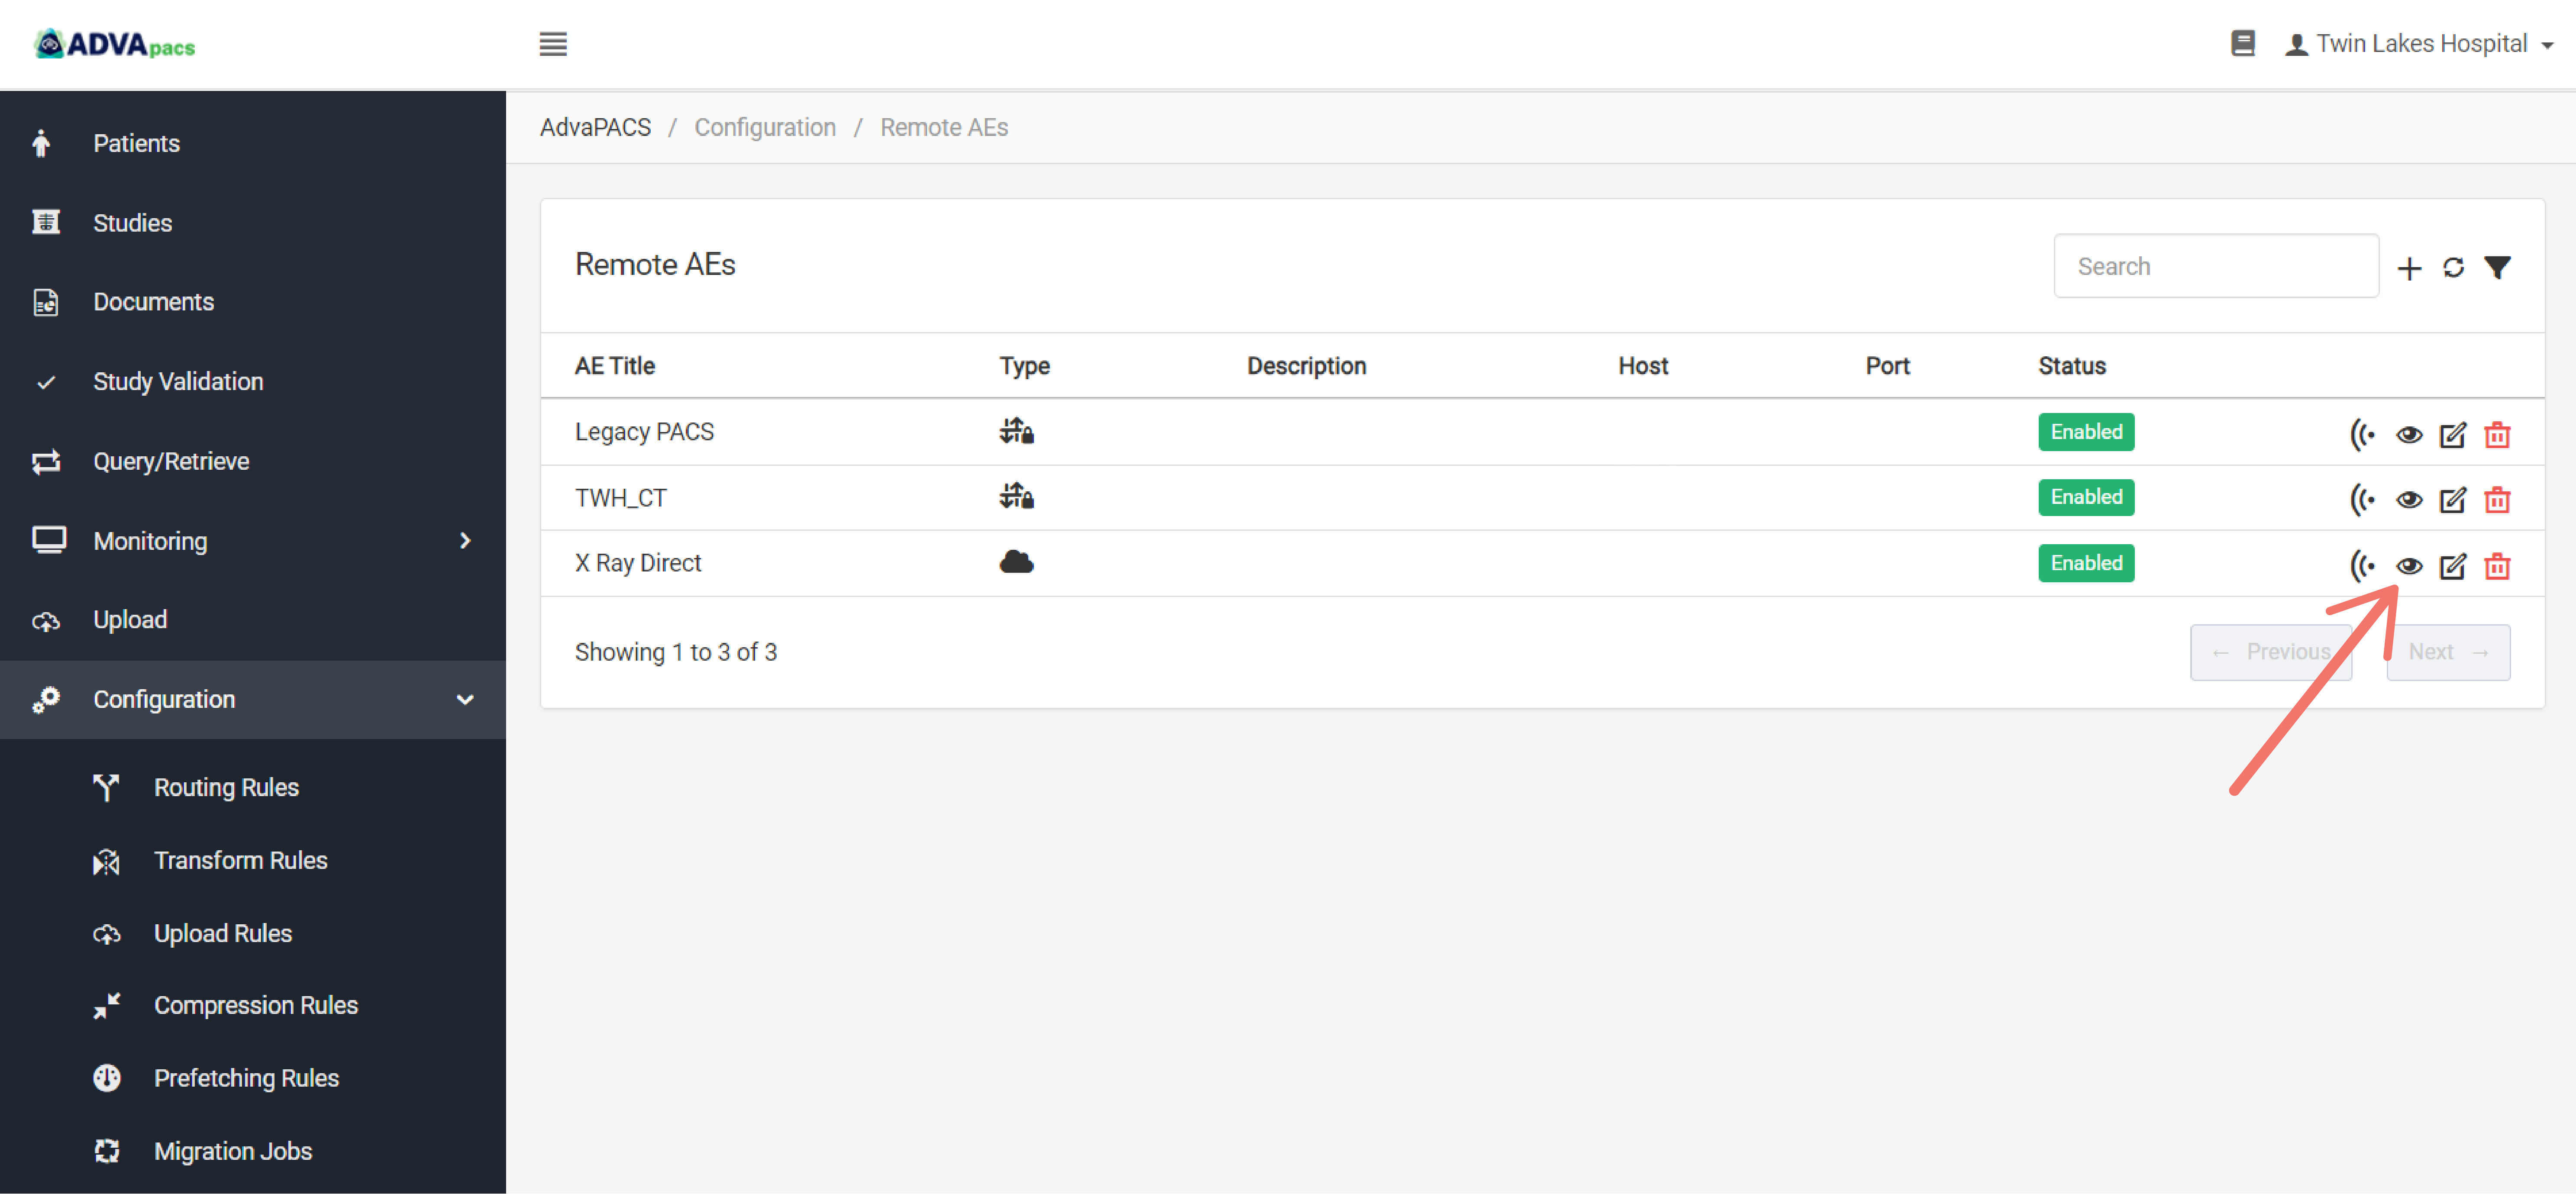
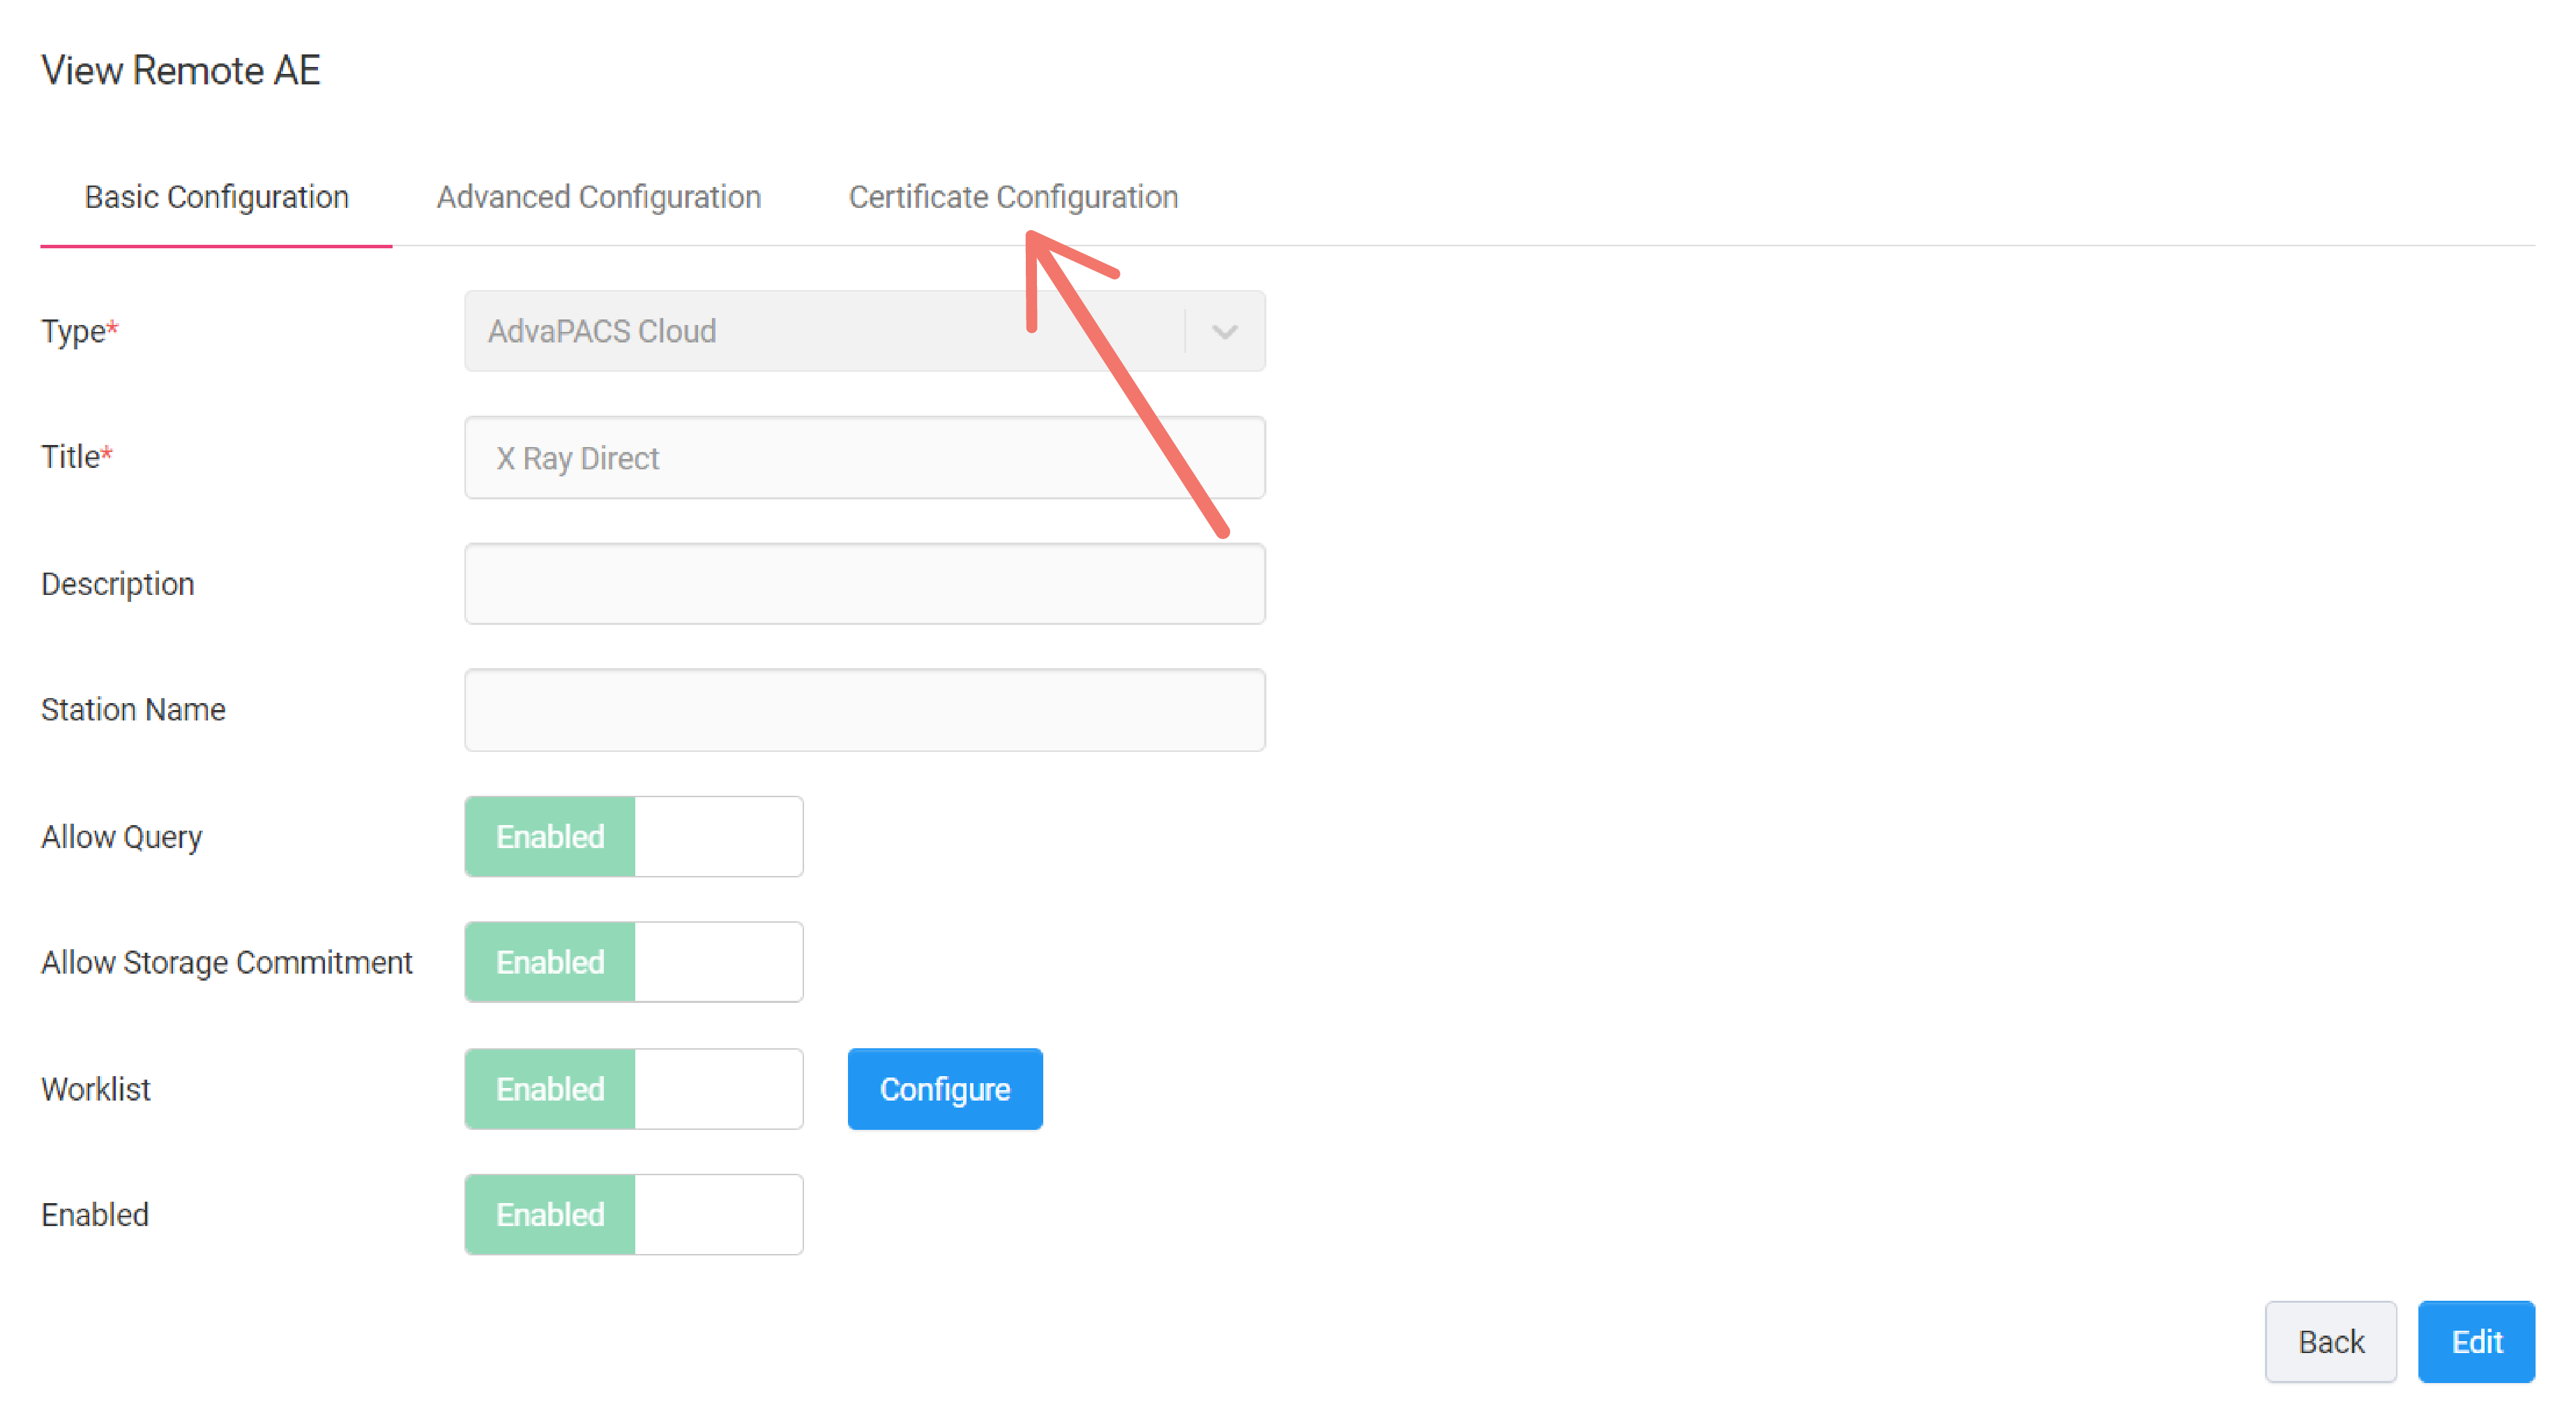
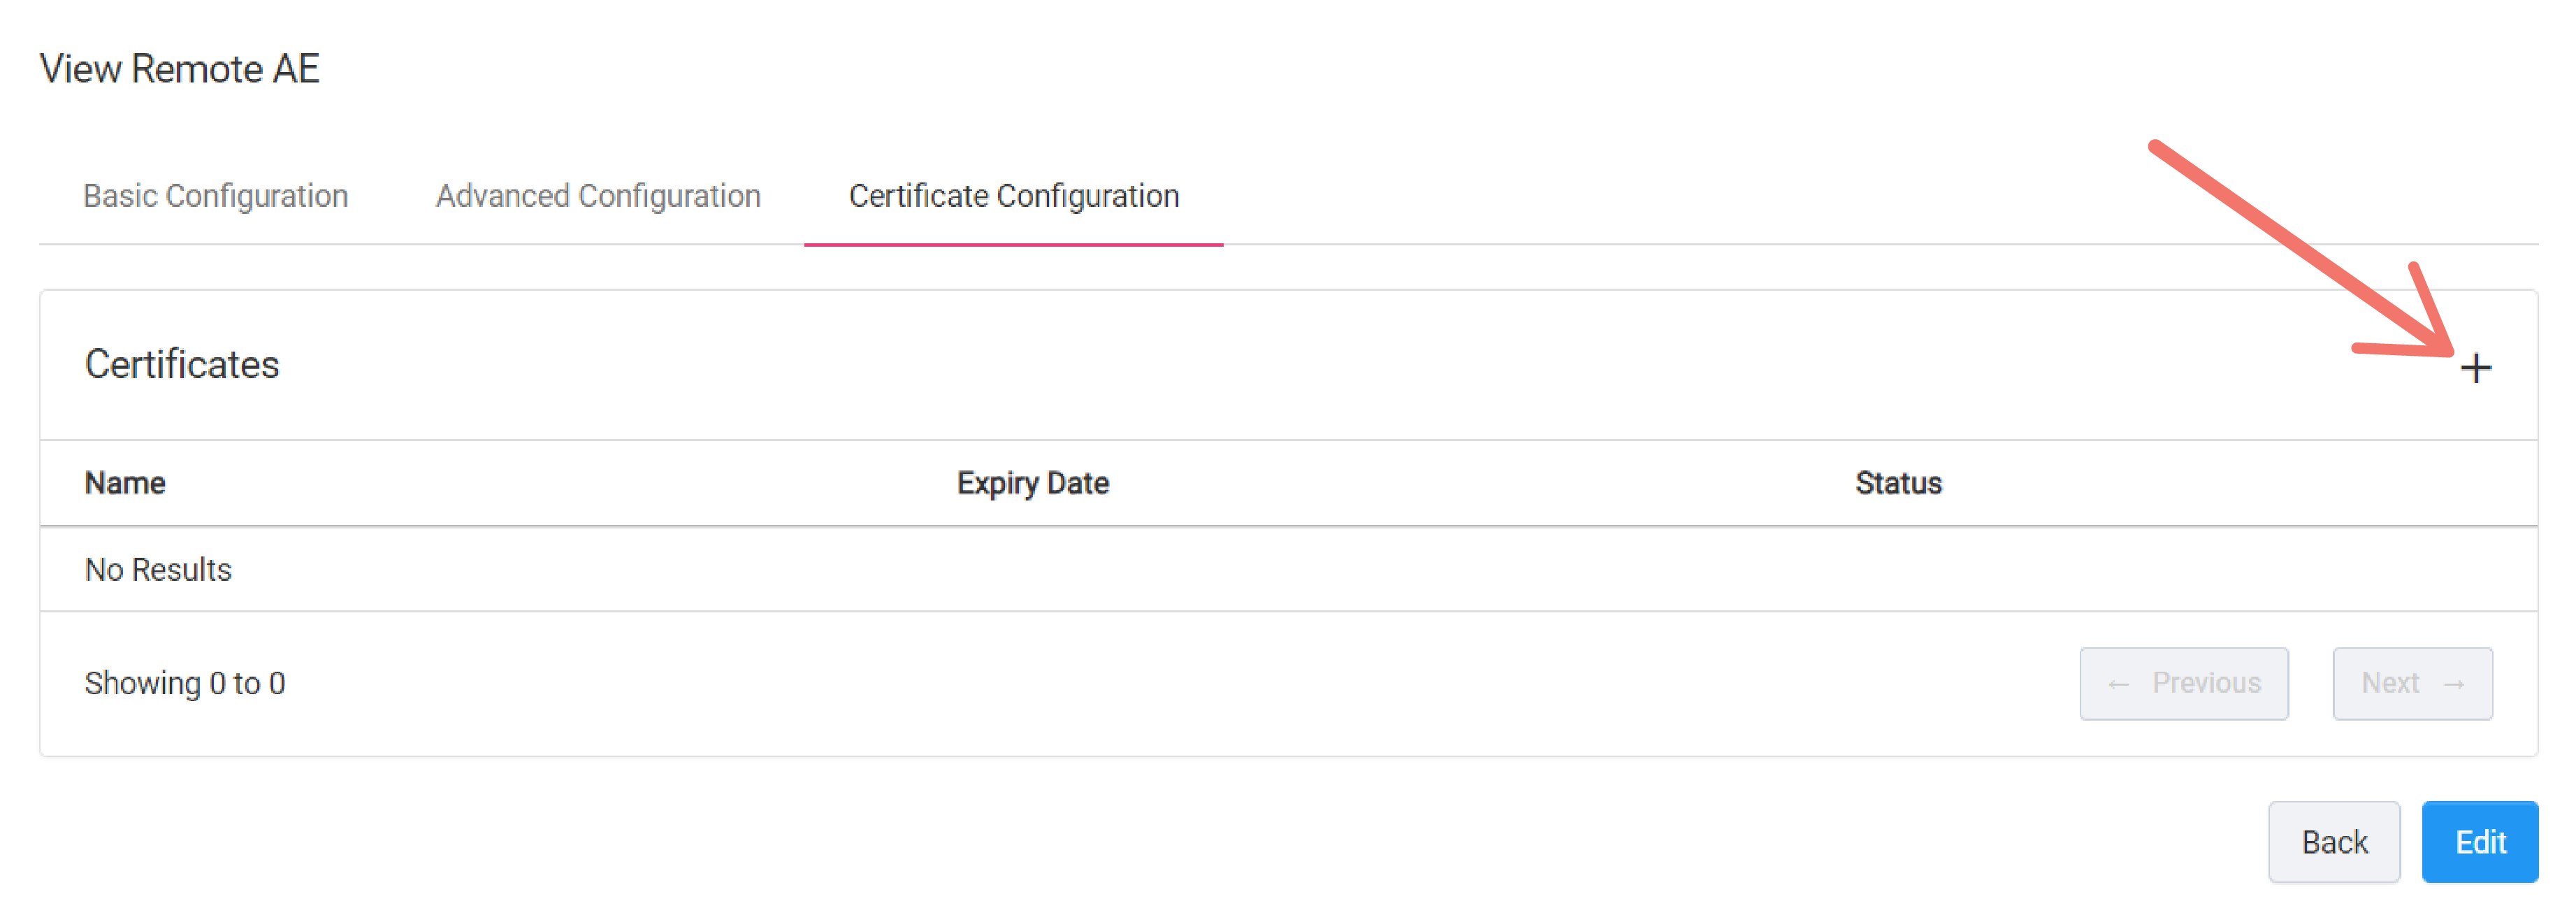
View the newly created Remote AE.
-
Navigate to Certificate Configuration.
-
Create a new certificate.
-
Configure the certificate.

- Name - Add a name for the certificate.
- Key Type - Select encryption method.
- Valid Duration - Specify the validity of the certificate.
-
Click Download.
Create a Local AE
For the Remote AE to connect to AdvaPACS, it needs a Local AE with type AdvaPACS Cloud to connect to. If you have not created a Local AE yet, follow the steps in this tutorial to create one.
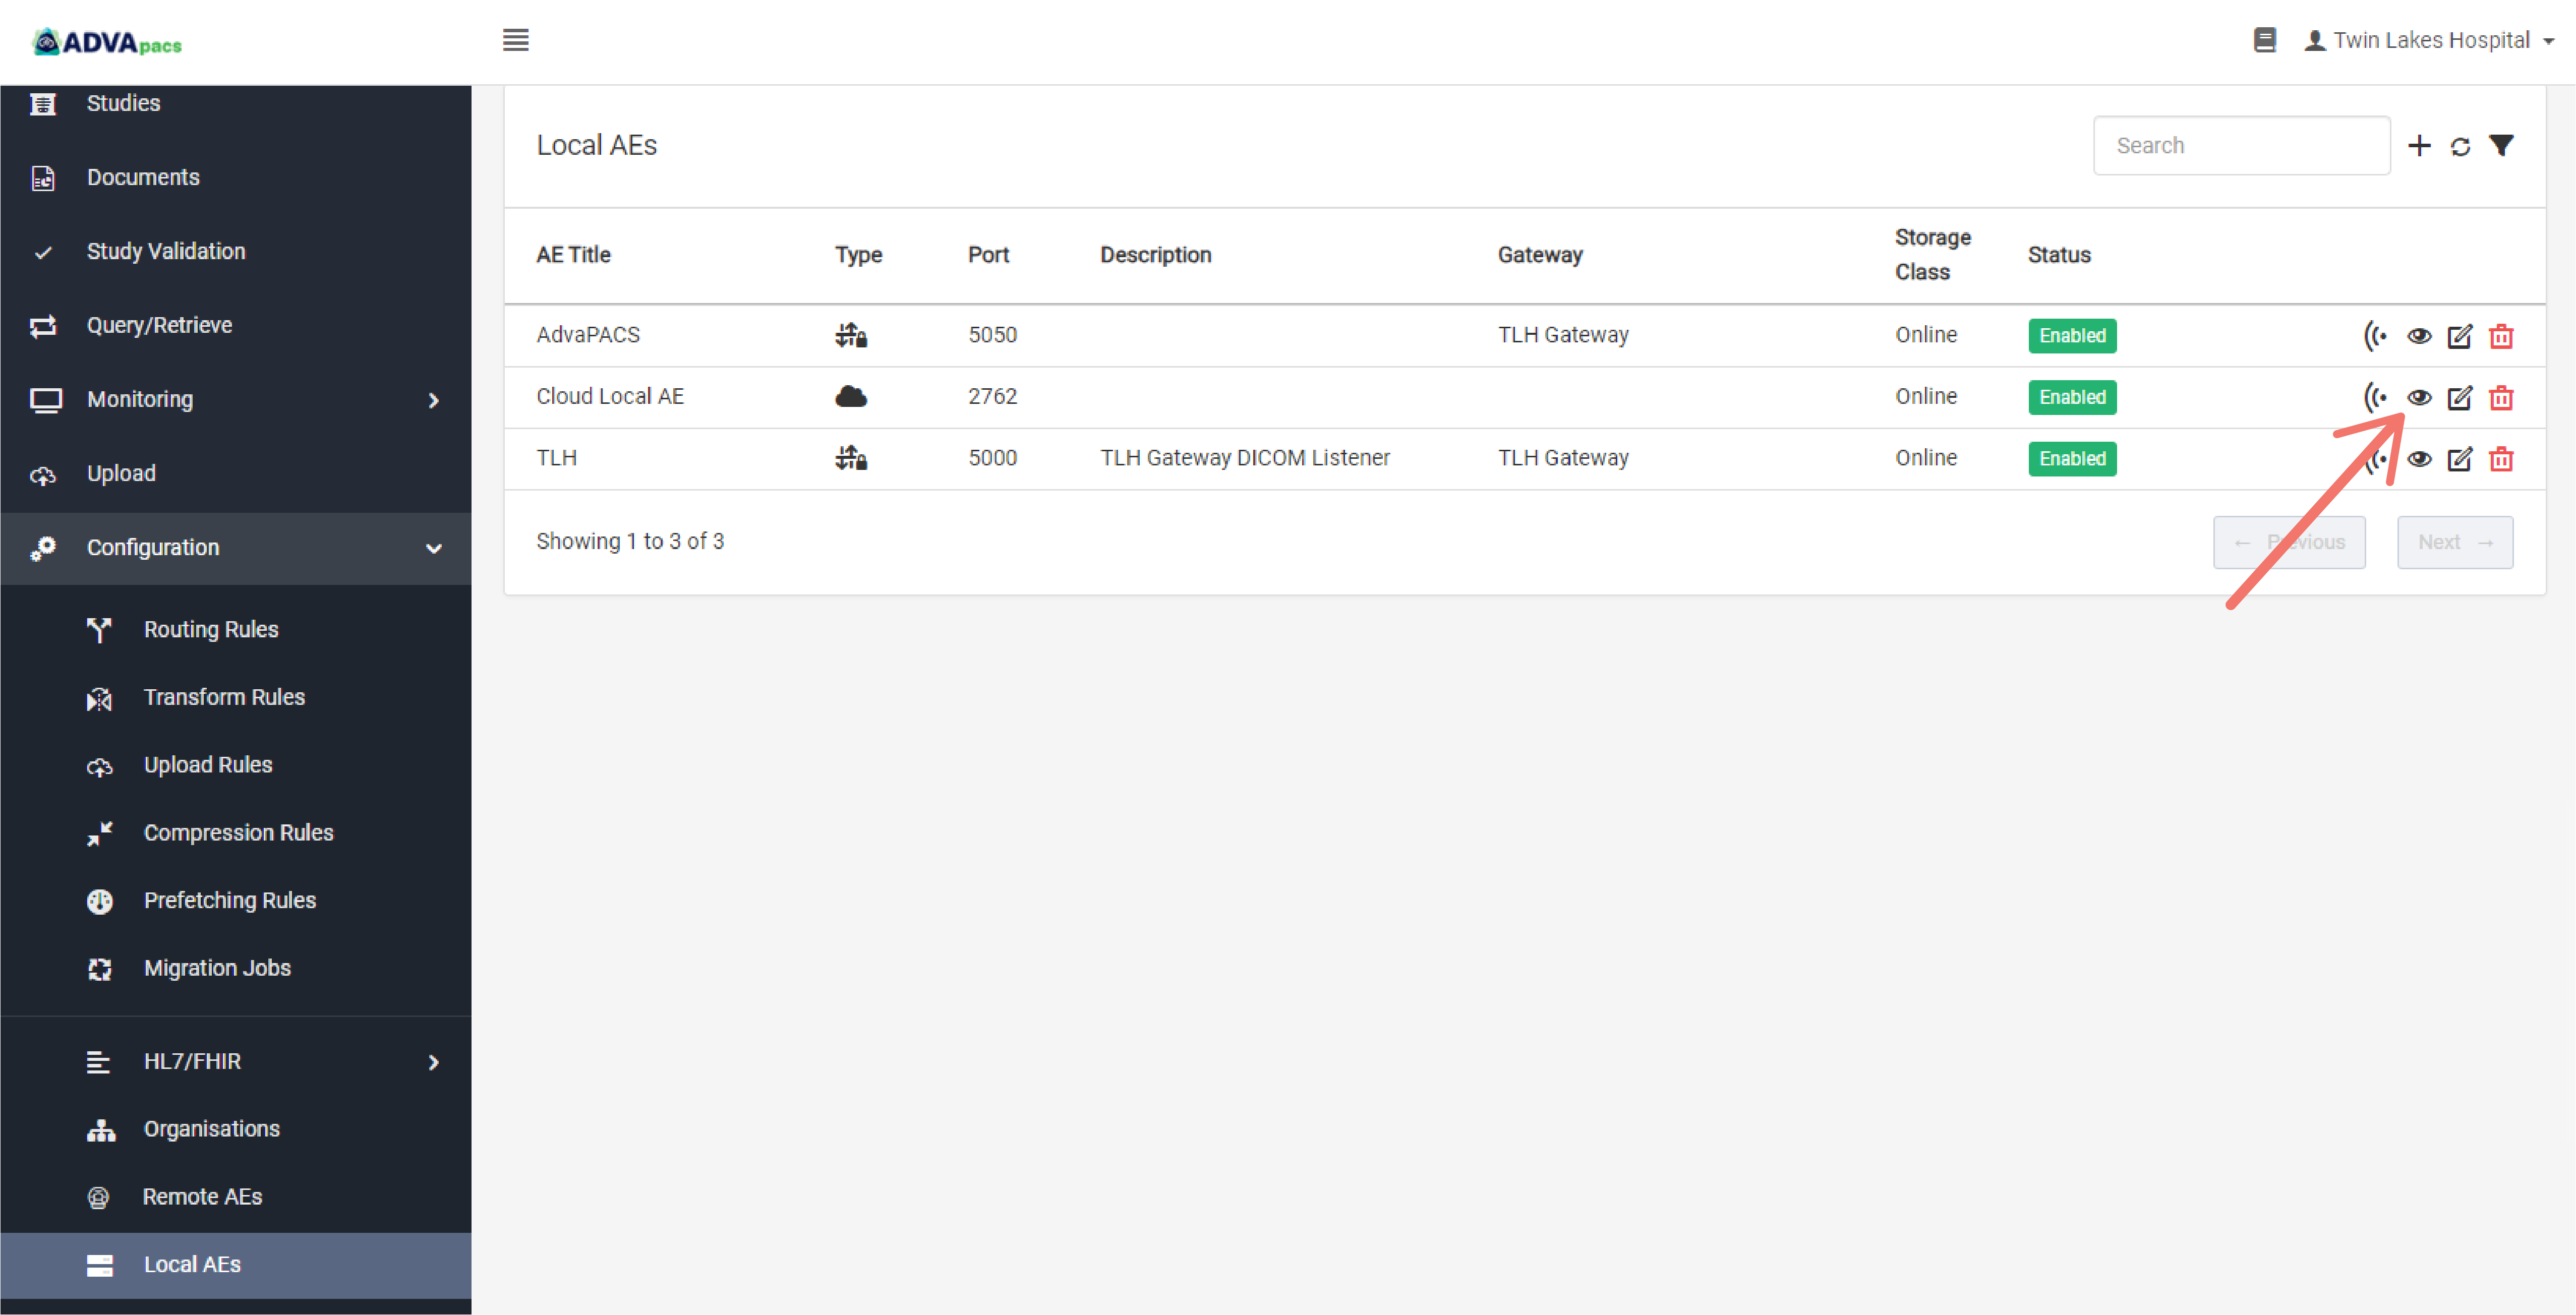
Obtain the Host and Port of the Local AE
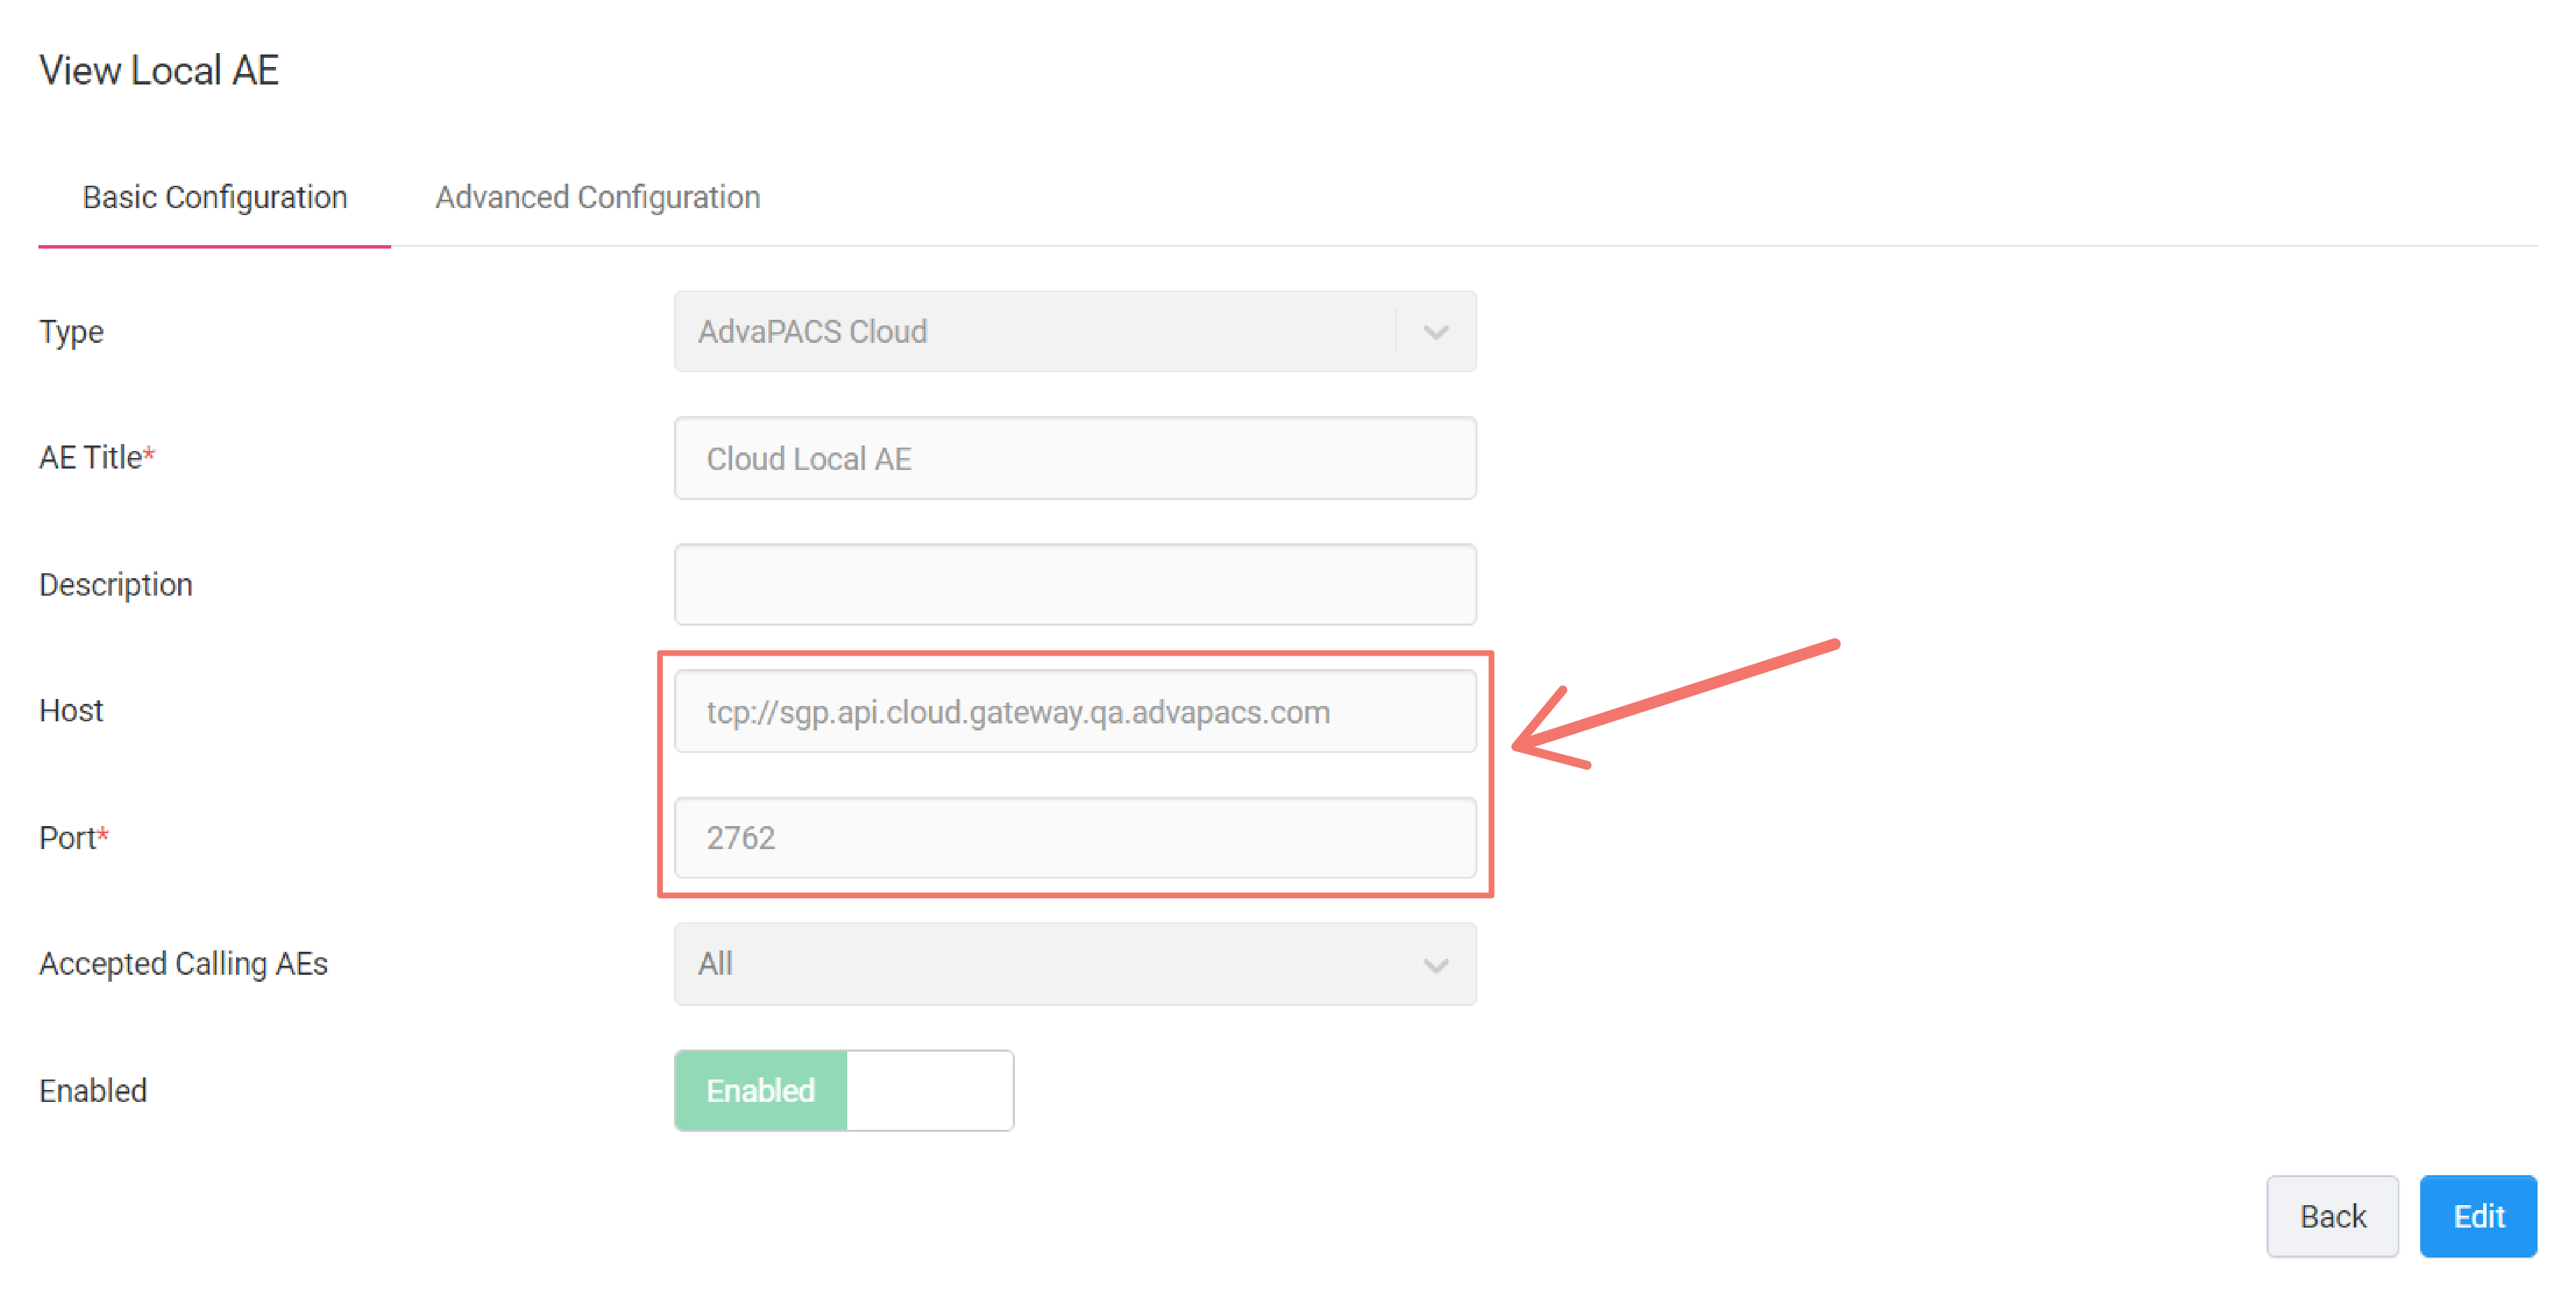
Once you have created a Local AE, obtain its Host and Port.
Click on the "View" button to view the Local AE's Host and Port.
Configure the Remote AE
The final step is to provide the Host, Port, and the Certificate to your modality.
If you are unsure on how to set it up in your modality please contact your IT department or your modality vendor's technical support.
Summary
To connect a Remote AE directly to AdvaPACS through a TCP connection, you need:
- A Remote AE with type AdvaPACS Cloud
- The Remote AE's certificate
- A Local AE with type AdvaPACS Cloud
- The Local AE's Host and Port