Orders
Overview
The Orders module displays all orders created in the system.
Orders can be created through several methods:
- Manually via the Orders UI
- Automatically when validating a study from a DICOM file
- From an external system using HL7 or FHIR
This article explains how to navigate, search, and create orders within the Orders module.
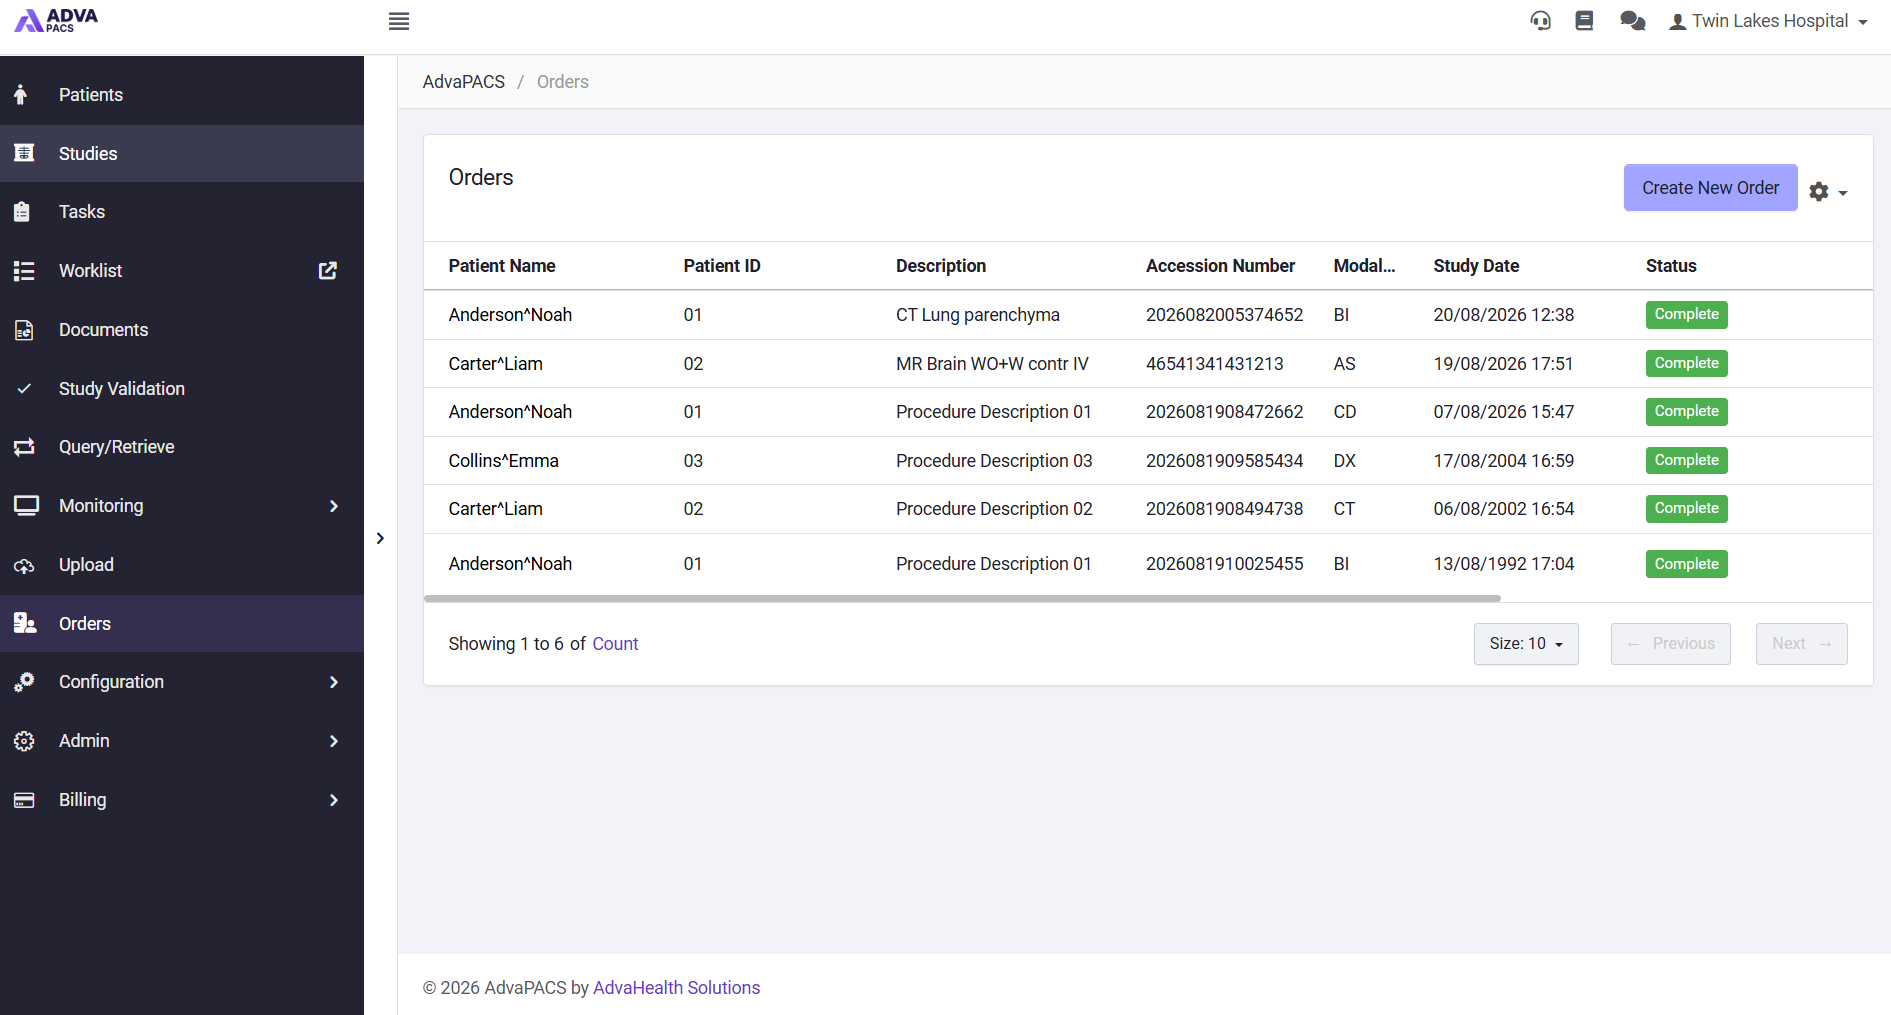
Search for Orders
On the left panel, users can search for orders by entering Patient Information or Accession Number.
In Advanced Search, additional filters are available:
- Universal Service ID
- Study Date
- Modality
- Order Status
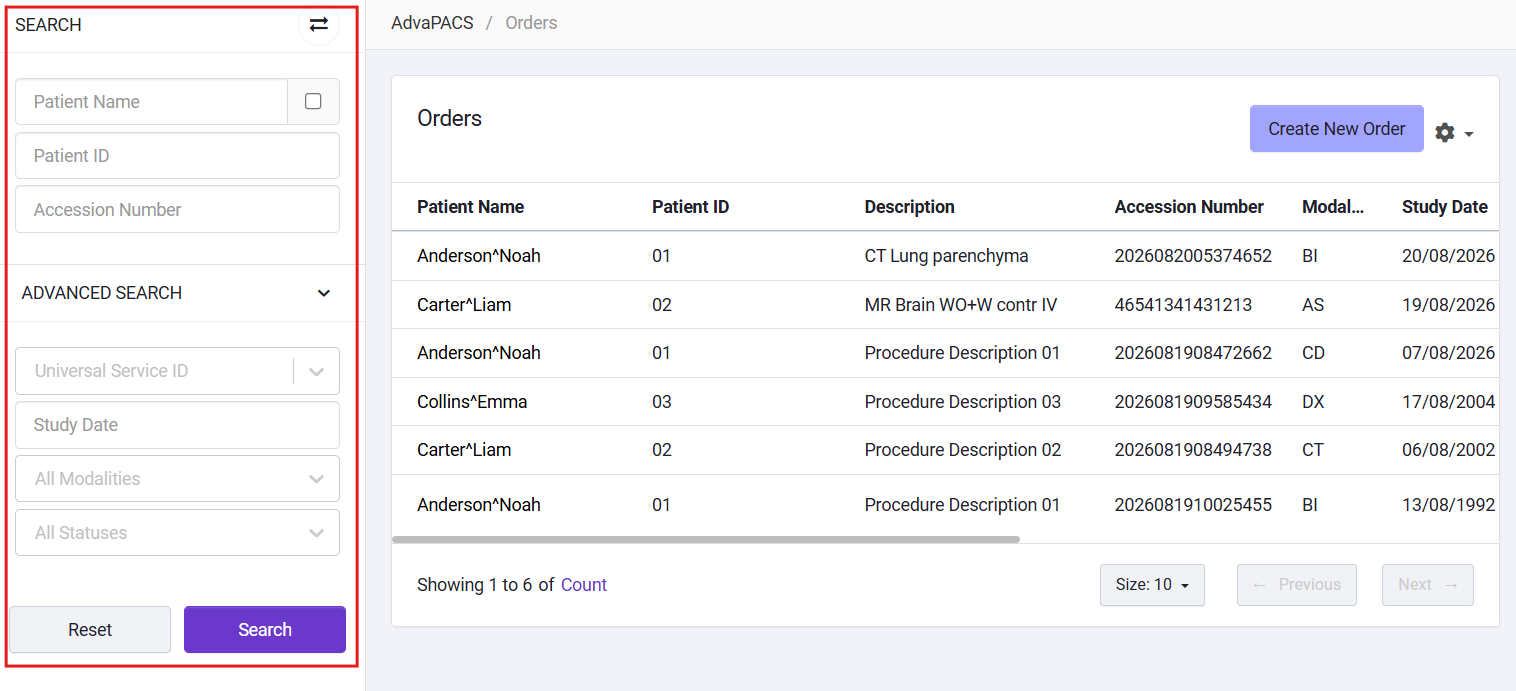
By default, the Study Date filter is set to the last 30 days.
To search all available records, click the Clear icon to remove the date filter.
Users can also customize the order table display by selecting the Settings (⚙️) icon and checking or unchecking columns to show or hide them.
Create a New Order
To create an order, click Create New Order on the Orders screen.
User need to have permission "Manage Order" to see the button.
1. Patient
New Patient
By default, the system assumes the order is for a new patient.
Enter the following mandatory information:
- Patient ID
- Name
- Date of Birth (DOB)
- Sex
You may also provide optional information such as Mobile Number and Email.
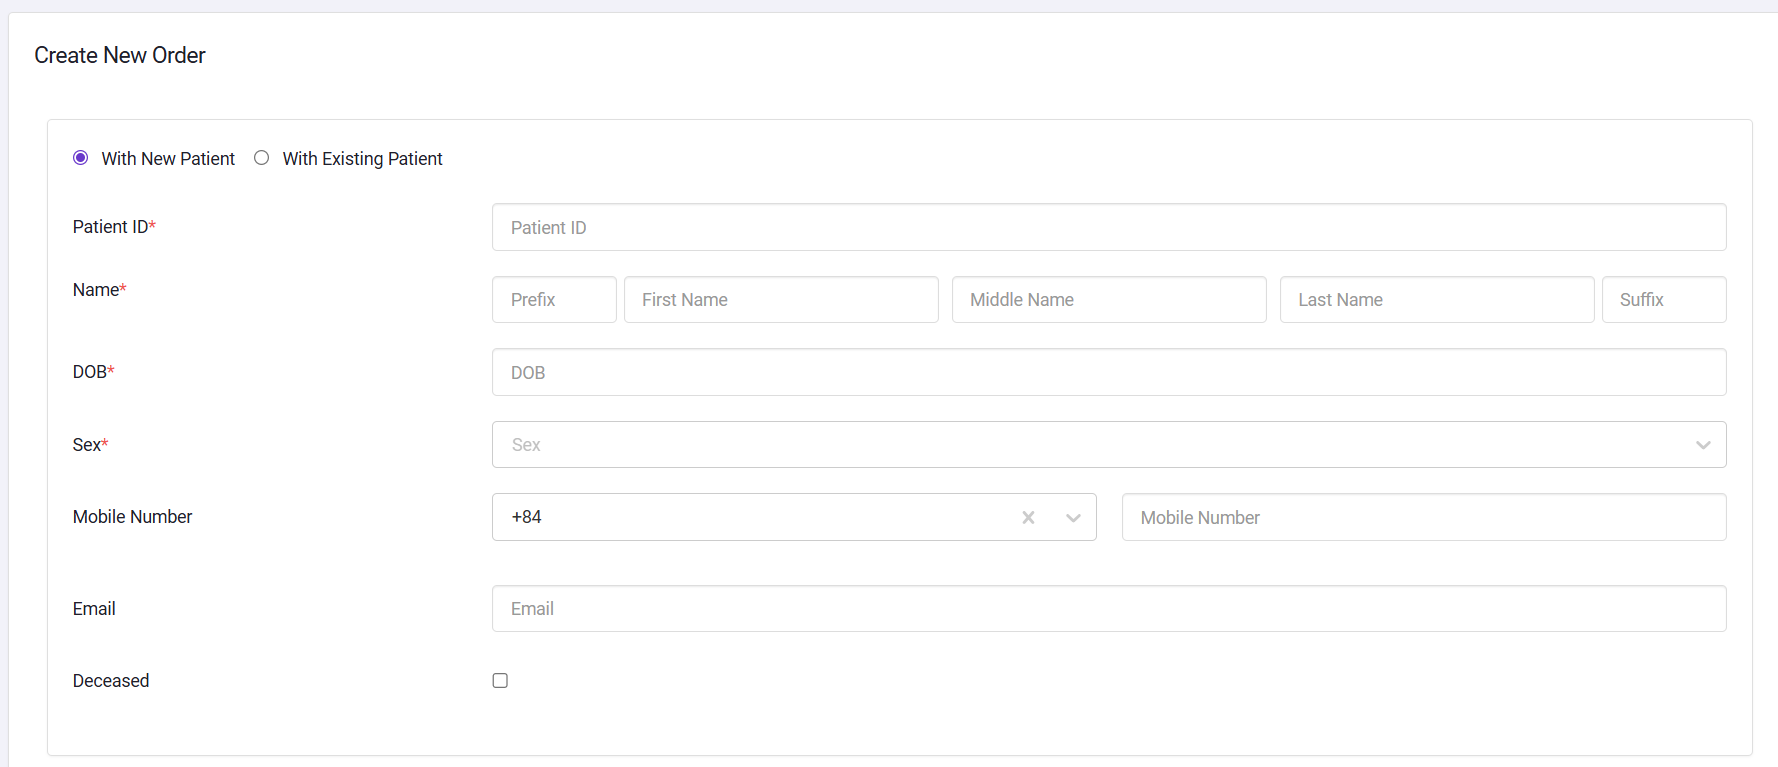
A new patient record will be created automatically after the order is saved.
You can find this new patient later under the Patients module.
Existing Patient
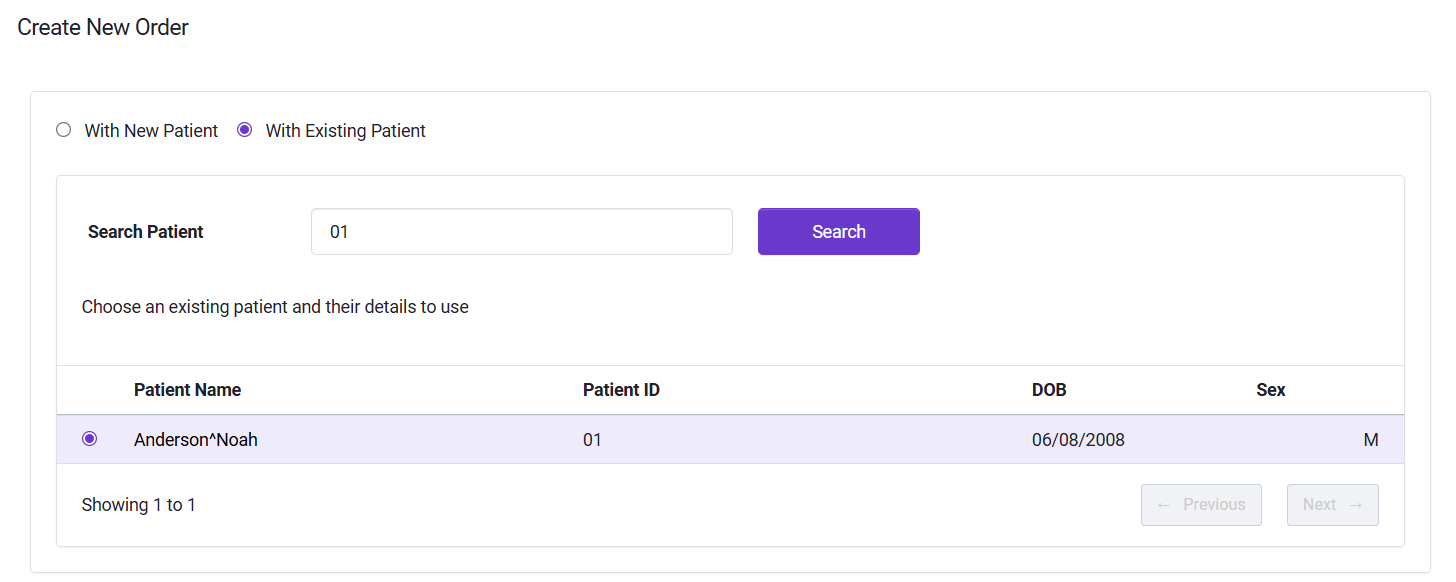
If the order is for an existing patient:
- Check With existing patient.
- Search by Patient Name or Patient ID in the search box.
- If one or more matches are found, select the desired patient from the results list.
2. Order Information
To successfully create a new order, fill in the following required fields:
-
Universal Service ID – Enter a code number to search.
The list of codes is configured in Admin → Data → Code.
You can also create a new code by clicking Create and either entering information manually or importing from LOINC. -
Procedure Description – Enter a description if no Universal Service ID is used.
Each order must contain either a Universal Service ID, a Procedure Description, or both.
- Accession Number – Enter manually or click Generate for automatic generation.
- Modality – Select from the available list configured in Admin → General → Modalities.
- Status – Choose the current order status.
- Study Date – Specify the study date.
- Study Time – Specify the study time.
- Procedure Priority – Select a priority level.
This value can also be imported from DICOM, HL7, or FHIR sources.
3. Optional Information
Users can optionally fill in additional details:
- Referring Doctor
- Result Copies To
- Performer
- Requested Procedure ID
- Scheduled Procedure Step ID
- Filler Order Number
- Placer Group Number
- Placer Order Number
- Visit Number
- Scheduled Station
- Clinical History
Referring Doctor and Result Copies To are populated from the list of practitioners configured in
Admin → Data → Practitioners.
Edit an Order
After an order is created, users with the “Manage Order” permission can modify it by clicking the Edit icon.
The edit form allows users to update any existing order information, similar to when creating a new order.
Change Patient Information
If the order needs to be reassigned to another patient, click Change Patient.
In the Change Patient modal:
- Search for an existing patient by entering a Patient ID or Patient Name.
- To create a new patient, click Create New Patient and complete the required information.
- After creating or selecting a patient, confirm that you want to update the current order with the new patient details.
Once confirmed, click Change — the new patient information will be applied to the order.
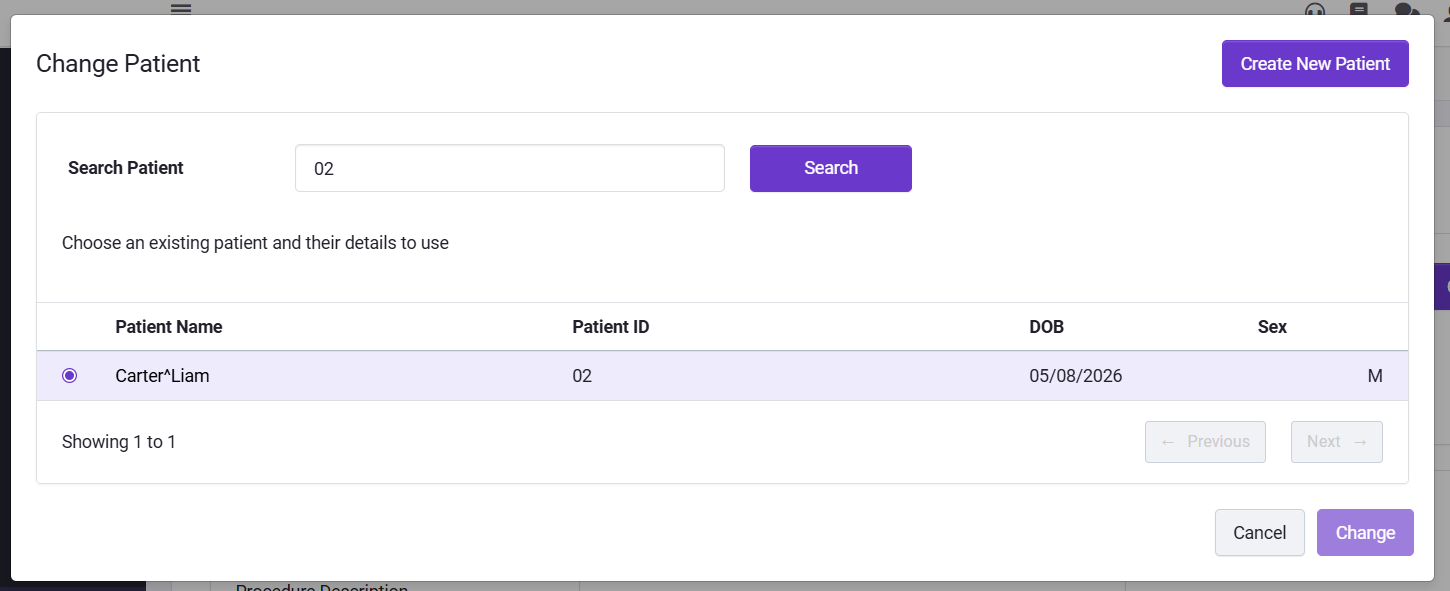
When a patient is changed, all related resources such as Studies, Documents, and Reports linked to the order will also be updated.
View Report in Order Listing
If an order is associated with a diagnostic report, a Report icon will appear in the corresponding row of the order list.
Click the icon to open the Report View modal.
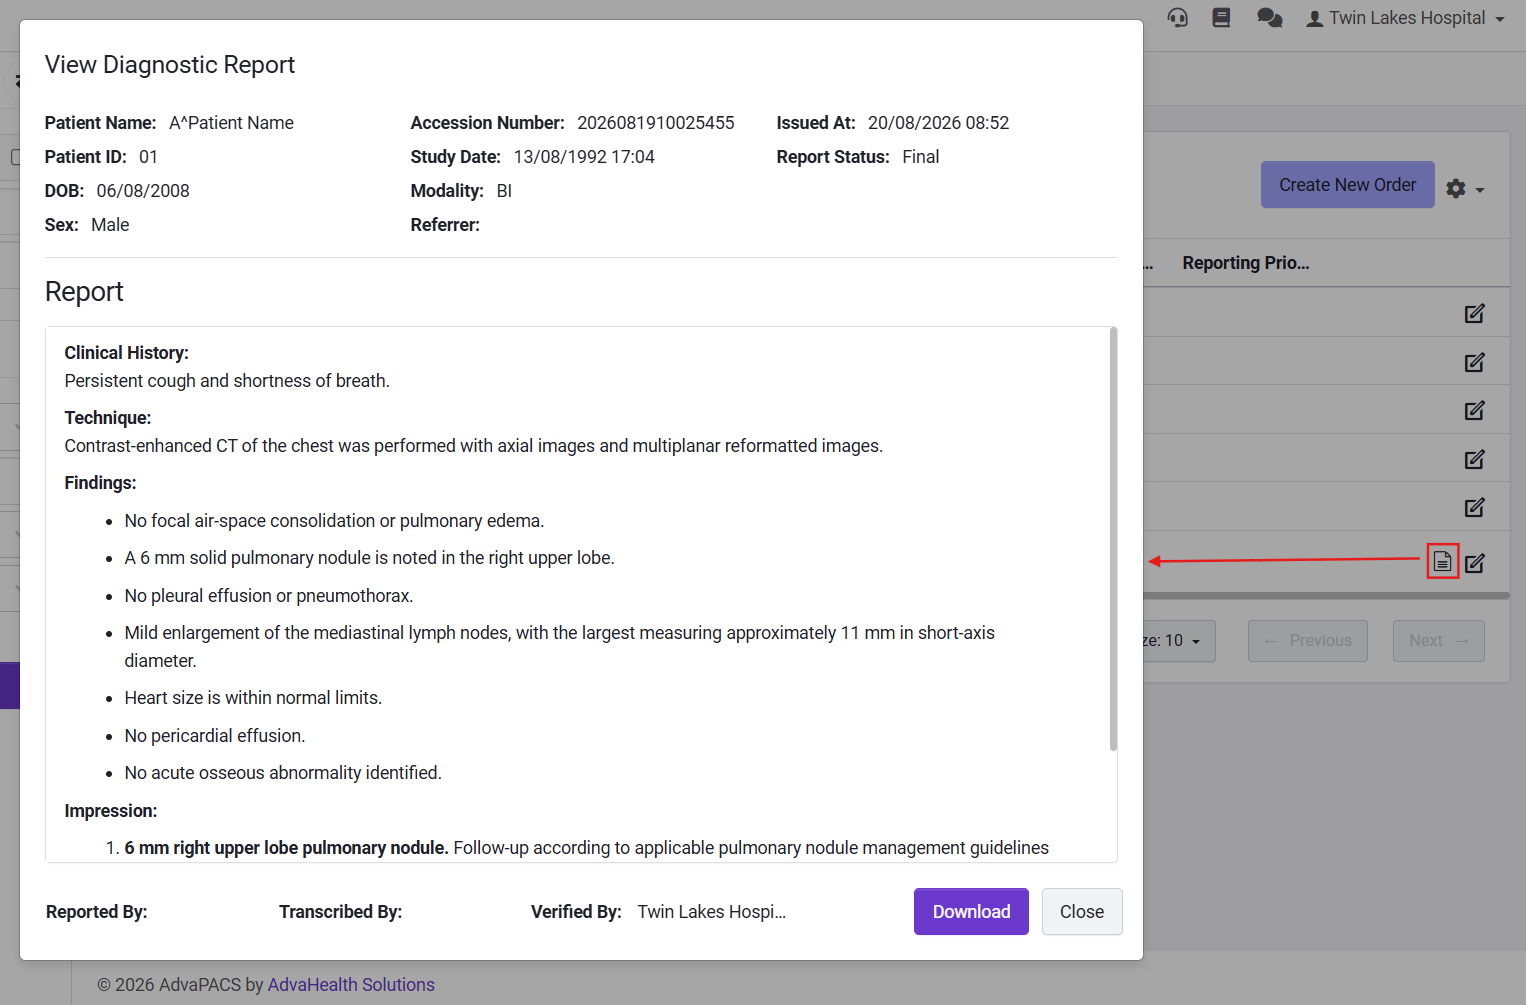
In the Report View, you can view the report in PDF or HTML format and download it in the desired format.